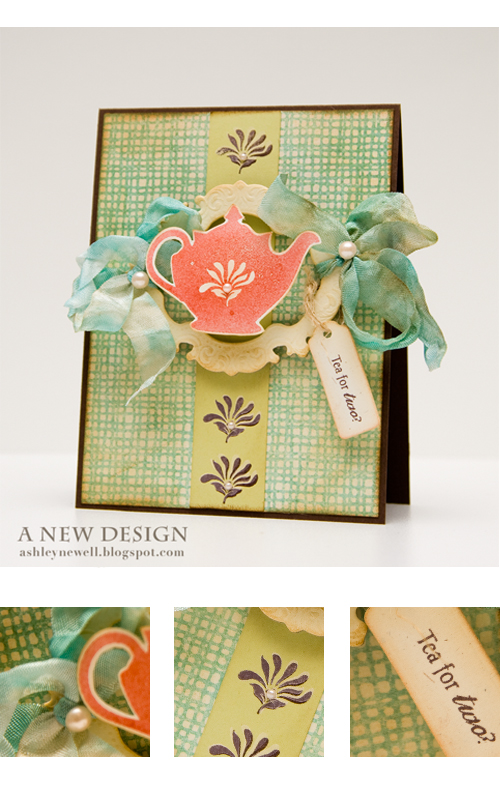
Happy Friday, Bleeps! It's already time for another Embellish challenge and now Renaissance by Design is sponsoring! I created this card using the color constraints and dimension, which is the element to include this time around. Make sure you head on over to the blog here to find out all of the details and see what the rest of my fabulous design team created. They're the best!
Have you all checked out Embellish Magazine's Premiere Issue yet? A lot of people have and I really appreciate the support and great feedback you all have given us about this major project! For those of you who haven't, it is still available to view here and the premier issue is only $3. Inside, there are a lot of great cards designed by well known designers and some newbies too! Also, you'll find articles and information about CHA! Make sure you check it out.
That leads me to the next topic...the next Embellish issue. The focus is on buttons! Who doesn't love buttons? The publication call is now open to everyone. The deadline is May 10, but I want to extend it another week...just because I can! We all need extra time, right? Trust me, being a designer I know that. So the new deadline will be May 17 at 11:59 pm EST to get those submissions in to be considered for the next issue. It is sponsored by DeNami Design and has a $250 prize up for grabs for the designer whose project is featured on the cover!
I'm done now! I just had to get that off my chest! So, what's everyone doing this weekend? I'll be creating, getting some gym time in, celebrating with my mom, and having a good time. I hope you enjoy your weekend.
Thanks so much for your visits and kind comments. I read each of them and am very grateful for you all!
Instructions
- Trim patterned paper to about 4" x 5.25" and ink it up with a blending tool and dye ink.
- Trim spring moss cardstock strip and ink, then adhere to patterned paper center.
- Ink chipboard frame with blending tool and add ribbon to both sides. Embellish the ribbon knots with pearls.
- Pop chipboard frame off patterned paper center.
- Stamp teapot and cut out. Pop off card front center using four layered dimensionals.
- Die cut tag and ink the edges.
- Stamp the sentiment and tie onto frame with twine.
- Stamp flower images on green cardstock strip, once in cream ink, then again in brown ink for a more subtle effect.
- Add pearls to flower images.
- Adhere patterned paper to a brown A2 card base.
Stamps :: Renaissance by Design - Coffee and Tea
Ink :: SU! - chocolate chip; Ranger - vintage photo, old paper; PTI - vintage cream, terracotta tile
Cardstock :: PTI - dark chocolate, stamper's select white, rustic cream; spring moss
Patterned Paper :: My Mind's Eye - Ooh La La - la da dee paper
Embellishments :: KaiserCraft - pearls; Tattered Angels - chipboard frame; PTI - twine; Memrie Mare - cabbage rose ribbon
Tools :: Spellbinders™ - tags trio (S3-148), wizard; Ranger - blending tool


8 comments:
Gorgeous card Ashley! Love the color combo & the Tea theme-are you coming over for a cup? :)
so elegant! Love the gorgeous soft colours! Hugs Juls
I really LOVE this, Ashley! Awesome!
I can't stop looking at all the amazing details!! Loving it all!
Oh, that teapot is so incredibly sweet, love it!
Love love love this card Ashley! So many fun details! This looks like a fun challenge, hoping I get a chance to play along!
Gorgeous!! LOVE the ribbon and the red color of the teapot!!
Une petite visite sur ton blog ou je ne vois que de magnifiques cartes, bravo j'adore !!
bises.
Post a Comment