


Hey Everyone! I hope you had a great weekend! Today, I have a few cards to share with you that were published in the March issue of CARDS magazine. They are photographed much better there, so I recommend you taking a peek at a copy at your local craft store or online! I had lots of fun making these, so I hope you enjoy them! Thanks so very much for visiting and I hope you have a great day!

Original Post
Instructions
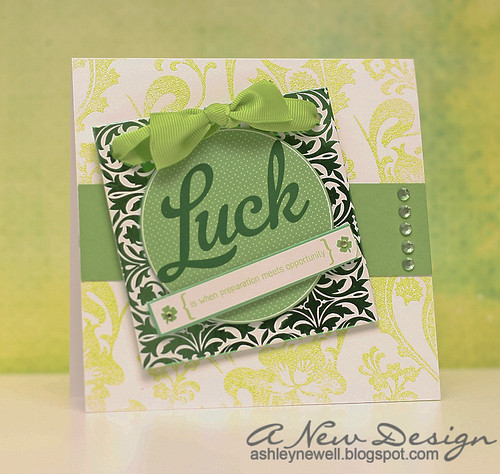
- Trim white cardstock to create a 5" square card base.
- Stamp background pattern on card front with watermark ink, cover with embossing powder, and heat set.
- Trim new leaf cardstock strip, adhere to card front center.
- Add rhinestones on new leaf cardstock strip.
- Add sticker.
Stamps :: Cornish Heritage Farms - scrapblock fiery floral
Ink :: Versamark
Cardstock :: PTI - white, new leaf
Embellishments :: KaiserCraft - rhinestones; Soft Spoken - sticker; America Crafts - lime embossing powder

Instructions
- Trim black cardstock to create an A2 card base.
- Trim ripe avocado cardstock strip, then adhere to card front.
- Trim black cardstock strip and layer over ripe avocado cardstock.
- Stamp sentiment border on pink cardstock, then die cut a scallop circle.
- Stamp martini on white cardstock, then die cut circle.
- Color martini, then pop off scallop circle.
- Adhere scallop circle to card front.
- Stamp sentiment and add rhinestones.
Stamps :: PTI - paper tray; JustRite - girl's night
Ink :: CTMH - black; SU! - markers; Copic markers
Cardstock :: PTI - ripe avocado, black, sweet blush, white
Embellishments :: KaiserCraft - rhinestones; Spellbinders - circle + scallop circle nestabilities
Tools :: Spellbinders - wizard
Instructions
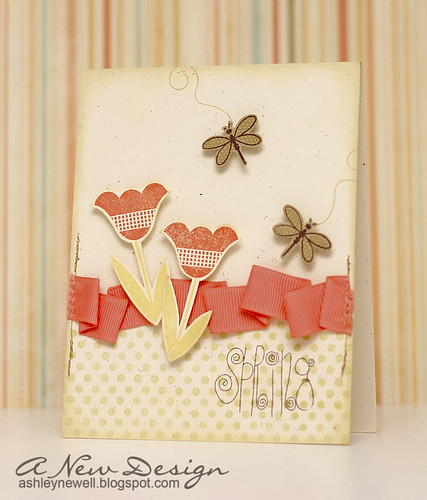
- Trim rustic cream cardstock to create an A2 card base.
- Stamp polka dot patter on bottom half of cardstock base.
- Stamp sentiment.
- Ruffle ribbon treatment, then stitch the edges.
- Stamp tulips and dragon flies, cut out, then pop off card front.
- Ink the edges of the card.
- To create a ruffled ribbon trim, I like to use scor-tape, then pleat the ribbon bit-by-bit. This time, I secured the edges with stitching, but it will stay on its own with a clean cut on the edge.
Stamps :: PTI - wishing you, polka dot basics 2; Pink Paislee - springtime
Ink :: PTI - melon berry, spring moss; SU! - river rock, chocolate chip
Cardstock :: PTI - rustic white, melon berry, kraft
Embellishments :: PTI - melon berry ribbon; thread
Tools :: sewing machine
Thanks for visiting! :)
10 comments:
Beautiful.
Eveline.
They're all gorgeous, Ashley! I especially love the first two. I love the deer and the color scheme of the first one and the rolled fabric flower with the tiny pins on the second one.
Wow! These are awesome! The colors n the first two just POP! Very fun!
These are all lovely, Ashley!!! I must say if I was forced to choose one I'd go with that green "Luck" one love the sentiment (couldn't agree more with it), design and textures. TFS
Oh my, all of these are adorable! And I love that fabric used for the first two.
This one is really fun! Love the zigzag shape of the ribbon!
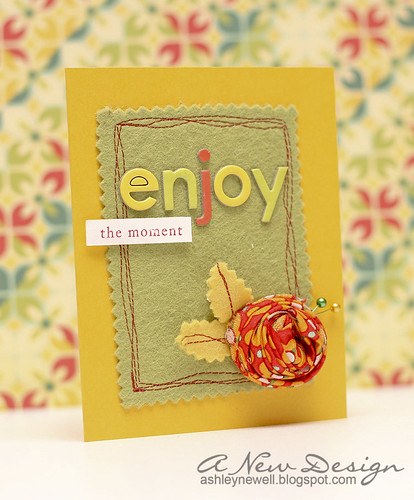
Wonderful cards but my favorite is the Enjoy card with the fabric rose!
beautiful cards!
Beautiful! I love the tulip card.
Ok, got through this page :) I LOVE the flower!! One of my goal is to make my own flowers, fabric, felt and all. So once I get my stuff I am going to do this. Lovely stuff on one post!!
Post a Comment