header.gif (12,818 bytes)
Showing posts with label coffee. Show all posts

10.03.2010

My Time Made Easy :: Guest Designer

Hey Everyone! I hope you have enjoyed your weekend so far! I have another project to share with you featuring some new My Time Made Easy products. The stamps are by Catherine Doucette and the template is by Lauren Meader. I also used some digital paper (polka dots) by Kristin.

This was such a fun project. I completed it while I was in North Carolina on a friend's dining room table with limited supplies. So, there's no excuse that you need a huge craft room to create a project - there's always enough space and just enough supplies, even when they're limited. I filled my teacup with my stash of buttons I brought! Here are the projects and how I made them!
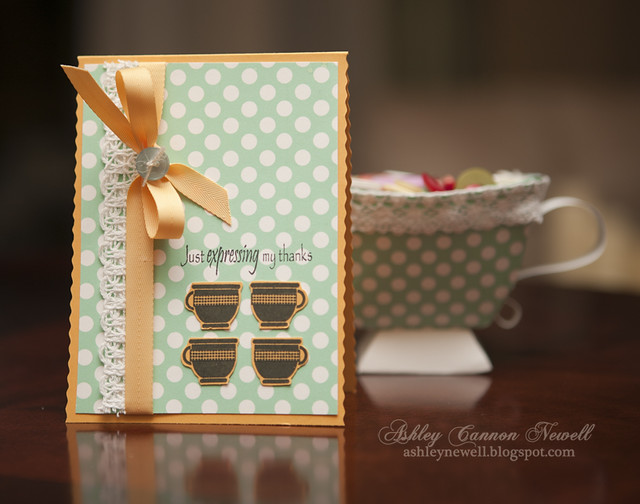

I created a card and teacup using Catherine's stamps, Lauren's template, and Kristin's digital patterned paper. To get that cool color on my patterned paper, I opened the .jpg file in Photoshop, clicked on the paint bucket tool, selected the color, and clicked on the background to dump the aqua color. The digital paper is so easy to use and even tailor to your color specifications. I printed the paper on about 80 lb. cardstock with my Epson Stylus 1400 printer.
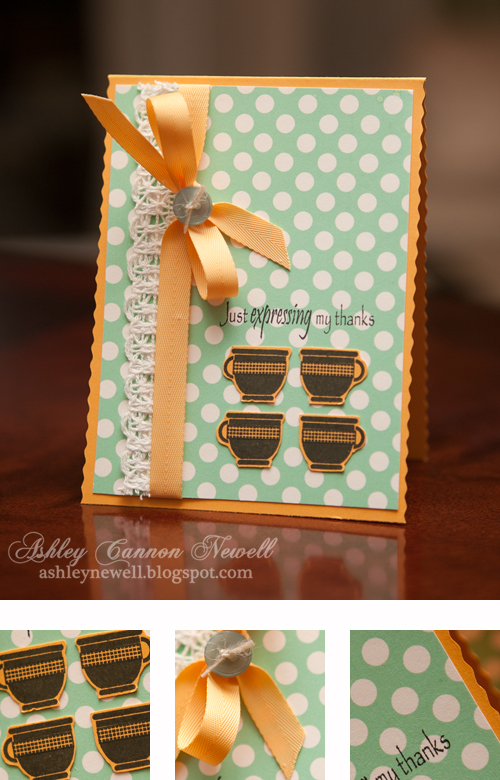

Instructions
  1. Alter color on digital patterned paper and print.
  2. Trim cardstock to create an A2 card base. I trimmed both sides with a zig zag edge (Craft Lite trimmer).
  3. Trim patterned paper, then add ribbon treatment and crocheted trim, and adhere to card front.
  4. Stamp cups on cardstock, cut out, then adhere to card front.
  5. Stamp sentiment.
  6. Add button with twine by wrapping the twine around the ribbon bow and through the button to secure it together.


I used the Grab A Cup template to create this fun coordinating gift. I filled my teacup with buttons - a perfect way to express gratitude for a crafty friend, right?! I printed the template on the digital patterned paper and the base of the template on white cardstock and assembled as directed. I added the crocheted trim and the handle. Super duper easy and fast project!


Here is another view of the teacup filled with lots of buttons! While creating this at my friend's house, everyone was in awe that I made it so fast and that it was a teacup! I love introducing non-crafty folks to stuff I do. They were amazed! Here are the supplies I used:

Supplies

Stamps :: My Time Made Easy - Grab a Cup, Grab a Cup Sentiments
Ink :: Tsukineko - memento tuxedo black
Cardstock :: Papertrey Ink - summer sunrise; Paper Source - white
Digital Elements :: My Time Made Easy - Grab A Cup template, Coffee Beans digital patterned paper
Embellishments :: Melissa Frances - crocheted trims; Papertrey Ink - summer sunrise twill tape, button; May Arts - twine
Tools :: Craft Lite - decorative trimmer (zig zag)

And for my secret - I packed my trimmer, but it only had the zig zag decorative edge blade. AAACK right? Well, I had my trusty scissors, used cardstock as my straight edge, cut, and embraced that zig zag edge trimmer! When faced with a dilemma, you create - try it!

Thanks so much for visiting! Have a great Sunday and enjoy the little bit of weekend you have left! Take care.

9.30.2010

My Time Made Easy :: Guest Designer

Hey Everyone! Today, I'm sharing something "new!" Catherine Doucette is now designing stamps for My Time Made Easy and I've created a few projects featuring these great stamps. If you love hot beverages, from coffee, tea, to even hot chocolate, these sets are for you! She has released a super cute Halloween set too (you know I've developed a teeny tiny like for Halloween paper crafts recently), so check everything out. Of course, Lauren has designed some fabulous templates that are super easy for anyone with a printer and scissors or a cutting machine.


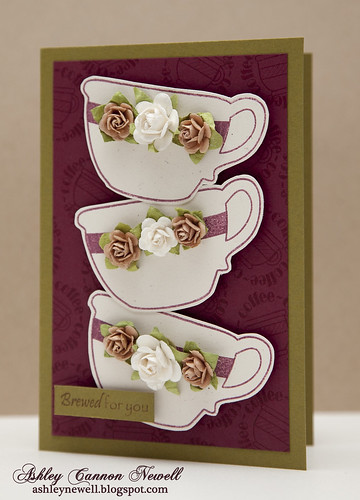
I created this card for the coffee lover, my mom! She really likes coffee and also burgundy too! So the colors are not Christmas-y, but totally "Mommy" colors for me! She usually pairs burgundy with green and gold. When she redecorates rooms in her house, she gravitates ever so naturally towards these warm, traditional tones. I figured she'd like a card using them too! Here is how I made it:

Instructions
  1. Trim burgundy cardstock to about 6" x 4.25" then stamp background images in burgundy ink.
  2. Stamp cups on cream cardstock, cut out, and adhere to card front with foam adhesive.
  3. Add flowers, then adhere to a 6.25" x 4.5" card base.
Supplies

Stamps :: My Time Made Easy - fancy a cuppa, fancy a cuppa add on, grab a cup
Ink :: Papertrey Ink - scarlet jewel
Cardstock :: Papertrey Ink - scarlet jewel, rustic cream, ripe avocado
Embellishments :: Recollections - flowers


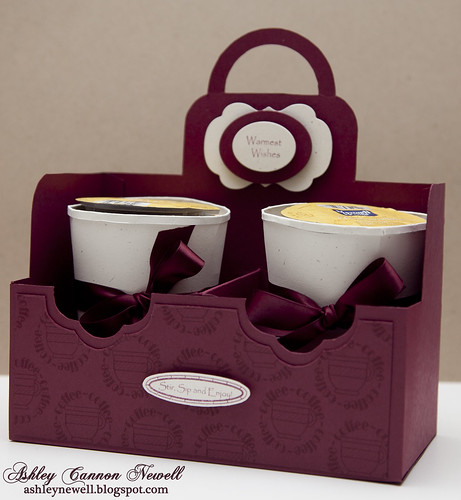
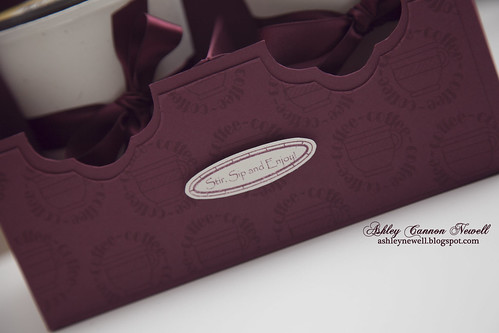
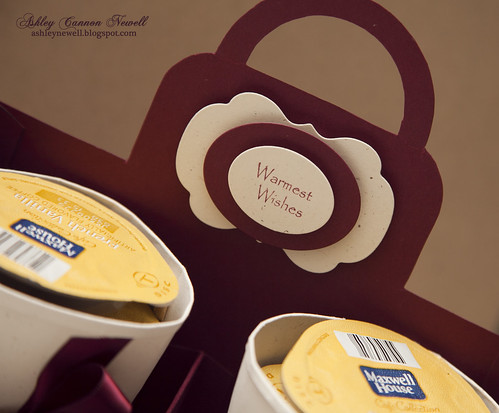
I also created a coffee cup carrier, courtesy of My Time Made Easy. Lauren has a serious talent creating these templates. And to think, it's all made from paper is seriously unbelievable. Just ask McArthur, he is amazed by these templates and kept wanting to touch it! The instructions are available with the Fancy a Cuppa template and I also used a To Go template which will be available here. Additionally, the sentiment on the front is one of the new stamps and I simply hand cut around the oval shape. Check out some detailed photos below.

Supplies

Stamps :: My Time Made Easy - Grab a cup sentiment, Grab a cup, Fancy a Cuppa Add On
Ink :: Papertrey Ink - scarlet jewel
Cardstock :: Papertrey Ink - scarlet jewel, rustic cream
Technology :: Epson - 1400 Stylus printer; Apple - MacBook Pro
Tools :: Spellbinders - Labels Fourteen, Ovals Small + Large; Martha Stewart - scissors


This template here, Go To cup, simply amazed me! Once I saw the Fancy a Cuppa template, I assumed Lauren purchased those disposable to-go cups and covered them. NOPE! I made these cups from CARDSTOCK! I'm so excited about this. I showed McArthur and he had NO IDEA! He thought I bought it...even after I made it. The template even fits those disposable lids, but I wanted to share how 'real' the cup looks! I didn't embellish the cups because I wanted them simple and to coordinate with the coffee carrier, so I added some burgundy satin ribbon (from my wedding...yep, you know Mommy was happy about my color choice, even though she wore a very light gold color).


A lot of people have the single serve coffee makers. I have had my Tassimo since we got married, nearly five years ago (WOW). My mom loved it, so she got one too (of course)! So, I usually get her some T-discs. Her favorite is the Maxwell House french vanilla and this to-go cup fits the T-discs perfect. Each cup is filled with some, just so she can enjoy for this upcoming fall weather!

I hope you enjoyed some of this coffee love I've shared. Although I'm not a big coffee drinker, I like teas and hot chocolate, which can still be showcased with these new sets! So, as soon as you get a chance, head over to My Time Made Easy (I believe the stamps are available for pre-order and will deliver very soon) and check out more ideas on Lauren's blog!

Thanks so much for stopping by and I'll be back on Sunday with more projects featuring these 'warm' stamp sets! Enjoy your weekend (I'm off to a wedding and need to design a card, find a dress, and oh yeah pick up a gift for the newlyweds)! Take care, Bleeps!

*Bleeps = blog peeps
Blog Design: Girly by Design