


Hey Bleeps! Happy Friday to you! I have {another} Halloween project to share. Two years ago, you could not pay me to create Halloween-themed projects. Today, that's obviously a different story. I love life! As time moves along, so do people - in their careers, families, and even creative ways. I'm very surprised that I like creating Halloween projects and really love the color combination of purple, orange, green, and black (with a "pop" of yellow here)! So, instead of fighting that creative urge, I embrace it! There are still some other holidays that I'm not too keen about creating for, but I'm sure in due time my likes and dislikes can change.
Here, it's a holiday weekend so we have Monday off of work *YAAAAAAY*! HOWEVER, I have to work Friday and Sunday...for McArthur. Yep, he's my boss {sometimes}. We have two weddings to photograph this weekend...TWO! I didn't realize how popular labor day weekend weddings were until this year. I'm super grateful for the opportunities to capture these special loving moments and for Saturday and Monday to regroup! We'll definitely need those two days of downtime. I'll be sure to share my favorite shots taken by myself from the two events. I'll be using my new camera for the first time and I'm a bit nervous {again}.
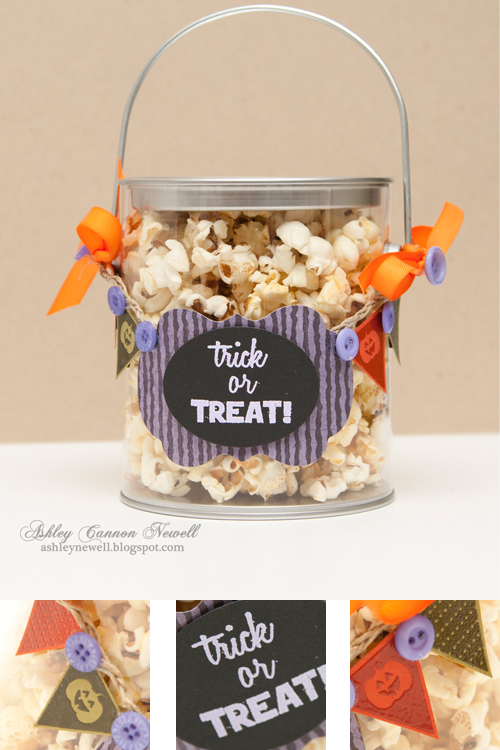
Anyway, I hope you all have a great weekend and do something fun! I know I'll probably nap and make some projects on my two days off! Here's more about this fun Halloween Popcorn Pail that you can give as treats at child Halloween parties, Halloween gifts, or even switch it up for a movie-theme party favor!
Instructions
- Tie twine together and secure around pail handles.
- Stamp sentiment with watermark ink on black cardstock, then heat set with embossing powder.
- Die cut oval from sentiment.
- Die cut label from patterned paper, then layer oval die cut and adhere to pail with foam adhesive.
- Stamp pennants and heat emboss. Cut pennants and adhere to pail under twine.
- Add ribbons and buttons.
- Fill with popcorn or any other Halloween treat.
Supplies
Stamps :: The Stamps of Life – banners4all, thanks2fall
Ink :: Tsukineko – VersaMark watermark ink
Cardstock :: Papertrey Ink – true black, terracotta tile, ripe avocado
Patterned Paper :: Graphic 45 – Hallowe’en in Wonderland collection (the mad hatter)
Embellishments :: Papertrey Ink – orange zest twill tape; Clear and Simple Stamps – purplicious buttons; Craft Supply – twine; American Crafts – lavender and clear embossing powder; Stampendous – clear pail
Tools :: Spellbinders – S4-290 labels fourteen, S-110 classic ovals large, W-001 wizard
Size :: 4.5” x 7.5” with handle
Thanks for visiting! Have a Fab Friday! I'll be back Sunday with a new Caardvarks challenge post!
3 comments:
Ashley!
I love it!
I agree about Halloween projects...in the past, never did them. This year, I can't stop!
For me, I think it's so easy since the colors are already 'chosen' I just get to play.
Hugs,
Stephanie
Cute Halloween treat bucket Ashley! That little banner is darling! Hope you enjoy the weddings :)
This is yummy Ashley. It was so nice meeting you too. Congrats on your July pub. Fondly,Kathy
Post a Comment