header.gif (12,818 bytes)
Showing posts with label gift bag. Show all posts

11.05.2010

Embellish Color Challenge :: Bags


Happy Friday, Bleeps! It's time for another Embellish color challenge! This time, it's all about bags! It's almost that time of year where we start giving from our heart and designing a coordinating gift bag is a perfect addition to any gift and wraps it well too! Head over to the blog to check out the designers' bags. They are very inspiring!
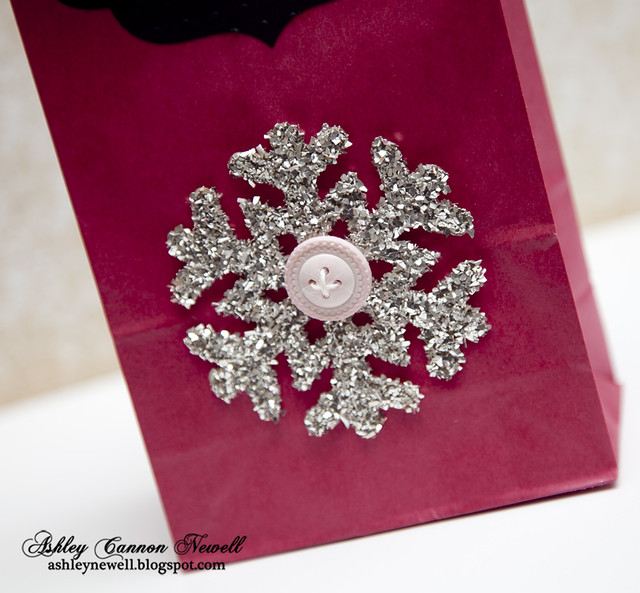

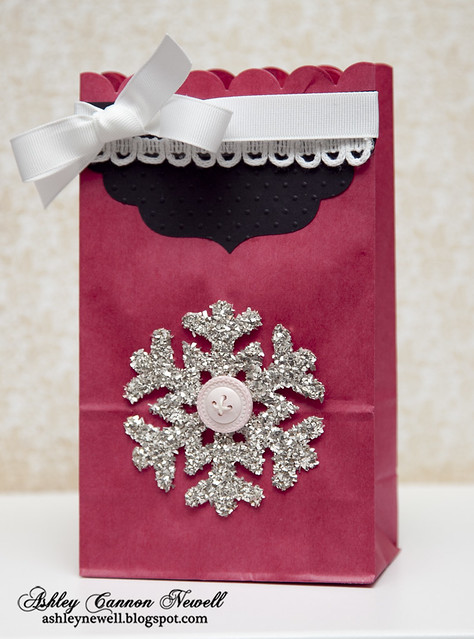
I chose to make this chipboard snowflake die cut the focal point of the bag. It's covered in silver glass glitter and embellished with a light pink button!
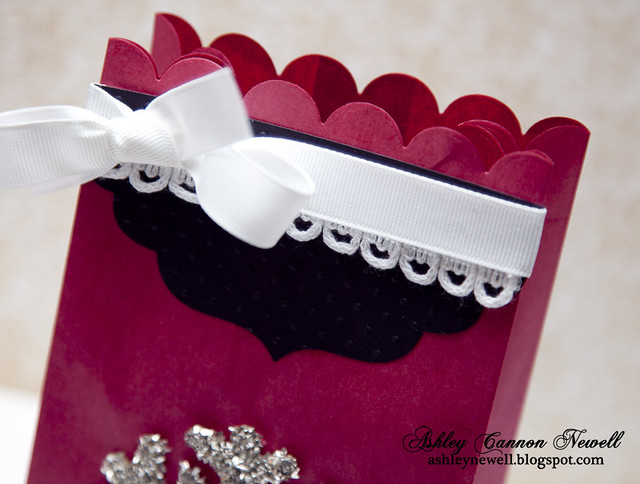

At the top, I die cut the scalloped edge, then added a label die cut and finished it off with a ribbon. Yep, could've added a tag, but didn't. When I give gift bags, I usually do not add tags, so I kept it as I would give. I usually stuff a card on the inside of the bag! :)

Instructions
  1. Die cut scalloped border on bag top. Keep the bag folded, place die side up with the scalloped edge facing the top of the bag. *Yep I used the red bag as a dark pink shade*
  2. Die cut label then emboss it. Trim it to fit bag front.
  3. Add ribbon around label die cut, then adhere to bag front.
  4. Add lace trim under ribbon treatment.
  5. Adhere glue to chipboard, then cover with glass glitter and let dry. Adhere button with twine to snowflake center, then adhere it to bag front.
Supplies

Cardstock :: Papertrey Ink - true black
Embellishments :: It's in the Bag! - red paper lunch bag; Creative Cuts & More - chipboard snowflake; Papertrey Ink- sweet blush button; May Arts - twine; Melissa Frances - silver glass glitter; Michaels - white grosgrain ribbon
Tools :: Spellbinders - LF-190 grand labels four, GC-001 grand calibur; Provo Craft - swiss dots embossing folder, cuttlebug

Don't forget, I have a blog giveaway here.
Also, I'll be back with another post for my last Caardvarks challenge. You have to check it out!

Thanks for visiting! I'll catch you later!

8.25.2010

PTI Blog Hop :: Fresh Homemade Goodies :: Just for You, My Friend


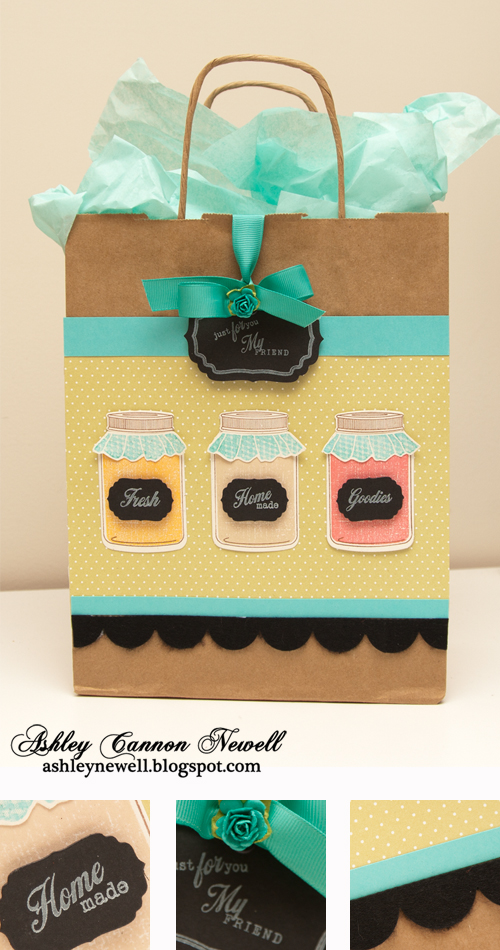
Hey Everyone! I barely made it to the PTI Blog Hop! I was really rushing here placing the final touches on my gift bag. I chose the more traditional route and used a kraft gift bag I had in my craft supply and altered it for "Fresh Homemade Goodies...Just for you, My Friend!" So, here's a brown paper bag project that even adults can appreciate.

I was inspired by a segment on Good Morning America today that featured chalkboard sticky labels. I wanted to order them, but thought I could use my Spellbinders™ Labels Four die templates and some white ink to replicate the chalkboard concept. I really like how that part turned out!

Thanks for hopping by. Here are so more details on my gift bag.

Instructions
  1. Trim polka dotted patterned paper and adhere to bag front.
  2. Trim hawaiian shores cardstock strip and adhere to bag front.
  3. Die cut scalloped edge border from felt and adhere to bag front.
  4. Trim another hawaiian shores cardstock strip (slightly larger than the previous one) and adhere to the top part of the bag front.
  5. Die cut jars, stamp insides and lids.
  6. Stamp imitation fabric, cut out and assemble jars.
  7. Adhere jars together.
  8. Die cut label from black cardstock and stamp sentiments.
  9. Die cut larger label from black cardstock. Stamp border and sentiment.
  10. Punch hole and set eyelet.
  11. Add ribbon and flower treatment and secure label on bag front.
  12. Adhere stamped jars to the center of the bag.
  13. Add tissue paper.

Supplies

Stamps :: Papertrey Ink - friendship jar; Waltzingmouse Stamps - very vintage labels no. 4
Ink :: Tsukeniko - VersaFine - vintage sepia; Stampin' Up! - white; Papertrey Ink - berry sorbet, summer sunrise; Close to My Heart - bamboo
Cardstock :: Papertrey Ink - rustic cream, hawaiian shores, true black
Patterned Paper :: Papertrey Ink - bitty dots spring moss
Embellishments :: Papertrey Ink - hawaiian shores grosgrain ribbon, black felt; Recollections - flower; Craft Supply - kraft gift bag + tissue paper
Tools :: Papertrey Ink - large scalloped border die, jar die/lid; Spellbinders - S4-190 Labels Four, W-001 wizard; Provo Craft - cuttlebug

11.25.2009

Thankful for you


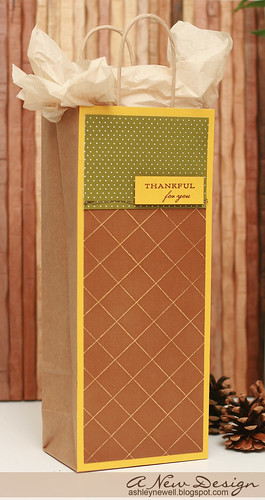
Happy Hump Day, Bleeps! Today, starts the pre-Thanksgiving festivities for us. I hope to get off of work a little early so I can nap and start cooking all night. I'm a night owl and prefer that schedule! Today, I am sharing a wine gift bag. It is super quick to make and perfect for a hostess if you going to someone's house for the holidays. Who doesn't like wine? Well, I'm sure many don't, but wine or even some sort of sparkling bubbly (alcoholic or not) is a festive way to express your gratitude.

I'd like to take today's post and express my gratitude for you, my Bleeps! I never thought people would read my blog and I'm ever so grateful for each of you. If I could, I would make this wine gift bag (with wine included) in it to give to you because I am thankful for you. There are so many things I am thankful for, but thankful for people is the most special to me. Everything else may come and go, but people should be cherished. I would love to hear what you are thankful for this holiday, so please leave a comment and share to celebrate this joyous holiday!

Enjoy your day and thanks so much for your visit!

Instructions
  1. Cover bag front with crushed curry cardstock. (TIP: I overlapped 2 pieces, but you can't see it!)
  2. Trim core'dinations cardstock and add scored lines, then sand and adhere to bag front.
  3. Trim polka dot patterned paper.
  4. Add stitching to the bottom of the patterned paper, then adhere to bag front.
  5. Stamp sentiment on cardstock block and adhere using foam adhesive.

Supplies

Stamps :: Papertrey Ink - first fruits
Ink :: Clear Snaps - chestnut
Paper :: Stampin' Up! - crushed curry; Papertrey Ink - bitty dots patterned paper; Core'dinations - chocolate collection (yellow core)
Embellishments :: Nashville Wraps - wine bag, tissue paper
Tools :: sewing machine; thread; Scor-Pal

2.06.2009

Happy Birthday Baggie


Have you all seen all of the recent news releases by Papertrey Ink? It's their 2 year anniversary and they have a lot of great things going on over there. Check out Nichole's blog! Oh my! They have great new stamp designers, will have a booth at the consumer portion of CHA, and fabulous prizes! This bag I created for the "It's all in the bag" challenge! I created a birthday gift baggie.

I sure hope I win! I could win an embroidered PTI bag with a $100 gift card in it!! Wish me luck!

It's Friday and I'm excited! I'm looking forward to a fun-filled weekend and hope you have the same! Thanks for stopping by!

How to:
  1. Trim black and pink cardstock and pattern paper to same width.
  2. Trim about 2 inches off of black cardstock and set aside.
  3. Scallop edge punch one end of pink cardstock.
  4. Adhere black cardstock to pattern paper and pink cardstock.
  5. With leftover black cardstock, scallop punch one strip and trim three more strips.
  6. Adhere scallop punched black cardstock to pattern paper.
  7. Adhere remaining black strips to top of pink cardstock.
  8. Stamp flowers and swirlies on white cardstock, then cut out and adhere to black cardstock using dimensionals.
  9. Adhere thickers to pink cardstock.
  10. Tie white ribbon in a bow around pattern paper and black cardstock.
  11. Add rhinestones to thickers and a portion of pink scallop edge.
  12. Stamp 'birthday' on white cardstock, trim, and adhere to black cardstock with dimensionals. Add pink rhinestones.
  13. Tie ribbon around handle.

:: My Goodies {Birthday Baggie} ::
Stamps: Papertrey Ink-Remember + Birthday Basics
Ink: SU-Black; Papertrey Ink-raspberry fizz
Cardstocks: Papertrey Ink- white + raspberry fizz; American Crafts-black
Pattern Paper: raspberry fizz
Accessories: Michaels-white ribbon; Hero Arts-rhinestone; dimensionals; SU-scallop punch; American Crafts-thickers; Nashville Wraps-gift bag
Bag Size: 8 x 11
Blog Design: Girly by Design