 Welcome to my Paper Crafting Photography Series! I'm so glad so many of you are interested in learning how I photograph my projects. I'd like to start off with a little history and share that I have been photographing my projects for over two years and they have not always met my high standards. I'm still not perfect or a professional by any means, but I finally have a system that I like and feel comfortable sharing it with you. I'm sure most of you have your very own system, which could be something that I'd like to hear as well!
When I first started blogging, I used a Canon Powershot Digital Elph point and shoot and a light box to photograph my projects. My photos were cropped too close, poorly lit, and did not have good positioning. Take a look at one of my earlier photos (and card)!

Later, I progressed to a higher end point and shoot Sony Cyber-Shot DSC H50, which had manual settings and allowed me to adjust them. The pictures improved, but still were not quite right. I think with a little more time and dedication to learning my settings with my Sony camera, I could have the photo that I wanted. Here is a decent photo using the Sony point and shoot:

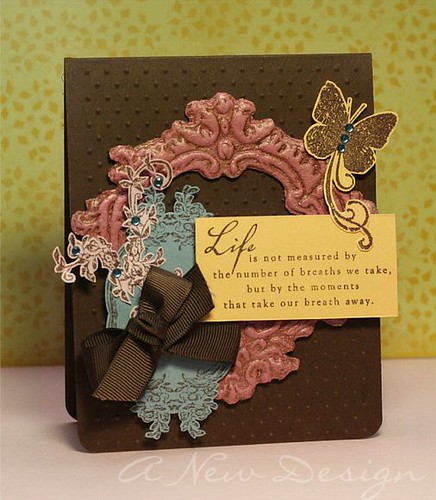
However, McArthur started learning photography and I resisted on learning another 'machine!' After a few tries and seeing what a DSLR camera could do, I was hooked. Here is my first photo taken with my Canon xTi.

Looking back, the second project is photographed the best; however, I didn't put the necessary time in to learn that camera before moving on to the DSLR. I'm sharing my history with you so you will not feel the need to go out and purchase a brand new camera. Learn the camera you have first!
This session will focus on tips, tricks and techniques on how I photography my projects currently. If you do not have the equipment and/or software I use to photograph and edit my photographs, there still may be some helpful tips you can use with your camera and editing program. So, let's get started!
 Camera
- Canon xTi Digital Single-Lens Reflex (DSLR) Camera - This is an older model. The comparable camera to this model now is the xSi.
- In my opinion, the secret in photographing with a DSLR is in the lens, not the camera body. Some may want a full-frame DSLR, but it is not necessary in paper crafting photography, in my opinion.
- I alternate lenses from a 24-105mm to a 50mm (often referred to as a 'nifty fifty')
- The 24-105mm lens is a luxury Canon lens that we purchased because we do freelance photography work. I do not think this is a necessary lens.
- The 50mm lens is considered a prime lens. You cannot adjust the focus with this lens. You work the focus, meaning you move closer or further from the object. I really like using this lens when photographing paper crafting projects and at a price of around $100 you can't beat that deal!
- Canon Speedlite 430EX II is an external flash I install on my DSLR and use in EVERY shot for my paper crafting project photographs.

Aperture/F-Stop
- 4.0 (24mm lens)
- 2.8 (50mm lens)
- The lower the number for an aperture setting, the blurrier the background is in the photo.
- 100 (in well-lit spaces) my usual setting
- 200 or 400 (in average or slightly darker rooms)
- 1/80
- M 1/4 = settings I keep it on
- Keep the flash pointed upward, towards a ceiling, especially if you have a white ceiling. This allows the light from the flash to bounce off of the ceiling onto the surface that you are shooting.
- Avoid using the pop-up flash on a DSLR. I find it washes the object out in photos because it pops directly off the object.
- Even on point-and-shoot cameras, I find that no-flash is better because you are unable to control where it shoots. When you have the flash off, you will need to substitute with a lot of light, which is why people use light boxes; however, direct lighting is sufficient.
- Play with your settings. You have to test everything out to see what works best for you in your space. Lighting is the key, but that varies from room-to-room, so you can start with the setting I provide, but try changing the Aperture to a higher number to get a clearer/brighter shot or adjusting your ISO to 200 for a brighter photo. The shutter speed will also have an effect on the end result.
- Practice! Every single one of my photos is not perfect by any means. Some days are better than others and it's usually when I'm not rushed. Take your time and try not to get frustrated!


12 comments:
This is so exciting and so terrific! Squeeee! I can't thank you enough for sharing your expertise with us!! I can't wait for the rest of your "lecture series." ;)
Thanks for your tips! Very much appreciate. I struggle with lighting all the time as I don't have an external flash and my house is not that bright. I've been reading my manual and that helps too. Really appreciate your efforts... thanks.
Thanks for the tips. I need them as we bought a new camera last Friday, a Nikon D5000 with a 18-105 mm lens. We are very pleased with it but need to learn a lot.
Eveline.
Thank you SO MUCH for the tips Ashley!! I really look forward to your next installment! I don't have many pennies or a fancy camera but I'll be happy to learn any tips to improve my photography :)
Hugs,
Aimes
x
P.S I wish my photography was half as decent as your earilier shots LOL!
Thanks for the advice I just purchased the same flash you have and hope to see an improvement in my photos. I will definetly follow your photography series
Thank you so much for this series as I am about to buy a new camera.
Thanks so much for doing this. I have a very simple point and shoot and have yet to venture into actually playing with the settings. But now, maybe I will! Thanks again.
Thank you so much for sharing your tips and techniques with us. I have the same camera you have and I know I have not fully explored its capabilities.
You've inspired me to learn more and I look forward to your series.
Again... you are the best and I appreciate you so much for doing this.
Take care,
Debbie Reaves
Ashley, thank you so much for sharing your tips with me. I am so thrill to learn your secret. It sure helps a lot. Looking forward to tomorrow's tips.
This is awesome, Ashley! Thanks for today's tips and I'm looking forward to learning more.
Thank you! Really appreciate the time to share your tips and tricks and knowledge along the way.
I'm so excited that you are doing this series. I absolutely love photography but with 4 small children - 2 of them being babies - I'm not able to take a course at this time. This will be extremely beneficial for me! I currently own a Canon Powershot A630 and I was considering investing in a DSLR. I might hold off for now though and just get to know my point & shoot a little better. Thanks for the tips! Looking forward to the rest of your series...Thanks! ;)
Post a Comment