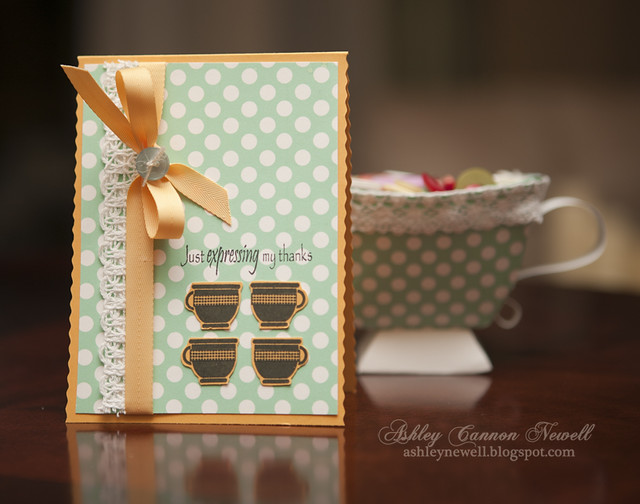
This was such a fun project. I completed it while I was in North Carolina on a friend's dining room table with limited supplies. So, there's no excuse that you need a huge craft room to create a project - there's always enough space and just enough supplies, even when they're limited. I filled my teacup with my stash of buttons I brought! Here are the projects and how I made them!

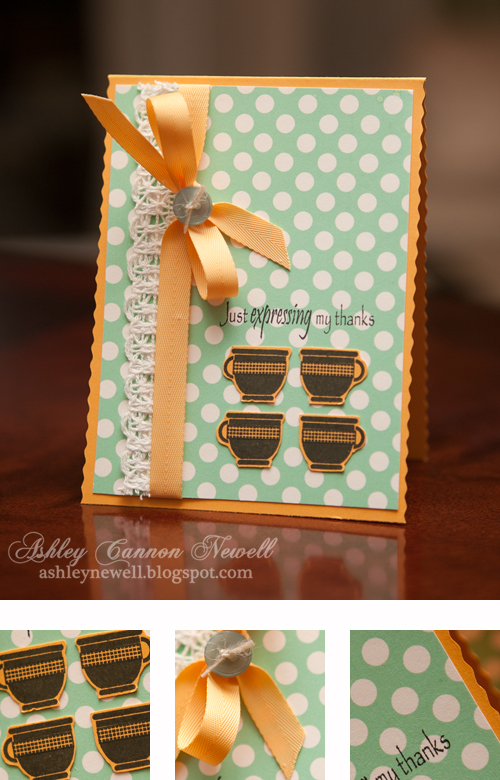
I created a card and teacup using Catherine's stamps, Lauren's template, and Kristin's digital patterned paper. To get that cool color on my patterned paper, I opened the .jpg file in Photoshop, clicked on the paint bucket tool, selected the color, and clicked on the background to dump the aqua color. The digital paper is so easy to use and even tailor to your color specifications. I printed the paper on about 80 lb. cardstock with my Epson Stylus 1400 printer.

Instructions
- Alter color on digital patterned paper and print.
- Trim cardstock to create an A2 card base. I trimmed both sides with a zig zag edge (Craft Lite trimmer).
- Trim patterned paper, then add ribbon treatment and crocheted trim, and adhere to card front.
- Stamp cups on cardstock, cut out, then adhere to card front.
- Stamp sentiment.
- Add button with twine by wrapping the twine around the ribbon bow and through the button to secure it together.

I used the Grab A Cup template to create this fun coordinating gift. I filled my teacup with buttons - a perfect way to express gratitude for a crafty friend, right?! I printed the template on the digital patterned paper and the base of the template on white cardstock and assembled as directed. I added the crocheted trim and the handle. Super duper easy and fast project!

Here is another view of the teacup filled with lots of buttons! While creating this at my friend's house, everyone was in awe that I made it so fast and that it was a teacup! I love introducing non-crafty folks to stuff I do. They were amazed! Here are the supplies I used:
Supplies
Stamps :: My Time Made Easy - Grab a Cup, Grab a Cup Sentiments
Ink :: Tsukineko - memento tuxedo black
Cardstock :: Papertrey Ink - summer sunrise; Paper Source - white
Digital Elements :: My Time Made Easy - Grab A Cup template, Coffee Beans digital patterned paper
Embellishments :: Melissa Frances - crocheted trims; Papertrey Ink - summer sunrise twill tape, button; May Arts - twine
Tools :: Craft Lite - decorative trimmer (zig zag)
And for my secret - I packed my trimmer, but it only had the zig zag decorative edge blade. AAACK right? Well, I had my trusty scissors, used cardstock as my straight edge, cut, and embraced that zig zag edge trimmer! When faced with a dilemma, you create - try it!
Thanks so much for visiting! Have a great Sunday and enjoy the little bit of weekend you have left! Take care.


11 comments:
Ashley~ I LOVE the jagged edges, very unexpected...and the lace trim on the card and cup are perfect :0) Thanks again!
Girl this is so fabulous! That teacup is so cute!
Brandi
Another lovely project, Ashley! The polka dot DSP is so fun on this project and oh my, look at all those buttons - yum! Thanks for being such an awesome GDT for MTME this week! PS - I live in NC -- next time you visit let me know!!
Sweet gift set, Ashley! LOVE the crocheted trim on both!!
Look how sweet! And your "props" make me rethink the way I store my buttons! I love the idea of storing them in those cute little cups!!! Hmm.... You may be on to something! Great projects!
Oh my! Very sweet project, love the little tea cup! I'm assuming you have to use really sturdy cardstock for the cup? Love the polka dots on the card!
Love the color combo you have on your card! Very pretty design and lovely teacup.
Terrific card and so easy to do! Thanks for the inspiration!! Love your paper cup full of buttons too!!!
GIRL! You make it seem so flippin easy .. whew. I LOVE your cards all of them .. wow ..
Such a beautiful creative project!! I absolutely LOVE it!!
The card is so sweet! Love the ribbon and lace! But that teacup is absolutely FABULOUS!!! So cute!
Post a Comment