|
|
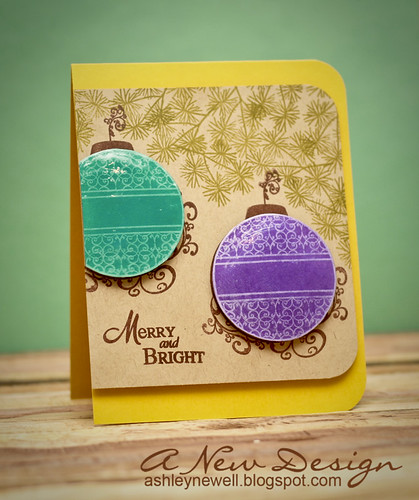
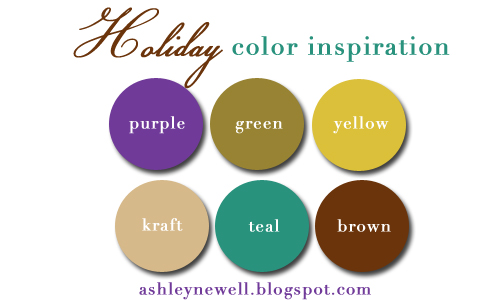
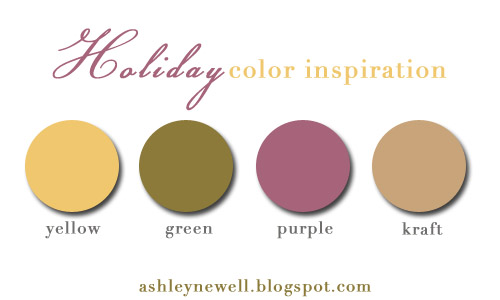
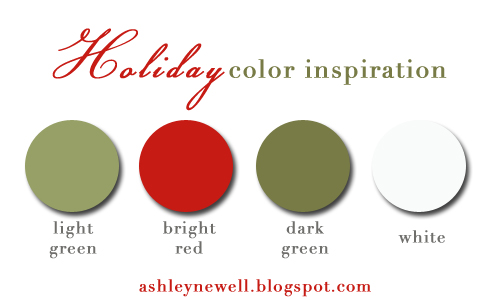
  Happy Friday, Bleeps! I'm back with a rather unusual holiday color palette! I was inspired by those Christmas trees or wrapping papers with bright colors. I had to rearrange the color inspiration image to fit the color swatches together. The only one I'm missing is white, but it's in the text so that counts too! I appreciate your feedback and comments! If you have more, please ask and I'll respond in the comments section, unless you provide your e-mail!
Thanks for stopping by and enjoy your weekend! We're supposed to get a nice snow storm in the DC area!!
I started a fan page for BoldLifestyle Photography (our photography venture) on Facebook. Click here to become a fan!
Instructions - Trim yellow cardstock to create an A2 card base.
- On kraft cardstock stamp ornament backgrounds.
- On purple and teal cardstock stamp ornaments, cut out, then pop off kraft cardstock (overlaying background ornament image).
- Add glossy accents to create a shine effect. Let dry.
- Stamp leaves to create a 'tree' effect.
- Stamp sentiment.
- Corner round right edges.
- Adhere kraft block to card base with foam adhesive.
Supplies
Stamps :: Verve Stamps :: ornamental christmas Ink :: Stampin' Up! - white; Clear Snaps - chestnut; Papertrey Ink - ripe avocado Paper :: Stampin' Up! - taken with teal, crushed curry; Cut Cardstock.com - purple; Papertrey Ink - kraft Tools :: Ranger - glossy accents; We R Memory Keepers - corner chomper
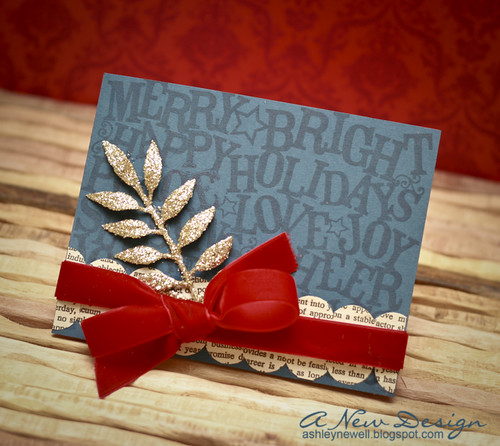
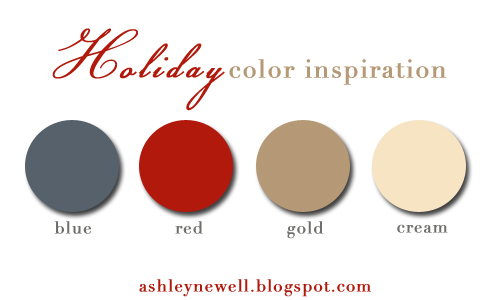
  Hey there! How's it going? I hope well for all of you. The week is almost over, which makes everything a tiny bit better, right?! Thanks for the feedback on yesterday's inspirational card. I really appreciate it and will make more with scriptures. It is definitely the reason for the season. I liked the navy so much on yesterday's card, I thought of ways to add other colors with it, so that's how the red, gold and cream were added. Notice anything different about my photos? Well, I've discovered Camera Raw and started editing the pictures in that program first before heading over to Photoshop CS4. Amazingly, you can edit JPG images in Camera Raw, which is weird because they should be in Raw format only. Mac discovered this months ago, but I'm just now getting around to learning how to work it (super easy with sliders) and I love it! I thought I'd share that tidbit with you because knowledge is power! Enjoy your Friday Eve and thanks for taking a peek!
**For the Caardvarks, "Christmas in Paris" post, scroll down!**
Instructions - Trim blue cardstock to create an A2 card base.
- Stamp background pattern.
- Tie ribbon into a bow.
- Punch circles from book text and add to card front to create a scallop border. Tuck under ribbon.
- Adhere glitter mistletoe.
Supplies
Stamps :: Hero Arts - big holiday words Ink :: Papertrey Ink - enchanted evening Paper :: Papertrey Ink - enchanted evening; Craft Supply - book text Embellishments :: Making Memories - glitter mistletoe Tools :: Creative Memories - 3/4" circle punch

 Happy Hump Day! Today, I'm back with a color inspiration featuring silver and navy. A very simple color combination can still have a major impact on a card. I chose a more traditional Christmas theme for this card and used a scripture as the focal point coupled with an embossed design. Thanks for stopping by and enjoy your day!
Instructions - Trim navy cardstock to create an A2 card base.
- Heat emboss design with silver embossing powder on card front.
- Trim vellum strip and stamp scripture, then adhere to card front.
- Add ribbon.
Supplies
Stamps :: Papertrey Ink - silent night; background basics (diamonds) Ink :: Versamark; Papertrey Ink - enchanted evening Paper :: Papertrey Ink - enchanted evening, vellum Embellishments :: Papertrey Ink - enchanted evening ribbon Tools :: Filigree - detailed silver embossing powder; heati gun
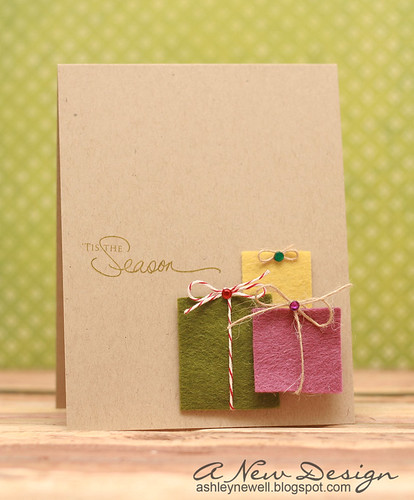
  TGIF! Here's a Fast Friday card for you too! Simple cut some squares from felt, add twine/bows and pop off cardstock! I wanted to share something with you today and I ran out of time, so it had to be quick. This is what I came up with. It's a bit too simple for me, but is really clean and simple. I hope you all enjoy your weekend! Don't forget to check out the new Embellish magazine challenge that started today ( HERE)!
Thanks for stopping by!
Instructions - Trim kraft cardstock to create an A2 card base.
- Cut felt into squares and rectangles.
- Add twine and rhinestones.
- Adhere 'presents' to card front.
- Stamp sentiment.
Supplies
Stamp :: Papertrey Ink - signature christmas Ink :: Papertrey Ink - ripe avocado Paper :: Papertrey Ink - kraft Embellishments :: Heather Bailey - felt; Nice Package - twine; Papertrey Ink - twine; Kaiser Craft - rhinestones
 
Okay, Bleeps, we made it to Hump Day! Today, I'm sharing a quick holiday card with you and focuses on the reason for the season and here and now. It is easy to get caught up in the hustle and bustle of the holiday season trying to make sure everyone is remembered and the gifts are purchased, but we should not forget the reason for the season and be thankful for the here and now. So, I made this card to remind people to remember this Christmas as it is and just let it be! Regardless if you could not find that special toy or could not afford all of the gifts you wanted to give because we are all on budgets, it is fellowship with family, friends, and of course your spiritual world. Writing this post made me think of more card designs (I bet you know what I'm thinking too)...see inspiration can spark at any moment! So, enjoy this holiday and let it be one to always remember!
Enjoy yourself and thank you for looking and reading!
Instructions - Trim brown cardstock to create a 3.5" x 5.5" card base.
- Trim green cardstock strip.
- Adhere label sticker.
- Add "25" number stickers.
- Trim doily in half and adhere to card front.
- Stamp sentiment.
- Add green cardstock strip.
- Add rhinestones and white doodle dots.
Supplies
Stamps :: October Afternoon - save the date Ink :: Stampin' Up! - white; Uniball - white gel pen Paper :: Papertrey Ink - dark chocolate, new leaf Embellishments :: Hambly Screen Prints - sticker label; American Crafts - thickers (sprinkles); KaiserCraft - rhinestones; Nice Package - doily
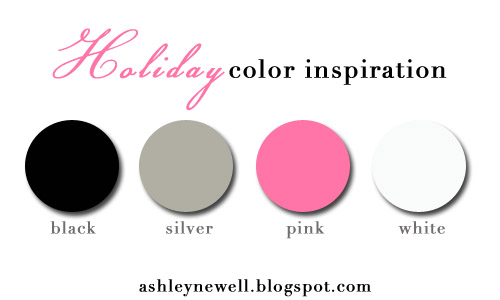
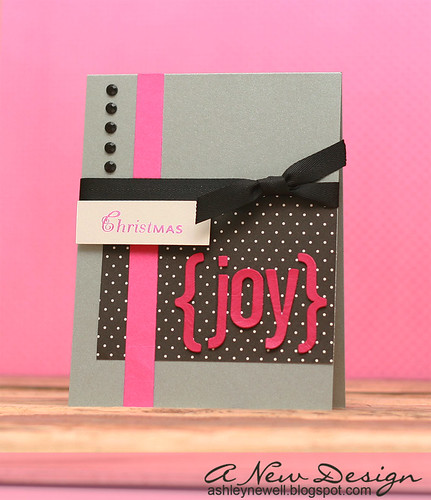
  Well, we survived another Monday! Today, I'm share a funky holiday card. Every one does not celebrate the holidays in the traditional fashion, so using various color combinations may spark someone's Christmas spirit more than others. This card is for the person with a lot of spunk!
Thanks for visiting and have a great day!
Instructions - Trim silver cardstock to create an A2 card base.
- Trim patterned paper and adhere to card front.
- Add pink cardstock strip.
- Adhere alpha stickers.
- Stamp "Christmas" on white cardstock and pop off card front.
- Tie ribbon into a knot.
- Embellish with black rhinestones.
Supplies
Stamps :: Papertrey Ink - silent night Ink :: Papertrey Ink - raspberry fizz Paper :: Papertrey Ink - silver, raspberry fizz, bitt dots Embellishments :: Papertrey Ink - black ribbon; KaiserCraft - black rhinestones; American Crafts - thickers
  ** BONUS SKETCH **  Happy Monday, Bleeps! How was your weekend? I got the chance to photograph a family yesterday and it was FREEZING! I even managed to get Mac to take a few shots of me! I may share those with you later this week! But, what I really wanted to share with you today were these cards for this week's 2 Sketches 4 You layouts! I say layout S because there is a bonus sketch this week by me! It is my very FIRST sketch, so take on the challenge and make two cards this week and link them up here! GCD Studios is the sponsor this week and you don't want to miss out on their fantastic products!
If you're looking for some holiday color inspiration, I didn't forget! Scroll down for the "traditional" color swatches I used in the above cards for 2 Sketches 4 You!
Thanks for visiting and have a great Monday!
Noel
Instructions - Trim white cardstock to create a 5" square card base.
- Trim green patterned paper and adhere to card front.
- Trim green strip and adhere on top of patterned paper.
- Trim die cut and stamp sentiment and flourish design (heat emboss and add rhinestones).
- Add die cut to card front.
- Die cut scallop circle and dry emboss polka dot patterned.
- Adhere scallop circle to card front with foam adhesive.
- Trim Christmas tree from patterned paper and pop off scallop circle and add rhinestone.
Supplies
Stamps :: Papertrey Ink - silent night; Christmas saying Ink :: Versamark Embellishments :: KaiserCraft - rhinestones Tools :: Spellbinders - scallop circle nestabilities; Provo Craft - swiss dots embossing folder; die cut machine; American Crafts - green embossing powder
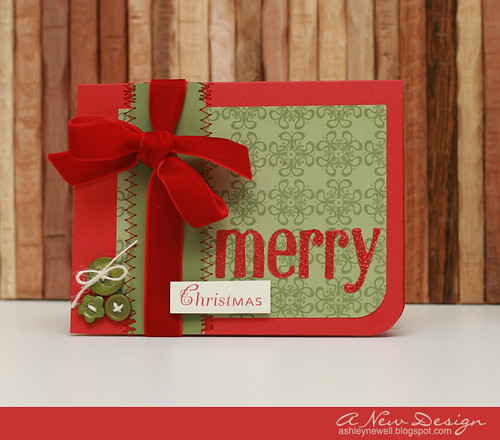
Merry Christmas
Instructions - Trim red cardstock to create an A2 card base.
- Corner round the bottom right edge.
- Trim patterned paper, corner round bottom right edge and adhere to card front.
- Trim green strip, adhere to card front.
- Add zig zag stitching.
- Tie ribbon around card front.
- Add sticker letters.
- Stamp "Christmas" then pop off card front.
- Add buttons.
Supplies
Stamps :: Papertrey Ink - silent night Ink :: Papertrey Ink - pure poppy Embellishments :: Michaels - ribbon; GCD Studios - buttons, alphabet glitter stickers; Papertrey Ink - twine; thread
Tools :: sewing machine, corner rounder
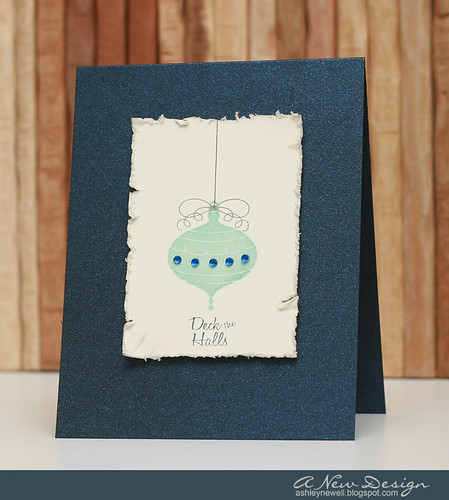
  Alrighty, Bleeps...it's FRIDAY! Thanks for your positive feedback on the holiday color inspiration. I really appreciate it and glad that you liked the color combination, so I am back today with another. Today's card is a "Fast Friday Card" and perfect to create multiples. I kept it really simple, but the colors make it somewhat elegant. The distressed edges on the focal point give it an artsy imbalance. I hope you try out this color combination too!
I added a poll to the left sidebar regarding the very possible change of my web site address in the future. I thought I'd reach out and see what my Bleeps thought about it first before I made my final decision. So, check out the poll and let me know what you think about me changing my web site address, which would require you to re-subscribe through Google Reader, RSS feed, or e-mail.
Feel free to create holiday cards using the color combination. The graphic is also available for you to save to your computer by right-clicking the image and selecting the "Save Image As" option, then upload it to your blog. I like fun and different holiday color combinations, which is why I am challenging myself to try a new holiday card every time I post to the blog this month!
Feel free to join me. If you do, I'd love to see what you created by linking your card posted in the comments. This is not a 'challenge' but just something fun to inspire my Bleeps out there to make more holiday cards!
Thanks for stopping by and enjoy the weekend!
Instructions - Trim night sky shimmer cardstock to create an A2 card base.
- Trim a rectangle from cream cardstock and stamp ornament.
- Stamp bow, add rhinestones, and draw a line with pencil (yep, that's just pencil, Bleeps!)
- Stamp the sentiment and distress the edges.
- Add focal point to card front center with foam adhesive.
Supplies
Stamps :: Our Craft Lounge - jolly ornaments Ink :: Papertrey Ink - aqua mist, smokey shadow, enchanted evening Paper :: Papertrey Ink - vintage cream, night sky shimmer Embellishments :: KaiserCraft - rhinestones Tools :: Tim Holtz - distresser
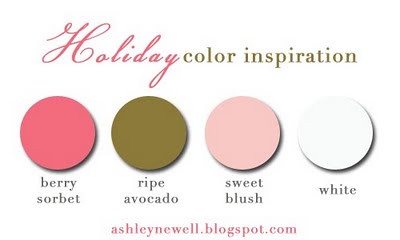
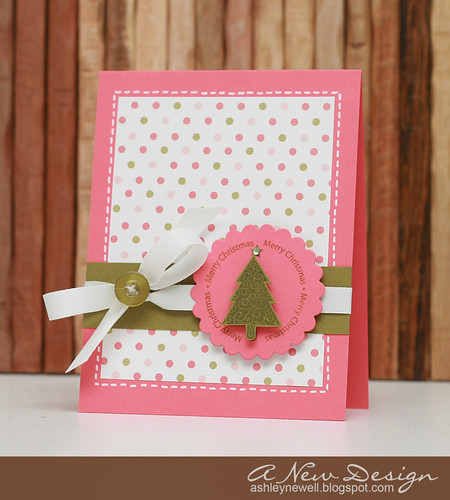
  Happy Friday Eve, Bleeps! Thursday already?! For me the week is moving on along just like I wanted. Well, I'm back today with a special surprise! I'm starting to share a little color inspiration with you all for the holiday cards I am planning to showcase throughout December here on the blog. In case you haven't noticed, the past few days, all of my cards have been Christmas/Winter themes. I'm not going to hold myself to it, but thought it would be a fun challenge for myself. So, I thought why not share with you all my color inspiration.
Feel free to create holiday cards using the color combination. The graphic is also available for you to save to your computer by right-clicking the image and selecting the "Save Image As" option, then upload it to your blog. I like fun and different holiday color combinations, which is why I am challenging myself to try a new holiday card every time I post to the blog this month!
Feel free to join me. If you do, I'd love to see what you created by linking your card posted in the comments. This is not a 'challenge' but just something fun to inspire my Bleeps out there to make more holiday cards!
Thanks for stopping by and have a great day!
Instructions - Trim berry sorbet cardstock to create an A2 card base.
- Trim polka dot patterned paper into a block and adhere to card front.
- Trim ripe avocado strip and adhere to card front.
- Die cut scallop circle.
- Stamp the sentiment, once on the scallop die cut, and again on ripe avocado cardstock.
- Cut tree from ripe avocado cardstock and pop off scallop circle die cut.
- Add rhinestone to center of the tree's star.
- Tie ribbon around card front into a bow.
- Add scallop circle die cut with foam adhesive.
- Add button to ribbon knot.
- Draw faux stitching.
Supplies
Stamps :: Papertrey Ink - 2008 Holiday Tag Collection Ink :: Papertrey Ink - ripe avocado; Uniball - signo broad white gel pen Paper :: Papertrey Ink - berry sorbet, ripe avocado, polka dot parade (patterned paper) Embellishments :: Papertrey Ink - white ribbon, ripe avocado button, twine; KaiserCraft - rhinestone Tools :: Spellbinders - scallop circle nestabilities
|
|