|
|
  Hey Everyone! Happy Friday to you! Today, I have a "Fast Friday Card" to share and it's inspired by the Embellish Squares Color Challenge that just started today. These colors are really great. I focused heavily on purple, with some black, and a bit of green. This 3.5" square mini card was super quick to create and just perfect to give my friend for her birthday. Please hop on over to the blog to check out the challenge and the design team's wonderful projects. I hope you all enjoy your weekend! Instructions- Stamp images on inchie squares with watermark ink.
- Add purple embossing powder and heat set.
- Adhere embossed inchie squares to card front with foam adhesive.
- Stamp sentiment.
- Add rhinestones.
SuppliesStamps :: Papertrey Ink - take three summer Ink :: Tsukineko - Versamark, Memento tuxedo black Cardstock :: Inchie Arts - purple inchie note card Embellishments :: Inchie Arts - 1" black inchie squares; Kaisercraft - green rhinestones; American Crafts - lavender embossing powder Thanks for taking a peek at my post today. Enjoy yourself and take care!
 Hey Everyone! This week, I'm a guest designer for The Play Date Cafe. They host weekly color challenges on their blog. You should go check them out. Lots of inspiration and fun! This week's colors are pink, white, black, and gray. In the color challenge inspiration image, I focused on the colors as they were presented. So, since there was a lot of black, I used a black card base and so forth. You can be inspired to create on so many levels and this is just the one I used this time. Although I've never tried that method before, it worked here and I thought I'd share just in case you all wanted to try that out too! That's why there's only a hint of pink in this card. By the way, the pearls were Mac's idea! Hey...who is really designing the cards, right?! :) Thanks so much for having me "Play Date!" Take care and thanks for your visit. Instructions- Trim black cardstock to create an A2 card base.
- Adhere frame element to card front center.
- Adhere ribbon loop to metal quote and then adhere to frame element.
- Add pearls.
SuppliesCardstock :: PTI - true black Embellishments :: Pink Paislee - artisan elements frame; KaiserCraft - pearls; PTI - sweet blush twill tape; Making Memories - metal quote

Hey there, Bleeps! It's Friday!
Let's all say..."YAAAAAAAY!"
Now, that we've all yelled out, here's a card for you today. I created this one last month for the Paper Crafts sketch challenge call. It's a mini card and very 'warm' with the felt flower embellishment. This is a "Fast Friday" card and easy to make multiples. It's going to be a beautiful weekend here in the Washington, DC area, so I hope to enjoy a bit of that this Easter weekend. I hope you all enjoy your weekend as well, whether you celebrate Easter or not, weekends are celebratory own their own every week! :) I also want to share that I've updated my "For Sale" posting with a new stamp set. I was so excited that someone purchased the stamps and punches that I could not wait to get another set up for sale. Believe me, there are plenty more! So, please take a peek at a great graduation set, perfect for the upcoming 'graduation season.' Thanks for your visit and enjoy your weekend! Instructions- Trim kraft cardstock to create a 4.25" square card base.
- Die cut label from patterned paper.
- Die cut circle and stamp vintage circle border.
- Stamp sentiment and add liquid pearls to embellish.
- Adhere circle die cut to label die cut with foam adhesive.
- Adhere label die cut to card front with foam adhesive.
- Add felt flower embellishment.
SuppliesStamps :: Waltzingmouse Stamps - blessed by you, vintage circles Ink :: ClearSnaps - colorbox chestnut Cardstock :: PTI - kraft, rustic cream Patterned Paper :: My Mind's Eye Breaking Free collection (Wild Ride-only smiles boy) Embellishments :: AlexxKesh - felt flower; Ranger - liquid pearls Tools :: Spellbinders - labels 9, standard circle large nestabilities, wizard
 Hey! You all ought to know that I love to say "Hey!" So, I got this cute stamp set by T he Stamps of Life! This is a quick and fun card to make. The stitching is a bit quirky, but I liked the end result. Enjoy your Friday Eve! I'm so happy the weekend is almost here!
Thanks for taking a peek today!
Instructions - Make 4.25" square card base.
- Trim patterned paper strips, adhere to card front, and add stitching.
- Stamp "hey" on tag, then add ribbon.
- Attach tag to card front with foam adhesive.
- To create flower embellishments, stamp flower, add epoxy sticker and cut out!
Supplies
Stamps :: The Stamps of Life - hello2you Ink :: PTI - raspberry fizz Paper :: PTI - kraft, bitty box, in bloom, raspberry fizz mix (patterned paper) Embellishments :: EK Success - epoxy sticker; KaiserCraft - rhinestone; PTI - ribbon; Nice Package Shop - mini tag Tools :: thread, sewing machine
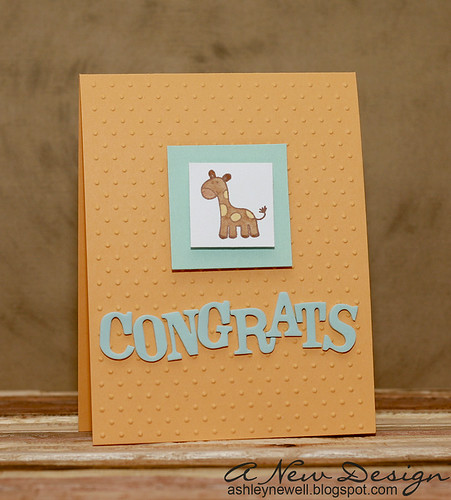
TGIF Bleeps! I have a fast card to share with you today! I even colored it a tiny bit! I wanted to share with you that I decided to go to CHA as of a few hours ago! I found a decent deal with less than 24 hours to plan and pack! As I type this, I still haven't packed, but I did take a nap to get on west coast time! I can't wait to see all of my crafty peeps! I'm super excited because I was not planning this or did not expect to go. That is until, McArthur told me to find a good deal and go! Sorry ladies, but I think I've got the best man out there! Gotta love that! I'll be hanging out with great people over the weekend and be at the trade show for a tiny bit of time on Sunday too, so I can meet some of the greats! I can't wait for the parties, giggles, gasps at how short I am, and photo opportunities! I'll be back next week with stuff to report of course, but until then, follow me on Twitter/Facebook to get a 'live feed!' The information is on my sidebar.
To some of you, I'll see you this weekend. To my other bleeps, thanks for stopping by and I hope to meet you one day!
Instructions - Trim cardstock to create an A2 card base.
- Emboss card front.
- Stamp giraffe, color and matte on blue square.
- Add square to card front center.
- Add thickers to spell CONGRATS.
Supplies
Stamps :: Hero Arts - giraffe Ink :: Stampin' Up! - chocolate chip; Copic markers Paper :: Papertrey Ink - spring rain, white, summer sunrise Embellishments :: American Crafts - lullaby thickers Tools :: Provo Craft - swiss dots embossing folder, Cuttlebug
 TGIF, Bleeps! Whew! This is a late night or should I say early morning! I was able to finish all of my tasks by the deadline. Take a peek over at Splitcoaststampers today to see all of the projects and my last gallery upload to the fan club as a design team member. The time went by so fast and it was a great ride!
Today, I'm sharing a card I made for our friend whose grandmother passed away. She already has it, so just in case she sees it on Facebook she won't be surprised! YaY for a long weekend!
Enjoy yourself and thanks for visiting!
Instructions - Trim cardstock to create an A2 card base.
- Trim cream cardstock and stamp polka dot pattern.
- Overlay with floral images and add ribbon.
- Matte on purple cardstock, then adhere to card front.
Supplies
Stamps :: Gina K Designs - comfort and peace; Papertrey Ink - background basics (polka dot) Ink :: Papertrey Ink - ripe avocado; Clear Snap - chestnut Paper :: Papertrey Ink - ripe avocado, vintage cream; Cut Cardstock - purple Embellishments :: Papertrey Ink - ripe avocado ribbon
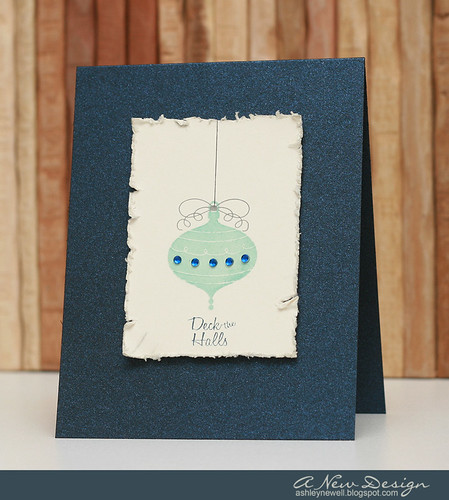
  Alrighty, Bleeps...it's FRIDAY! Thanks for your positive feedback on the holiday color inspiration. I really appreciate it and glad that you liked the color combination, so I am back today with another. Today's card is a "Fast Friday Card" and perfect to create multiples. I kept it really simple, but the colors make it somewhat elegant. The distressed edges on the focal point give it an artsy imbalance. I hope you try out this color combination too!
I added a poll to the left sidebar regarding the very possible change of my web site address in the future. I thought I'd reach out and see what my Bleeps thought about it first before I made my final decision. So, check out the poll and let me know what you think about me changing my web site address, which would require you to re-subscribe through Google Reader, RSS feed, or e-mail.
Feel free to create holiday cards using the color combination. The graphic is also available for you to save to your computer by right-clicking the image and selecting the "Save Image As" option, then upload it to your blog. I like fun and different holiday color combinations, which is why I am challenging myself to try a new holiday card every time I post to the blog this month!
Feel free to join me. If you do, I'd love to see what you created by linking your card posted in the comments. This is not a 'challenge' but just something fun to inspire my Bleeps out there to make more holiday cards!
Thanks for stopping by and enjoy the weekend!
Instructions - Trim night sky shimmer cardstock to create an A2 card base.
- Trim a rectangle from cream cardstock and stamp ornament.
- Stamp bow, add rhinestones, and draw a line with pencil (yep, that's just pencil, Bleeps!)
- Stamp the sentiment and distress the edges.
- Add focal point to card front center with foam adhesive.
Supplies
Stamps :: Our Craft Lounge - jolly ornaments Ink :: Papertrey Ink - aqua mist, smokey shadow, enchanted evening Paper :: Papertrey Ink - vintage cream, night sky shimmer Embellishments :: KaiserCraft - rhinestones Tools :: Tim Holtz - distresser
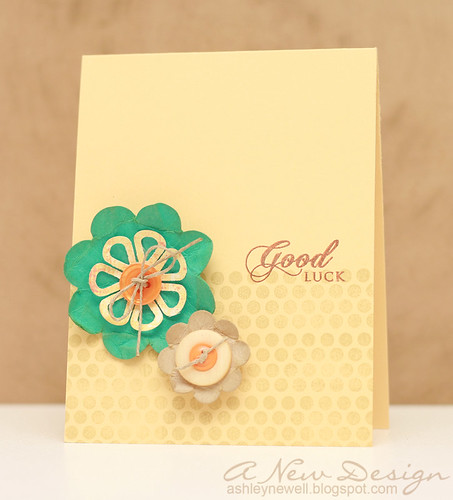
 Happy Friday, Bleeps! How are you?! I hope well now that the weekend is peeking over our shoulders! Today, I have a quick card for you. The hardest part is the die cutting! I hope you enjoy your weekend and as usual, thanks so much for taking a peek over here at the blog.
On a side note, Embellish Magazine is hosting a new challenge starting today. Have you been by there recently? If not, check it out, add it to your reader/RSS feed/e-mail. Don't forget to connect with Embellish on Facebook/Twitter/Flickr too. Come join us and play along! It will be worth the challenge!
Instructions - Trim yellow cardstock to create an A2 card base.
- Die cut flowers (in various cardstocks/patterned papers).
- Stamp polka dot background on bottom portion of card front.
- Stamp sentiment in orange ink, then overlay in brown ink (a neat shadow effect).
- Distress die cut flowers, add buttons, then adhere to card front with foam adhesive.
Supplies
Stamps :: Papertrey Ink - mega mixed messages, polka dot basics 2 Ink :: Stampin' Up! - river rock; Papertrey Ink - orange zest; Clear Snaps - colorbox chestnut Paper :: Yellow cardstock (NO CLUE where I picked up this scrap, odd I know!); Stampin' Up! - bermuda bay; Papertrey Ink - kraft; My Mind's Eye - breaking free collection Embellishments :: Papertrey Ink - buttons; Craft Supply - twine Tools :: Provo Craft - cuttlebug; Quick Kutz - nesting flower dies

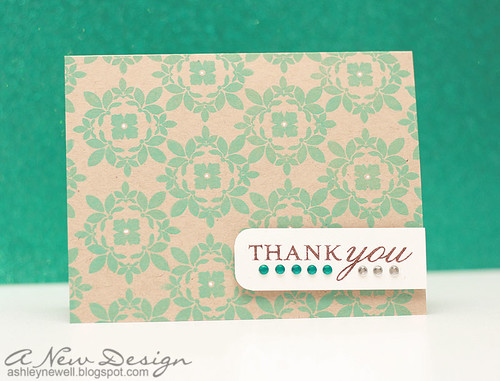
TGIF! Today, I am sharing a fast card. It took about 10 minutes to make. Stamping the background pattern is the most time consuming part, but the pattern is easy to align to create a perfect pattern. This card can easily reproduced as gifts or for those last minute thank you notes. Changing the colors can be a breeze too!
Instructions - Trim kraft cardstock to an A2 size by trimming 8.5" x 11" cardstock in half horizontally.
- Stamp background pattern. TIP: Stamp from the top down to prevent inking your hands!
- Stamp sentiment, trim, add rhinestones and adhere to card front.
- Doodle white dots.
Supplies - Stamps :: Papertrey Ink - giga guidelines
- Ink :: Clear Snaps - colorbox mint, chestnut
- Paper :: Papertrey Ink - kraft, white
- Embellishments :: Kaiser Craft - rhinestones; Uniball - white signo broad gel pen
 I'm back with a Fast Friday Card! I know it's been a while, but I could not resist making a fast card today because I'm so happy it's Friday! So, this card may not 'seem' to be fast based on the instructions below, but the reason why it was fast to me is because steps 2-4 were already completed. I previously die cut this apple and never used it. So, I'm sure you have items like that hanging around your workspace, if so use that in place of my apple here and it will be a faster card!
I had nothing else better to do with this card, so I kept on distressing it, over and over again! I also had an 'accident' when handwriting the sentiment. My handwriting is not the best because I need to practice using tools other than pens/pencils, but anyway I goofed the first time. So here is what I did to fix it. I erased it very lightly until most of the white was gone, then just wrote back over it and it worked! Can you see it? Be honest! :) I'm just proud that I actually wrote a sentiment with my own handwriting and it didn't look like chicken scratch!
By the way, if you're looking for something to do over the next couple of weeks, check out Embellish. We're hosting a blog challenge in addition to the December challenge issue! Go check it out!
Thanks for visiting to me today. I appreciate each of you and your comments and I hope you enjoy your weekend.
Card Instructions - Trim soft suede cardstock to an A2 card.
- Die cut apple using Cricut.
- Dry emboss polka dot pattern.
- Punch scallop circle halfway to create a 'bite.'
- Trace stem on brown paper, then adhere to apple.
- Color embossed dots with marker and pen and distress.
- Adhere apple to card front with foam adhesive.
- Corner round edges and add faux stitching.
- Adhere buttons with twine.
- Write sentiment.
:: My Goodies {sweet} ::Cardstock: Stampin' Up! - kiwi kiss + soft suede Patterned Paper: Making Memories - passport (brown stem) Accessories: Papertrey Ink - buttons + twine; Uniball - white signo gel pen; We R Memory Keepers - corner chomper; Marvy Uchida - scallop circle punch; Provo Craft - cricut + plantin schoolbook cartridge + cuttlebug + swiss dots embossing folder; Stampin' Up! - soft suede marker; Tim Holtz - paper distresser
Card Size: 4.25" x 5.5"

Happy Friday! This card is sort of a fast card because it is a case of another card. When you case a card, you can make it so much faster than if you had to think of the layout and supplies, then create it. I did make some changes to it, such as add the velvet scallop trim, tag, and pins. The original card is posted here. I had so much fun making the first card, I had to make another. We're enjoying New Orleans (as you can see in my tweets)! Today, we went to the lower ninth ward to photograph Susan G. Komen giving a 'big check' to the only health clinic within the area (since hurricane Katrina). Tomorrow we'll be at the festival and then of course there's the concert! Can't wait!
Enjoy your holiday weekend! Thanks so much for stopping by.
Card Instructions
- Trim smokey shadow cardstock into an A2 card.
- Trim patterned papers to 4" x 5.25" and adhere together.
- Tie ribbons around (first grey ribbon, then purple ribbon into a bow).
- Adhere to card front.
- Stamp sentiment on cardstock sticker and adhere to card front with foam adhesive.
:: My Goodies {Make a Wish} ::
Stamps: Papertrey Ink - mixed messages
Ink: Papertrey Ink - smokey shadow
Cardstock: Papertrey Ink -smokey shadow
Patterned Paper: SEI Bridgeport collection
Accessories: SEI- ribbon + rub-on flowers on the tag (Bridgeport collection); Creative Imaginations - velvet purple scalloped edge trim
Card Size: 4.25" x 5.5"
 Click here to buy this card Finally Friday! Finally, a fast card! Today's card was inspired by a Paper Source promotional e-mail I received yesterday. They are hosting a Girl's Night Out class featuring hand stamped cards and other crafts in an Indian theme. I picked up this stamp from Paper Source last year and have only used it once, so I decided it's perfect for a simple one-layer card. This design is great for cards to be made in large quantities or as a quick card gift set. Any sentiment can be added on the front or leave it blank for none at all. It's all up to you in your paper crafting world! I hope you enjoy your weekend and as always, I appreciate your visit to my blog! Card Instructions- Trim dark chocolate cardstock into an A2 card.
- Stamp Indian flowers on left side of card front and heat emboss.
- Tie ribbon into a knot around card front.
- Stamp sentiment and heat emboss.
:: My Goodies {Happy Birthday} ::Stamps: Papertrey Ink - birthday basics; Paper Source - Indian flower Ink: Versamark Cardstock: Papertrey Ink -smokey shadow Accessories: Papertrey Ink - raspberry fizz ribbon; white embossing powder; heat gun Card Size: 5.5" x 4.25"
 Hey everyone! TGIF! I've had a busy week moving and organizing my studio and it is still not finished, but hopefully with some time this weekend, I can get a lot more completed. Today's card is SUPER FAST! I ran out of steam last night after working on another card, so I had no choice but to make it really quick and easy. I also practiced on my camera a bit, taking tips learned from Lisa Spangler's Scribble This challenge. Since I did not have time to customize my white balance for the picture, I did use an auto white balance setting in the manual mode! That is a big step for me to get out of an automatic macro (flower) setting! Since my pictures were a bit blown out (due to over-brightness), I asked Mac what to do about it. So, he suggested I adjust the apeture setting. It worked a lot better! :) The card is cream, but the brightness is still there. Do you think the photo turned out good or a little too bright still? As for the studio update, I did add a major element to the room, but I can't share it just yet. I'll reveal it soon! Sorry folks, no sneak peeks on this hot item! I appreciate your comments and thanks for stopping by! Have a great weekend! Card Instructions- Trim vintage cream cardstock into an A2 card.
- Stamp flowers onto card front.
- Stamp sentiment.
:: My Goodies {Enjoy} ::Stamps: Papertrey Ink - handwritten notes; Verve Visual - abundant blessings Ink: Stampin' Up! - chocolate chip + tangerine tango + kiwi kiss Cardstock: Papertrey Ink - vintage cream Card Size: 5.5" x 4.25"
 TGIF! Here's a fast card for you. If you have ever made a 5.5"square card, then you will have a piece of paper this size leftover. Don't waste it...make it a card. It measures about 3" x 5.5" and fits in an A2 envelope. It may not fill the envelope, but it fits in there! Have you all read Paper Crafts magazine new issue for July/August? It's full of great ideas. You have to read the section on how to make cards in $5 and use what you have to make cards. Although we love to buy new supplies, given this day and time, that is not always possible. The great thing about this issue is that it encourages you to continue to create with what you already have or purchase limited supplies for $5 and create something from that. I plan to do a post in the near future featuring limited supplies that I already have in my stash. Oh yeah, in the magazine, there is an advertisement for Card Creations 7 and one of my cards is highlighted in the ad!!! How cool is that?! I recognized my card and wondered how they got it until I remembered it will be published there! HA Can you guess which card is mine? Go check it out! Thanks for visiting me today. I hope you enjoy your weekend! Card Instructions- Make an 3" x5.5" card with dark chocolate cardstock.
- Trim patterned paper to fit the center.
- Stamp floral spray.
- Punch scallop edge on lemon tart cardstock, then adhere to patterned paper.
- Tie ribbon into a bow and adhere to card front.
- Stamp sentiment and add to card front.
:: My Goodies {Wishing You Well}:: Stamps: Papertrey Ink - everyday classics + with sympathy
Ink: Stampin' Up!-chocolate chip Cardstocks: Papertrey Ink - lemon tart + dark chocolate Patterned Paper: Papertrey Ink - bitty dot basics Accessories: Papertrey Ink - lemon tart ribbon; Stampin' Up! - scallop edge punch
 Happy Friday to ya! It's a holiday weekend, which means fun in the sun. Here's a fast card for you today. I decided to make a rustic-love card. Did it work? I worked backwards when creating this card. I stamped the owl, cut it out, then adhered it. Next, I added the stamped tree limb and the sentiment. Most people would have stamped the tree limb first, then adhered the owl. I wanted to share this with you so you can get an idea of how my cards transform into the product. Most of the time (even if I have a sketch), I work a little backwards, sometimes removing elements to add something here or there. How do you work? Do you work backwards too? Well, I have a great weekend planned with family coming over from out-of-town. So, you know that means...I need to get off of this computer and go straighten, well...clean up! Why do I do this to myself (that is, wait to the last minute)?! Are you a procrastinator? I am, but I try to work on that when I have paper crafting deadlines. We all have a shortfalls, but it's whether we are aware of them and actually try to tackle them one day at a time, right?! Anyway, thank you so much for all of your comments you left me this week. I ended up liking this card way more than I did when I finished it because of your encouraging words. They lift me up and help me to continue crafting, so I thank you! Have a great weekend, be safe, and I'll be back on Monday or Tuesday! Hugs & Kisses XOXO Card Instructions- Make an A2 card with white cardstock.
- Trim core'dinations cardstock, emboss, cut into shape, sand, distress, and adhere.
- Apply stickers and rhinestones.
- Stamp sentiment.
- Corner round bottom edge.
:: My Goodies {Hugs & Kisses}:: Stamps: Papertrey Ink - handwritten notes; October Afternoon - Night Owl; ColorBok - friendly forest
Ink: ColorBox - chestnut; Papertrey Ink - hibiscus burst Cardstocks: Papertrey Ink - kraft + hibiscus burst; Core'dinations - chocolate box collection Accessories: Papertrey Ink - spring moss ribbon; EK Success - corner rounder
 How was your weekend? I stopped by a bead show on Friday afternoon and picked up a few fun beads for my brother-in-law's girlfriend who makes jewelry and a few for myself too! Later that evening we left for Raleigh for my brother-in-law's law school graduation! He graduated from the same law school I went to, so it was interesting to see how the school has changed and remained the same since my graduation four years ago (WOW...time flies)! At the graduation, I picked up some t-shirts and mugs. We had a great fellowship with family and friends and will reconvene next weekend for my sister-in-law's graduation (yep, another one, but this time it's for her LLM, which is a masters in law)! After returning from our road trip from Raleigh, I ate and hurried to the studio to make a card to share today. It is a quickie, but I know how many of you like those fast cards. My tip for today is to use patterned paper and stamp less when you want to make a card, but do not have lots of time. I'm still not back to my old creative self, so maybe this week that will change (I hope)! So much traveling has gotten me out of my groove. Edited to Add: This card was inspired by Dawn's Color Challenge! Some have asked about our pictures and trip to the Dominican Republic. Our photos were taken by Franco Rigoni, a photographer staffed by a vendor located at our resort. Franco is an outstanding photographer and we could not resist capturing the moments. We stayed at the Grand Paradise Bavaro Resort. They provided great service and had a wide variety of food selections. The rooms were not the best, but we did not go on vacation to stay in a room all day long. The beach and weather made everything worthwhile! We even made friends there. I would love to return later in life, but would try another resort. We heard from other travelers who visit frequently that there is not that much difference in resorts except amenities, so it will depend on your travel expectations. I'm not a fussy vacationer, just happy to be somewhere other than at home and working! I highly recommend visiting the Dominican Republic and call it the new and upcoming Caribbean destination. Enjoy your Monday and I appreciate your visit! :) Card Instructions- Make an A2 card with berry sorbet cardstock.
- Trim flower patterned paper to fit most of the card front and adhere.
- Make scallop edge on white cardstock using slot punch and adhere.
- Tie ribbon around card front into a bow (cut a small slit along score line).
- Die cut tag; stamp sentiment; adhere tag to ribbon with button (brad).
:: My Goodies {Friends to the end}:: Stamps: Papertrey Ink - mixed messages
Ink: Stampin' Up!-chocolate chip Cardstocks: Papertrey Ink - berry sorbet + white Patterned Paper: Papertrey Ink - friends til the end + bitty dot basics Accessories: Papertrey Ink - aqua mist ribbon; Stampin' Up! - slot punch + corduroy button; Provo Craft-cuttlebug; Spellbinders-tag die
 This is a Monday Fast Card! I couldn't hold it until Friday, so I decided to share today. The longest step is heat embossing and die cutting, but once that's done, the card is basically finished. I really like the heat embossing of the wood grain background, so you may see this again soon! The heat embossing shows the texture of the wood grain, so its really effective. This is a very simple card and you can hand-write your own sentiment in the empty space. This weekend was fun-filled. I got my eyes checked and picked out some new glasses. They won't be ready for a while, so I'll share a video-blog with you when they are so you can see them and tell me what you think! I usually only wear my glasses at work, but also on occasion when I'm crafting. They're exactly what I wanted, bold and fun! I saw Obsessed and it is your new Fatal Attraction. It was entertaining, but no movie of the year. It's a good movie, but not necessarily a must-see at the big screen, but DVD, yes! Don't worry, I won't spoil the movie for you, you'll just have to see for yourself. We also did another infant + family session and it was great! I'll definitely share the photos with you when they're done. I have such a fun time with McArthur on these shoots and meeting new people. You get a chance to step into the lives of others and see them in their best light. Last, but not least, I picked up my new video camera!!! I videoed TWO recordings of cards already. It's very easy to use and has much better video quality than my previous camcorder. Although I didn't get the Flip Mino, I did get a comparable HD camera that is budget-friendly and effective for my recording purposes. I'll let you know what it is after I finish editing it and am 100% sure I want to recommend it! Have a great Monday and thanks for stopping by! Card Instructions- Trim berry sorbet cardstock to an A2 card.
- Emboss wood grain background stamp on dark chocolate cardstock.
- Die cut circles and adhere to card front with foam adhesive.
- Stamp sentiment.
- Corner round edges.
:: My Goodies {Enjoy Everyday Enjoy Life}:: Stamps: Papertrey Ink - handwritten notes; All Night Media - wood grain background rubber stamp (Michaels) Ink: Versamark; Stampin' Up! - chocolate chip Cardstocks: Papertrey Ink - berry sorbet + dark chocolate Accessories: Spellbinders - circle nestabilities; ProvoCraft-Cuttlebug; White Embossing Powder; Heat Gun; Corner Rounder
 Hey Everyone! It's Friday and time for another fast card. Now, anyone can whip this card up in a jiffy. You know how when you want to send a little note along in a package? Well, this card is the perfect solution for that and you can make it in under 10 minutes (should be 5 if you work quickly from these steps). Drawing or handwriting on a card adds a personal touch, but is also super quick. Don't like your handwriting? Practice or purchase a handwriting stamp. Papertrey Ink has plenty, Technique Tuesday's Alli Edwards has a few, and even rubber stamps found at A.C. Moore or Michaels (like the one I used) work as a great substitute. One-layer cards can look plain, but I like them sometimes for simplicity and they remind me of graphic cards I can purchase in a pack in a store, except I made it! :) I hope you all have a great weekend. We have some fun plans. Of course, we have another photo session. This time it's a family + newborn. I have some great ideas and I just hope the baby stays asleep so we can do them! We plan to go to the movies to see the new Beyonce movie with the lady from Heroes, Ali Larter, called Obsessed, it looks so dramatic! Other than that, I have lots of projects and cards to make in the between time to keep me happily busy. Oh yeah and I hope to pick up my new Flip Mino HD Video Camera too and play with that! Thanks for stopping by! Card Instructions- Trim gray cardstock to an A2 card.
- Adhere felt sticker to the center of the card front.
- Stamp sentiment.
- Doodle a frame around the center.
:: My Goodies {Just a little Note}:: Stamps: Stampendous - just a note
Ink: Stampin' Up! - white Cardstocks: Papertrey Ink - smokey shadow Accessories:Martha Stewart - felt applique stickers; Unibal-signo gel pen
  Hey out there! Thanks for stopping by on this great Friday. Today's Fast Friday Card may not seem as fast as some of the others, but believe me it is. It is a basic one-layer card with embellishments. The cool new thing to do is create your own hand-crafted embellishments. I really love fabric, so I thought of a way to make a fabric flower (I'm sure others have done this before me). I did this before on the baby layout here and also on a baby frame that I'll share with you soon. To make the fabric flower, simply follow the steps below. I may add a video tutorial in a couple of weeks if it's needed, so let me know if you want to 'see' me create one. The card is very simple, but the added embellishments make it seem like you worked all night on it! This card took me about 25 minutes to complete and most of that time was used thinking of what I wanted to add next! So, if you were to follow the steps, I'm sure it could be done in about 15 minutes, if not less. As you can see in the close-up photo, I leave the fabric rough on the edges. This adds lots of texture and I like the added frayed edges. Have a great day! Card Instructions- Trim dark chocolate cardstock into an A2 pre-scored card.
- Trim patterned paper to about 4.25" x 3.5" and adhere to card front.
- Add ric rac trim.
- Cut a 1" thick strip of fabric.
- Hold one end of fabric with your thumb, continue to gather fabric into a circle until complete, add a brad to the center, and adhere to card front.
- Fold new leaf cardstock and hand-cut leaves, then adhere around fabric flower.
- Stamp sentiment and add rhinestone.
- Corner round the card base.
:: My Goodies {You're My Favorite}:: Stamps: Papertrey Ink - Everyday Classics
Ink: Papertrey Ink - Vintage Cream Cardstocks: Papertrey Ink - dark chocolate + new leaf Patterned Paper: Papertrey Ink - raspberry fizz bitty dots Accessories: Amy Butler - pink damask fabric; corner rounder; Chatterbox - brad; JoAnn's - ric rac; Hero Arts - rhinestone
 Hey there everyone! I'm doing really well because it's FRIDAY! Today's card is a Fast Friday Card! I made it very quickly and as you can see on the instructions below, it only takes 3 steps! One-layer cards are great because they remind me of graphic printed cards, but instead are stamped with blood, sweat, and tears...right?! To be honest, PTI's Wishing You set was not initially on my list, but when it came time to make my monthly purchase, I chose it over another set and boy am I glad. I do not have any flower stamp sets like it and it's so darn CUTE. It's perfect for spring. I even made Easter cards with it. Speaking of my Easter cards, I made 5 last night, so I only have about 2 more to make tomorrow! I should definitely be able to meet my goal! YAAAAAY! It's so hard to make lots of cards in a short time frame because many times I lose my creative mojo. I usually make one card a day (sometimes more on weekends), but that is typically all I can do. I really surprised myself, but I know what helped me...earlier, I sketched some ideas, so when I got into the studio, I knew exactly what stamps to pull out and just started creating my sketched ideas. Most were not completed exactly how I sketched them, but the point is, it got me started so I was not just sitting here and watching TV (Wheel of Fortune to be exact)! My favorite SU! item purchase this month are my markers! I invested in the entire set and I am SO GLAD! This is exactly what I've been missing. I love how it has a fine tip end and a broader tip too! I'm getting back into doodling, so this is perfect timing! I say getting back into because my very first scrapbook (completed in high school) was done with limited supplies and I used these Painters markers and doodled on pages, creating frames and designs around pictures. I had them in every color M.J. Designs carried (now Michaels) and I know my mom spent a pretty penny on just one marker every time I'd go in that store! Since it looks crazy now, I'm going to redeem myself and make doodling work better for my projects! Well, I hope each of you have a great weekend! It's Cherry Blossom Festival time here in DC, so you know what we'll be doing...photography! McArthur already went out yesterday and took some shots. Even on a gray day, the Tidal Basin is so photogenic with all of those cherry blossoms! Hmmm that reminds me, I need to do a new cherry blossom card with my Paper Source stamp! Anyway, I've said enough in today's post! I'll be back tomorrow and maybe with a cherry blossom card! Card Instructions- Stamp flowers on card front.
- Stamp sentiment.
- Using a ruler, draw a line.
:: My Goodies {Wishing You a Happy Birthday}:: Stamps: Papertrey Ink-Wishing You
Ink: Stampin' Up-chocolate chip + kiwi kiss; Papertrey Ink-lemon tart + berry sorbet Cardstocks: Papertrey Ink-white A2 pre-scored square card Accessories: Stampin' Up!-chocolate chip marker
|
|