|
|
Hey there, Bleeps! I hope you enjoyed your weekend. I'm already looking forward to our upcoming weekend since it will be a nice 3-day for me. Today, I am sharing some cards for the new Caardvarks challenge sponsored by SRM Stickers. The challenge involves scrap lifting one of the cards from the design team. The entire new release of SRM Stickers is the featured prize. Head on over to the blog to check out how everyone used these clear stickers. Edited to Add: By publisher's request, the image for this card was removed.
To view this card, please see Cards magazine April 2011 issue.
The image will be re-uploaded after May 2011.
Instructions- Trim patterned paper block and adhere to orange A2 card base.
- Trim doily in half and adhere to card front.
- Apply sentiment stickers to die cut embellishment, then adhere to card front.
- Add buttons with twine and bloomer.
SuppliesCardstock :: Papertrey Ink - orange zest Patterned Paper :: Kaisercraft - hippy girl collection Embellishments :: SRM - sentiment sticker; Craft Supply - doily; American Crafts - bloomer; Papertrey Ink - buttons; May Arts - twine; Kaisercraft - die cut embellishment (hippy girl collection)  Instructions - Trim patterned papers to fit A2 card front and adhere.
- Die cut label and trim one end, then adhere to card front to create a border.
- Add ribbon.
- Punch folder tab and add sentiment stickers, then adhere to card front.
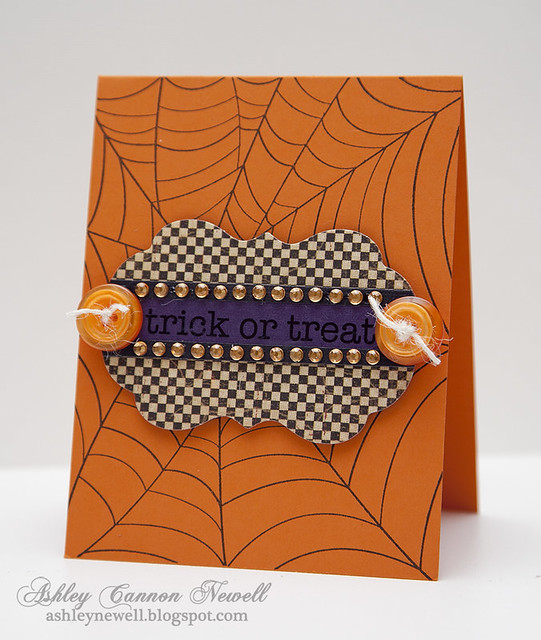
SuppliesCardstock :: Stampin' Up! - elegant eggplant; Papertrey Ink - rustic white Patterned Paper :: Kaisercraft - hippy girl collection Embellishments :: SRM - sentiment sticker; Papertrey Ink - ribbon Tools :: Spellbinders - S4-290 labels fourteen, wizard; McGill - folder tab punch  Instructions - Trim cardstock to create an A2 card base.
- Stamp web pattern.
- Die cut label, then adhere purple and black cardstock strips.
- Add sentiment sticker, then adhere buttons with twine.
- Embellish with rhinestones, then adhere to card front with foam adhesive.
SuppliesStamps :: Hero Arts - web background Ink :: Close to My Heart - black Cardstock :: Papertrey Ink - orange zest; Stampin' Up! - elegant eggplant; American Crafts - black Patterned Paper :: Graphic 45 - hallowe'en in wonderland collection (harold's square) Embellishments :: SRM - sentiment sticker; Kaisercraft - rhinestones; May Arts twine; Papertrey Ink buttons Tools :: Spellbinders - S4-290 labels fourteen, wizard Thanks so much for visiting today! Take care!
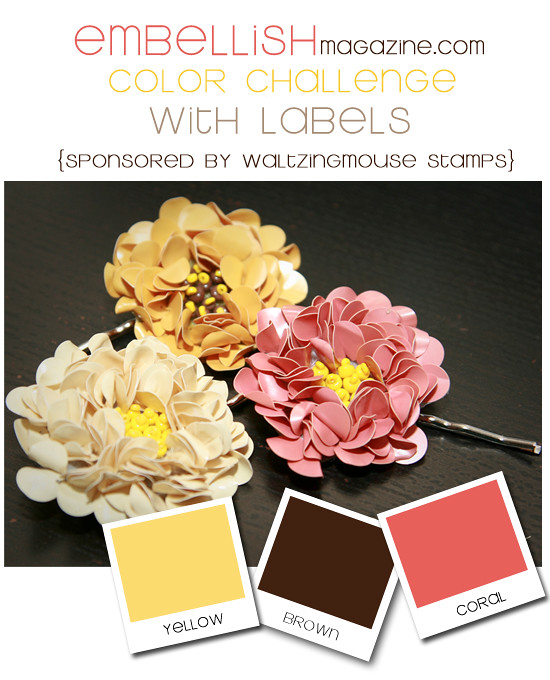
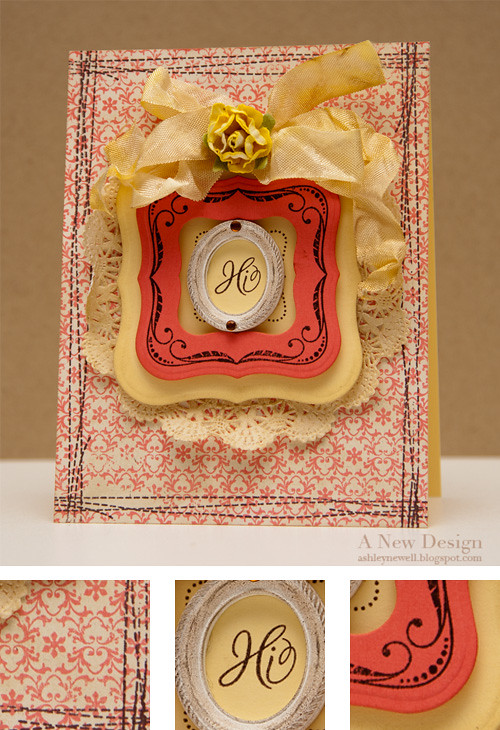
  Hey Everyone! How are all of my Bleeps? I hope you all are doing well. I'm happy to report that today is Friday and it's time for a wonderful weekend! It's also time to get started on a new Embellish Magazine challenge. This challenge is sponsored by Waltzingmouse Stamps and features labels. I had a lot of fun with this challenge and I hope you do too! Go check out what the rest of the design team created and get started too! Instructions- Trim rustic cream cardstock to fit an A2 card front.
- Stamp background and add distress ink.
- Stamp faux stitching on edges with brown ink, then adhere to a yellow A2 card base.
- Add glimmer mist and distress ink to doily, then adhere to card front.
- Die cut and emboss one label from yellow cardstock.
- Die cut and emboss a smaller label from berry sorbet cardstock. Place a smaller die template inside and die cut it at the same time to create a frame.
- Stamp small dotted label on yellow die cut, then stamp "hi."
- Stamp decorative label on berry sorbet cardstock, then pop off yellow die cut.
- Add inked resin oval frame to inset and embellish with rhinestones.
- Tie cabbage rose ribbon into a bow twice and embellish with flower.
Tips & Tricks- Don't forget about your holiday stamps! Sometimes, you can find great designs there too. Here, I found a great background design. Use it in a different color than the traditional Christmas color scheme and you would never know it was a holiday stamp!
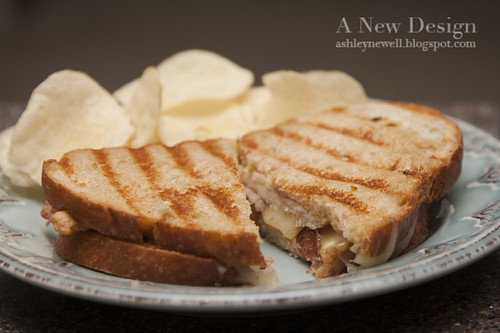
SuppliesStamps :: Waltzingmouse Stamps - off beat backgrounds (faux stitching), very vintage labels no. 1 (die cut label stamps), very vintage christmas (background) Ink :: SU! - chocolate chip; Ranger - old photo; PTI - berry sorbet Cardstock :: PTI - rustic cream, lemon tart, berry sorbet Embellishments :: Craft Supply - doily; MemrieMare - cabbage rose ribbon; Prima - flower; Melissa Frances - oval resin frame; KaiserCraft - rhinestones Tools :: Spellbinders - labels one nestabilities (S4- 161), wizard Thanks so much for stopping by yesterday and taking a peek at my Nanny's Fried Corn dish. If she were here with us, she'd be sitting in her chair with her legs crossed, taking it all in! Now, I couldn't leave you today without another quick dish, perfect for the weekend. It's my version of a panini. I don't know if you all remember, but heating/grilling sandwiches is not a new menu item, but a new trend nonetheless. I can remember my dad having one of those sandwich makers years ago for his ham and cheese or grilled cheese sandwiches he'd make himself during the day. Today, they've introduced "panini presses," which can be very expensive, especially at that Williams-Sonoma! Well, being the kitchen gadget junkie that I am, I had to have it. After staring at it online, in catalogs and even in the store, I decided it was not worth the cost and the limited storage space in my kitchen. So, I use my grill pan to make the grill marks. I could get a press to press the sandwich down, but you can use a spatula or even a plate and it's all the same! I picked up some wheat bread last night for this quick meal, but usually I try to find a specialty bread in the bakery section of my local grocer. You all get the idea...find some nice bread that's better than your typical sliced bread. I grilled some chicken breasts and fried some bacon! On the sandwich, I put some honey mustard (never been a mayonnaise girl - it does not even come in this house - haha), then the chicken breast (or breasts for Mac!), some bacon, and provolone cheese (it's what I had on hand), then the other slice of bread with mustard on it. Place some butter on the grill pan, then the sandwich and let it cook, then more butter and flip. Here's how it turned out! Do you have some panini sandwich ideas? Please share! :)  Thanks so much for stopping by today! I hope you all have a great Friday. I'll be back tomorrow with a new Caardvarks challenge too!
 Hey there, Bleeps! Happy Monday to you! I can say that because it's a holiday today! Have you all seen the new Hero Arts 2010 catalog? I remember when it was released last year and I made a list of goodies I wanted! The doily stamps were a definite for me. So, when I visited Raleigh, I found a few at Archiver's and one was this doily stamp. I stamped it off of the page for a different effect and heat embossed it.
I hope you have a great day! Thanks so much for stopping by.
Instructions - Make an A2 card base.
- Trim berry sorbet cardstock to fit card front.
- Stamp doily and heat emboss with clear embossing powder, then heat set.
- Stamp sentiment.
- Add ribbon and pearl.
- Corner round edges and adhere to card front center with foam adhesive.
Supplies
Stamps :: Hero Arts - starbust lace + everyday sayings Ink :: Versamark; Clear Snap - chestnut Paper :: PTI - dark chocolate, berry sorbet Embellishments :: PTI - ribbon; Kaiser - pearl Tools :: American Crafts - clear embossing powder; We R Memory Keepers - corner chomper

Hey there! I like that greeting and here it is in the this stamp set! :) I stamped the background and added the sentiment. It's a very clean and simple layout and design and perfect to give a guy...at least that's what I think!
For those of you who want to see my photos from CHA (as opposed to the slideshow), I have added them to my Flickr gallery here! Enjoy!
I'll be back tomorrow with a card for the new Caardvarks challenge!
Thanks so much for visiting and have a great Friday Eve!
Instructions - Make an A2 card base.
- Trim kraft cardstock and stamp tree pattern.
- Mat kraft cardstock on red cardstock.
- Stamp sentiments.
- Add ribbon treatment and adhere to card front center.
Supplies
Stamps :: Stampendous - birch buddies (trees); PTI - big and bold wishes Ink :: SU! - white, black; PTI - pure poppy Paper :: PTI - black, red, kraft Embellishments :: PTI - white ribbon
 Hey! You all ought to know that I love to say "Hey!" So, I got this cute stamp set by T he Stamps of Life! This is a quick and fun card to make. The stitching is a bit quirky, but I liked the end result. Enjoy your Friday Eve! I'm so happy the weekend is almost here!
Thanks for taking a peek today!
Instructions - Make 4.25" square card base.
- Trim patterned paper strips, adhere to card front, and add stitching.
- Stamp "hey" on tag, then add ribbon.
- Attach tag to card front with foam adhesive.
- To create flower embellishments, stamp flower, add epoxy sticker and cut out!
Supplies
Stamps :: The Stamps of Life - hello2you Ink :: PTI - raspberry fizz Paper :: PTI - kraft, bitty box, in bloom, raspberry fizz mix (patterned paper) Embellishments :: EK Success - epoxy sticker; KaiserCraft - rhinestone; PTI - ribbon; Nice Package Shop - mini tag Tools :: thread, sewing machine
 How's it going today?! I hope well. Today's card is a simple design with very little stamping. I used a bright color combination and a simple layout. I designed quite a bit, but all for DT work, so I will share that with you later; hence the fast cards! I hope you like them!
Thanks for stopping by!
Instructions - Trim yellow cardstock to an A2 card base.
- Trim patterned paper strip, then adhere.
- Tie ribbon into a bow.
- Add brad to ribbon knot by piercing a hole, then add brad.
- Apply sticker and rhinestones.
- Trim turquoise cardstock to make a tag and stamp sentiment.
- Tie tag around ribbon.
Stamps - Stamps :: Papertrey Ink - paper tray
- Ink :: Clear Snaps - colorbox chestnut
- Paper :: DCWV - safari collection; Stampin' Up! - crushed curry, bermuda bay
- Embellishments :: Papertrey Ink - raspberry fizz ribbon; Recollections - brad; Hambly - sticker; KaiserCraft - rhinestones
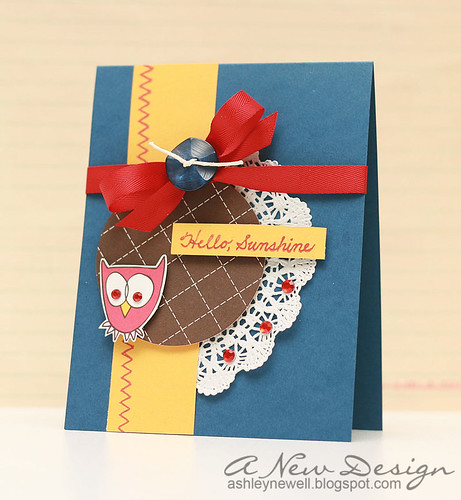
 Hey, Hey! It's Friday Eve and I have a card to share with you today! It is inspired by M's Sketch #2. Of course I tweaked the sketch a bit to fit the elements that I decided to go with, but it follows the layout for the most part. This is my first time using a doily and I'm pleased with the way it turned out. I had no idea how to use them on cards, but thought they would be great paper embellishments. I'm sure they'll look great on some elegant themed cards too. I'll have to try that out later. This time, I made a fun card using bright colors that remind me of back-to-school. Does it to you? It's something about the yellow (which is the reverse side of the American Crafts patterned paper and reminds me of SU! crushed curry that I love) combined with the blue and red that screams back-to-school! The brown sort of throws it off I guess!
The winner of Sleigh Ride stamp set is Erika! So, so pretty! I have been trying to figure out my Christmas card for this year and this set would do the trick! Thanks so much, Ashley!
Thanks so much for visiting today and enjoy yourself!
Instructions - Trim blue cardstock to an A2 card by trimming 8.5" x 11" cardstock in half vertically.
- Trim doily in half and adhere to card front.
- Trim yellow paper to about 1.5", stamp faux stitching and adhere to card front.
- Die cut circle from patterned paper and adhere to card front with foam adhesive.
- Cut owl from patterned paper and pop off of circle die cut.
- Stamp sentiment and add to card front.
- Tie ribbon into a bow and add button with floss.
- Add rhinestones.
Supplies - Stamps :: Papertrey Ink - handwritten notes; Sassafras - stitchery
- Ink :: Papertrey Ink - pure poppy
- Paper :: Papertrey Ink - enchanted evening; American Crafts - craft fair collection
- Embellishments :: Papertrey Ink - pure poppy ribbon + enchanted evening button; Nice Package - doily + floss; Kaiser Craft - rhinestones
 Happy Tuesday, Bleeps! I'm back today with a card featuring some Hambly Screen Prints products. Oh how I am enjoying their products. Let me tell you, the rub-ons are amazing! They feel like an embossed image on the cardstock!
I was feeling a bit non-creative and needed some inspiration, especially on a layout. So, I scrolled through my Google Reader for something! Have you ever done this? I hate copying directly, but sometimes other's card sketches can inspire your own. I thought I'd share with you exactly which card inspired me to create this sketch. Jennifer McGuire's card is so cute and I loved the simple layout, so I went from there only looking at it once and here is what I created. I do not think it looks the same or would be considered copying, but I wanted you to see how you can take something from another crafter's project and make it work for yourself. This does not always work for me, but this time it did, so I wanted to share! What do you think? Does this sound like something you already do and can do?
I love to say "Hey" so I wanted to make a card saying just that! Sentiments are hard sometimes, especially with chipboard letters or stickers because they are larger and shorter words are needed. Think of quick sayings you like and put them on a card. It's a great way to send a part of yourself to someone else!
BTW - My Maya Mist looks like clumpy nail polish because of the finish on the chipboard letters, but "hey"...it gives it "character!"
Thanks so much for visiting and enjoy yourself!
Card Instructions - Trim bermuda bay cardstock to an A2 card.
- Trim yellow cardstock and punch slots to create scallop edge.
- Trim patterned paper, then adhere scallop edge cardstock and adhere to card front.
- Tie ribbon into a bow and add button.
- Apply rub-on to yellow cardstock, then cut out.
- Maya mist some chipboard letters, then adhere to rub-on frame.
- Adhere frame to card front with foam adhesive and add rhinestones.
:: My Goodies {hey} ::Paper: Stampin' Up! - bermuda bay + crushed curry; Hambly Prints - all mixed up Accessories: Papertrey Ink - ribbon; Basic Grey - chipboard letters; Maya Mist - garnet; Hambly Prints - elegant labels rub-on; Craft Supply - button; KaiserCraft - rhinestones; Stampin' Up! - slot punch Card Size: 4.25" x 5.5"

Happy Hump Day! This week is going slow and fast at the same time. Is that possible? Well, this week feels that way! Here is card where I am trying something different. I am using one of American Crafts new stamp sets that I picked up at Archiver's. I used a pure graphic style for this design. I'm not sure if I like it. The rhinestone brads are now making me think of Texas (giggle)! I used the letter 'hi' because I had to remove them from another project. Instead of tossing them, I added them to this card. Somehow, I lost the dot to go over the "i" so I used another brad. OVER-BRAD! :)
I've been working on lots of projects and will be able to share them with you sooner than later. One is a major project that will involve you, hopefully! That's all I'm telling until it's time for me to tell! :)
I hope you enjoy your Wednesday and thanks so much for visiting!
Card Instructions - Trim white cardstock to an A2 card.
- Stamp scallop border.
- Trim patterned paper and adhere to card front.
- Stamp frame, cut out, and stamp flowers, then add brads.
- Adhere to card front.
- Add brads to scallop border.
- Adhere chipboard letters and brad.
:: My Goodies {hi} ::Stamps: American Crafts - sentiments Ink: ColorBox - mint; Papertrey Ink - berry sorbet Cardstock: Papertrey Ink - white Patterned Paper: Papertrey Ink - bitty box Accessories: Papertrey Ink - berry sorbet ribbon; foam adhesive; JoAnns - rhinestone brads; Basic Grey - chipboard letters
Card Size: 4.25" x 5.5"
 Hey there, Chickadee! I think that is such a fun sentiment to send someone. So, as you all saw I received my order from PTI. Yesterday, I got a chance to make a couple of cards. Here is the first one I made. I think these birds are my favorite of the last purchase. I can't wait to ink it up again. I also made another card, but I'll share that one later.
What do you think about the pleated ribbon using staples? Just would like to know if you think it looks weird. I thought it looked neat, but it could be a bit over-the-top!
Last night, I moved another cabinet into my studio. Finally, some more progress. I'm getting there! Just a few more items to move and install, then I'll do a video and pictures for you all to see! I just want to warn you, it's nothing all fancy and organized, but it's the way I work!
Thanks for visiting and leaving comments!! Enjoy your Friday EVE! :)
Card Instructions
- Trim hibiscus burst cardstock into an A2 card.
- Trim kraft cardstock and apply ribbons in a pleated pattern using staples to adhere.
- Adhere kraft cardstock to white cardstock.
- Stamp bird legs on white cardstock and bird bodies on various cardstocks, then cut out and adhere using foam adhesive.
- Add rhinestones to create 'eyes.'
- Stamp sentiment on kraft cardstock.
- Adhere using staples and trim edge at an angle.
:: My Goodies {hey there, chickadee} ::
Stamps: Papertrey Ink - bird watching additions + everyday button bits
Ink: Papertrey Ink - hibiscus burst
Cardstock: Papertrey Ink - stamper's select white + kraft + hibiscus burst + summer sunrise + aqua mist Accessories: Papertrey Ink - aqua mist ribbon; Craft Supplies - staples + stapler + orange ribbon + pink ribbon; KaiserCraft - rhinestones; foam adhesive
Card Size: 4.25" x 5.5"
  This card was inspired by the current Loonie Stampers Challenge. I normally take on the challenge on Sunday, but this week, the challenge was...well...challenging! I did not know what to do! I wanted to use the layout mostly and it was not my usual style, so it was quite difficult. I think I should have just used the colors as inspiration! How do you think it turned out? Sorry, there is no video again. I hope to upload more videos in June. But, I hope you still enjoy the card postings in the meantime. Have a great Wednesday and thanks for your visit. Card Instructions- Make an A2 card with white cardstock.
- Trim core'dinations cardstock, emboss, cut into shape, sand, distress, and adhere.
- Apply stickers and rhinestones.
- Stamp sentiment.
:: My Goodies {Hello, Sunshine}:: Stamps: Papertrey Ink - handwritten notes
Ink: Stampin' Up! - purely pomegranate Cardstocks: Papertrey Ink - white; Core'dinations - vintage collection Accessories: Provo Craft-cuttlebug + spots and dots embossing folder ; American Crafts - fashion accents remarks stickers; KaiserCraft-rhinestones
  TGIF! Remember my "Fast Friday Cards?" Well, they're back! These mini cards were made last month for a color challenge, but I never posted them, thinking they were not good enough. After staring at them for weeks, I decided I should share them eventually. They are VERY simple cards and are really easy to make. I basically trimmed my white cardstock to make the card bases. Then, I die cut the squares. I stamped, punched, and added a ribbon/bling to them. Very simple. Have you seen the March issue of CARDS magazine yet? I received mine yesterday and you can see one of my cards on page 118! I'm really excited since this is my first card ever published! I couldn't believe the great news when they notified me of the acceptance. I thought it would be a lifetime before March arrived, but it's HERE! I've submitted lots of projects for publication and have received acceptances and denials, so it's all just a process now. I'll share my published card with you next month. Have a great Friday and come back tomorrow to check out the baby book scrapbook layouts. Thanks for stopping by! :: My Goodies {baby makes three}::Stamps: Papertrey Ink-bitty baby blessings Ink: Close to My Heart-black Cardstocks: Papertrey Ink-stamper's select white; Stampin' Up!-ruby red Accessories: dimensionals; Creative Memories-circle punch; Cuttlebug; Spellbinders-square nestabilities Card Size: 3 x 3 :: My Goodies {bling hi}::Stamps: Papertrey Ink-say it with scallops Ink: Stampin' Up!-white Cardstocks: Papertrey Ink-stamper's select white; Stampin' Up!-ruby red Accessories: dimensionals; KaiserCraft-rhinestones; Cuttlebug; Spellbinders-square nestabilities; Craft Supply-orange/white polka dot ribbon Card Size: 3 x 3
 Edited to Add: Many requests regarding the flourish stamp used above. It's an Inkadinkado wood mounted rubber stamp that I purchased at AC Moore. There is no 'name' listed on the stamp, but you should be able to locate it on their wall of stamps. Last time I checked, it was still there. They have two sizes, small and large. I used the large one on the card above and stamped it twice. I hope you can find it!    I made four cards using Four Square by Stampin' Up! All of the cards are quite different, but at the same time similar because I used kraft cardstock and brown ink. I used simple one layer stamping, then added the square as a dimension. I only used ribbon on one, but that was because I took it too far! I was supposed to do simple cards only! I have a lot of cards and I have finally decided to part with them. Most of the cards, if not all, have all been posted on the blog, so you have seen them before. I am going to slowly, but surely update my online store. I have neglected the store for quite some time now, but I wanted to make sure I used it more this year. So, be on the look out for some 'for sale' posts...hopefully sooner than later. Not interested in my cards? Well, you may want to keep an eye out for some craft supply for sale postings. Soon, I will be looking for new homes that will appreciate some great craft supplies I have neglected over the past few months from Prima flowers to stamps. I hope all of my readers can find something to buy. So, start saving a few dollars and get ready! Anyway, for these cards, I'm not going to post instructions or supplies because tonight I'm being lazy...really...and I want to go watch American Idol (on TiVo). But, if you have any questions on what I have used or how I made the cards, please feel free to ask by leaving a comment or e-mailing me. I'll update the post as necessary! Want these cards? They will be available to purchase very soon!
 Hi everyone! I'm having a great lazy Saturday! I did get a chance to make this card for K. Werner's Color Challenge before the deadline this evening. It is a VERY simple card because these colors are difficult to work with for me because I have limited supplies. I do not have any ink colors except white. They're very pretty, but a challenge to work with. I needed to use more black with it, but I refrained from using it to stay within the challenge requirements. Today, I'm watching CNN as President-Elect Obama is making his way to DC. It is great to see City Hall in Baltimore full of people knowing I used to live only a few blocks from there while in graduate school. Later, I am going to probably nap, eat, and watch a few movies before finishing up some projects I'm working on. I hope you all enjoy your Saturday and hopefully, I'll be back with a post tomorrow! So, if you're cold like me, stop by Kristina's site to see all of the challenge posts. There are over 200 entries...WHOA! I'm going to start clicking! Instructions: - Make card base by trimming ruby red cardstock to 4.25" x 11", then score at 5.5".
- Stamp scallop square on ruby red cardstock using watermark ink, then heat emboss with white embossing powder.
- Cut stamp into a square and mat on a pink cardstock square.
- Add rhinestones to the scallop square flowers.
- Trim orange polka dot and white ribbons, then adhere to card base.
- Adhere square to card base.
:: My Goodies {hi}::Stamps: Stampin' Up! -Say it with Scallops
Ink: Versamark
Cardstock: Papertrey Ink-sweet blush; Stampin' Up!-ruby red
Accessories: KaiserCraft-rhinestones; Joann Essentials-white ribbon; Michaels-orange polka dot ribbon; dimensionals
Card Size: 4.25 x 5.5
  For K. Werner's Color Challenge this week, it was...well let's say A CHALLENGE. I would never combine most of these colors together. They look nice in the button journal above, but they were quite difficult to work with to create a card. So, when all else fails, I use polka dots because they solve all of my designer challenges! To create this card: - Trim card base to 4.25" x 11", then score at 5.5".
- Stamp polka dots on the brown card base.
- Die cut square in white cardstock and a scalloped square in teal cardstock.
- Stamp flower square in orange ink on white square.
- With dimensionals, pop white square off of scalloped square.
- Tie ribbon around bottom of card base and double the knot.
- Add buttons tied in blue twine.
- Pop the square off of the card base to the right of the ribbon knots.
- Stamp sentiment in brown ink on white cardstock.
- Adhere to side of card.
:: My Goodies {hello}::
Stamps: PTI-polka dot basics; out of the box
Ink: brown; tangerine tango
Cardstock: dark chocolate; taken with teal; white
Accessories: dimensionals; certainly celery grosgrain ribbon; buttons; baker's twine; spellbinders-square + scallop square nestabilities
Technique: Stamped
Card Size: 4.25 x 4.25
 Today marks the day for another Color Inspiration Challenge. The colors remain true to the colors of fall. I kept this card extremely simple, making the card focus solely on the colors rather than the design.  :: My Goodies ::Stamps : Stampin' Up-Say It With Scallops (sentiment) Ink: Versamark Paper: Cardstocks: SU!-Chocolate Chip, Kiwi Kiss; Bazzill Navel Accessories: PTI-chocolate chip polka dot satin ribbon; dimensionals; chocolate twinkle embossing powder; heat gun Technique: Stamped ; Heat Embossed
Card Size: 4-1/4 x 5-1/2  So, I wanted to try out my new Say it With Scallops stamp set. I think this set is great for heat embossing, so that's what I did for both cards. Typically, in fashion, I would never mix polka dots with stripes, but somehow in interior design and cards, it works. Well, do you think it works? But, if I wore a polka dot top and stripe pants everyone would call the fashion police! Anyway, here's my 'mis-matched' design! Instructions: - Make card base by trimming cardstock to 4.25" x 11" then score at 5.5"
- Stamp polka dots at the top of card base, then heat emboss with black embossing powder.
- Trim pattern paper to about 3.5" x 4.25" and adhere to card base.
- Stamp sentiment on green cardstock and heat emboss with black embossing powder.
- Cut out into a square.
- Tie ribbon around card base and add sentiment square.
:: My Goodies ::Stamps: Stampin' Up-Say it with scallops (sentiment); Art Warehouse Journal Stamp (polka dot) Ink: Versamark Paper: Cardstocks: SU!-Baja Breeze; Kiwi Kiss Pattern Paper: American Crafts Accessories: Black saddle stitch ribbon; dimensionals; black embossing powder; heat gun Technique: Stamped; Heat Embossed
Card Size: 4-1/4 x 5-1/2
  I created this card in response to Kristina Werner's Color Inspiration # 7 Challenge. Although I did not get a chance to 'submit' it to her blog, I still completed it! I simply added strips of blue paper on top of the brown. I also stitched on top of some of the blue strips. Yes, the stitching is supposed to appear crooked and frazzled! "Cheers" is stamped on the blue card stock and layered using the colors, adhering to the color challenge. I also added three brown brads to the top left corner. I also corner-rounded the bottom edges of the card. My GoodiesStamp: K&Co AB Lotus Greeting Ink: SU! Chocolate Chip Paper: CTMH cream, brown, blue card stock; Recollections pre-scored card Accessories: Brads; Thread; SU! Corner Rounder Technique: Stamped; Sewn Card Size: 5" x 7"
|
|