After December 4, 2010, all future posts are on a new site. Please subscribe to my NEW feed at www.ashleynewell.com or click below to subscribe to the NEW feed.
Hey there! Happy Saturday to you! Yesterday, Embellish started a new color challenge and this one focuses on scrapbook layouts. I know, I rarely do them and usually I struggle, like on this one. I sometimes get stuck and it was a challenge for me. So, I ask you to join me in this challenge. The more you work at it, the better you get! We have a great sponsor for this challenge. Canvas Corp has offered a very generous prize pack with patterned paper, canvas, clothespins, and so much more. Check out what the other team members created. They didn't seem to have as much of a challenge as I did, but I wouldn't expect that because that's why they're on the team, right?! Click here.
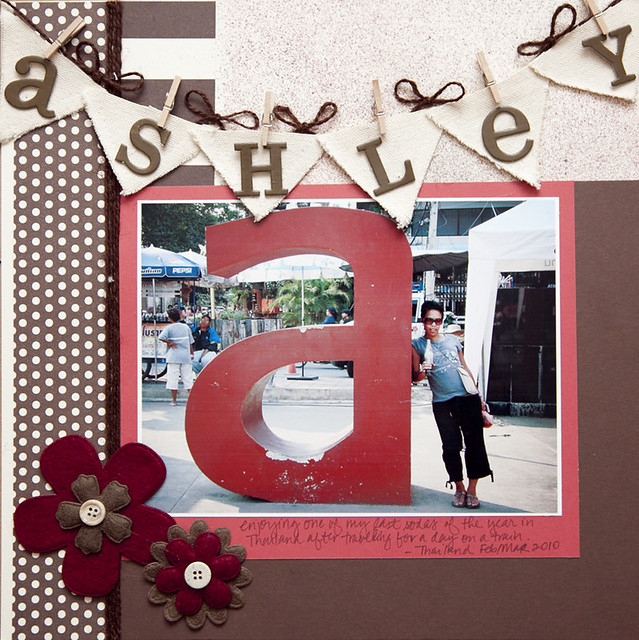
I used patterned paper from the Chocolate and Vanilla collection (Big Stripes) + (Dot Reverse) as side borders. In between the paper, I included a jute twine border using this chocolate texture. The flower die cuts are old embellishments I picked up from my LSS and I think they're by Creative Imaginations or Creative Cafe, but not 100% sure, just a hunch from my memory about 2 years ago.
Here, I added some mini clothespins to hold the "ashley" banner I created using the canvas diamond die cuts. I cut the diamond die cuts in half to create the pennant banner. I also spritzed some Maya Mist on the top part of the layout to get that paint color. I used a brown and a red mist and sprayed very far away from my page to get that sprinkle effect. About the photo: This picture was taken by McArthur in Thailand. We rode the infamous train over River Kwai through the countryside. It was VERY HOT on that hour train ride. We ended here, at this market near Kanchanaburi. We returned the day after the train ride to shop a bit in this market. Even in early March, it is very hot in Thailand. I love the heat, but also enjoy a good refreshing beverage, which leads me to my purpose of this picture. I'm leaning against a huge "a" and in my world, it's for Ashley, but as I recall, it spelled WAR and I'm not quite sure why except for that the building the train system from Burma through Thailand caused a war because people were forced to build it.
Anyway, I'm drinking a Pepsi. This picture shows one of my last times enjoying a soda. I have not had a soda since July. I did not set out to make this a rule of law for me, but it sort of just happened. I was trying to limit my intake and next thing I remember, I realized a month passed since by last soda, so I decided to try for another week, another month, etc. Now, it's been four months since by last soda. Now, that may not sound all that news breaking, but for this soda drinker, it is!
In grad school while getting my MBA, I had night and online classes, so I would stay up really late to work on my projects and study, then wake up around noonish and get ready for my day. To keep me going, I'd drink 2-3 Pepsi's at once, like they were water. This was also the time I discovered my love for Thai food. I lived in a quaint studio apartment right across the street from what I believe is the BEST Thai restaurant ever - Thai Landing in Baltimore, MD. It's authentic and they always treated me like family. I think I ate there about 4 times a week and sometimes twice a day! haha
Anyway, I cut back since then, but kept drinking sodas. No, I'm not a Pepsi only drinker, I like Coke and Ginger Ale too! I can drink almost any soda, well I used to be able to at least!
I really should have titled the page, "The Last Soda" because that's how I feel when I see this picture. At the time the photo was taken, I had no idea it would be one of my last sodas and I enjoyed it!
So, whatever your photo is and whatever motive you have behind it, make sure you scrap it to capture that moment, feeling, and time period of what's going on! I challenge you, even if you are not a scrapper like me to join us for an Embellish challenge!
Blog Update - I will be changing my blog in the next week or so. I will be migrating to a new web address, which means if you follow me in your reader or via email, you will need to re-subscribe to a new feed. I apologize for any inconvenience, but each of you will benefit from the blog transfer because of the added features, such as my being able to reply to comments and so much more! Just wanted to warn you, it's happening VERY SOON! My Blogger site will always be available for as far as I know, I just will not have current posts from it; however, new visitors will be re-directed to the new blog! So stay tuned, I'm almost done with the design!
Thanks so much for visiting! Today, I'm off to try to decorate the house for the holidays and I get to see my friend's baby for the first time! Take care and have a great weekend!
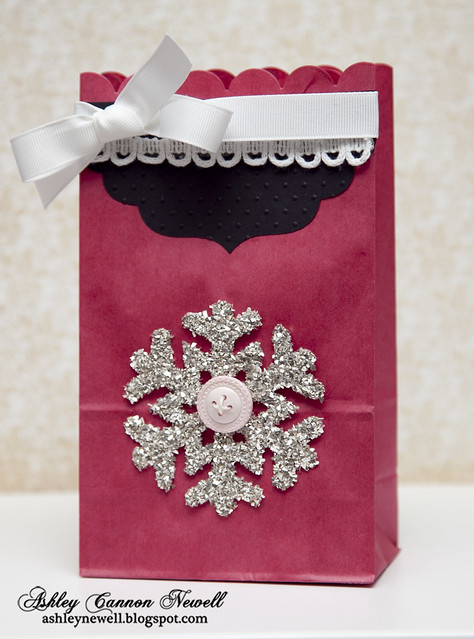
Happy Friday, Bleeps! It's time for another Embellish color challenge! This time, it's all about bags! It's almost that time of year where we start giving from our heart and designing a coordinating gift bag is a perfect addition to any gift and wraps it well too! Head over to the blog to check out the designers' bags. They are very inspiring!
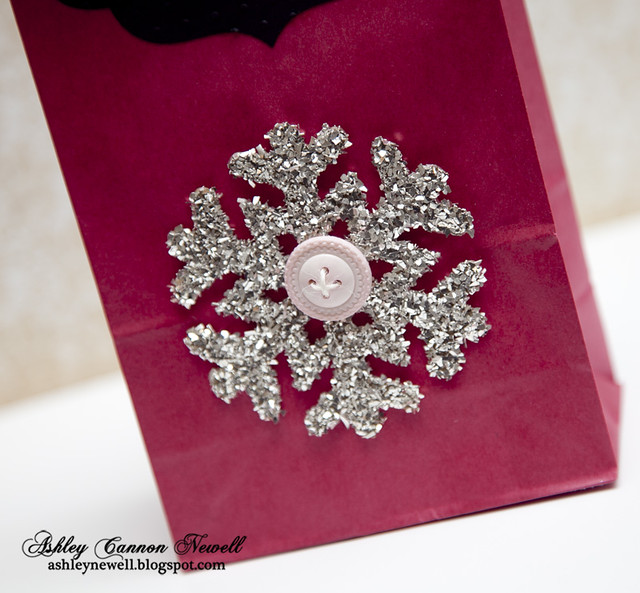
I chose to make this chipboard snowflake die cut the focal point of the bag. It's covered in silver glass glitter and embellished with a light pink button!
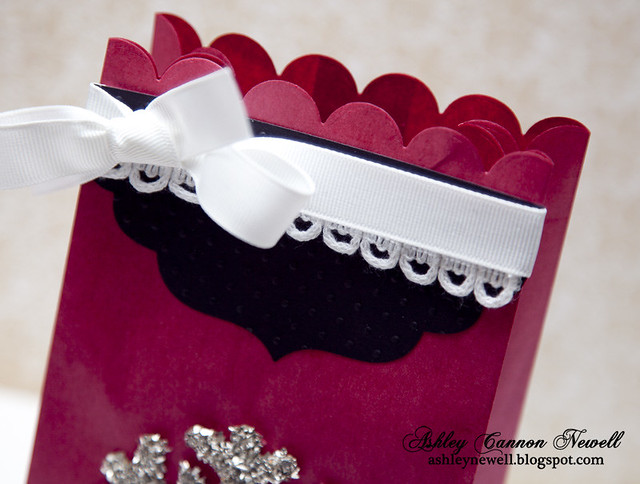
At the top, I die cut the scalloped edge, then added a label die cut and finished it off with a ribbon. Yep, could've added a tag, but didn't. When I give gift bags, I usually do not add tags, so I kept it as I would give. I usually stuff a card on the inside of the bag! :)
Instructions
Die cut scalloped border on bag top. Keep the bag folded, place die side up with the scalloped edge facing the top of the bag. *Yep I used the red bag as a dark pink shade*
Die cut label then emboss it. Trim it to fit bag front.
Add ribbon around label die cut, then adhere to bag front.
Add lace trim under ribbon treatment.
Adhere glue to chipboard, then cover with glass glitter and let dry. Adhere button with twine to snowflake center, then adhere it to bag front.
Supplies
Cardstock :: Papertrey Ink - true black Embellishments :: It's in the Bag! - red paper lunch bag; Creative Cuts & More - chipboard snowflake; Papertrey Ink- sweet blush button; May Arts - twine; Melissa Frances - silver glass glitter; Michaels - white grosgrain ribbon Tools :: Spellbinders - LF-190 grand labels four, GC-001 grand calibur; Provo Craft - swiss dots embossing folder, cuttlebug
Don't forget, I have a blog giveaway here. Also, I'll be back with another post for my last Caardvarks challenge. You have to check it out!
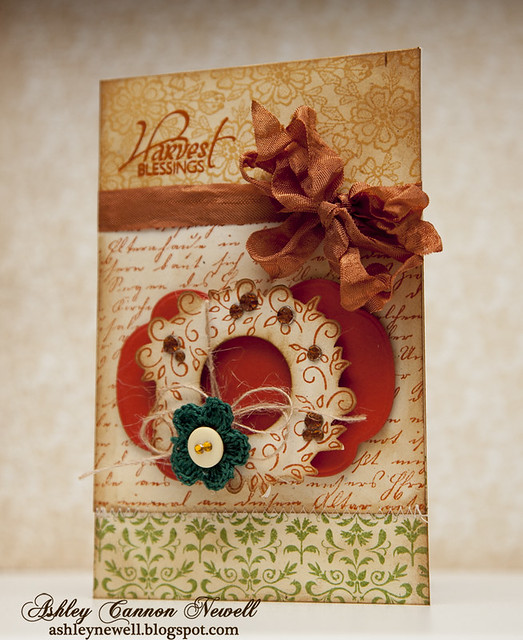
Hey Bleeps! Happy Friday! This week sparks a new Embellish Color Challenge! It's all about vintage, so get out your distress inks, doilies, crocheted trims, and other antique elements to participate. There's a great fall color palette to follow as well. I hope you take some time to participate! Our sponsor is Pixie Petals, an etsy shoppe with lots of fun vintage embellishments.
Here's how I made this card, which took about 6 hours to make!
Instructions
Trim cream cardstock strip and stamp lace background in yellow ink, then add distress ink and adhere to card front.
Stamp text background on cream cardstock block in rust in, add distress ink, and adhere to card front.
Trim another cream cardstock strip and stamp antique background in green ink, add distress ink, and adhere to card front.
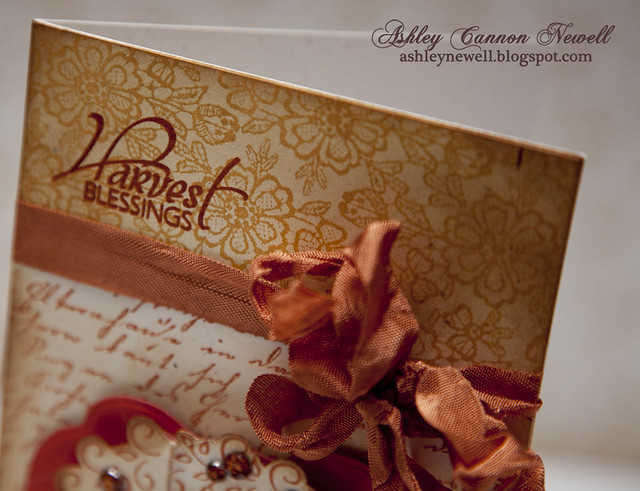
Add ribbon and stamp sentiment. *TIP* To make that ribbon full, I tied three bows using the long tails leftover!
Die cut and emboss label, then adhere to card front.
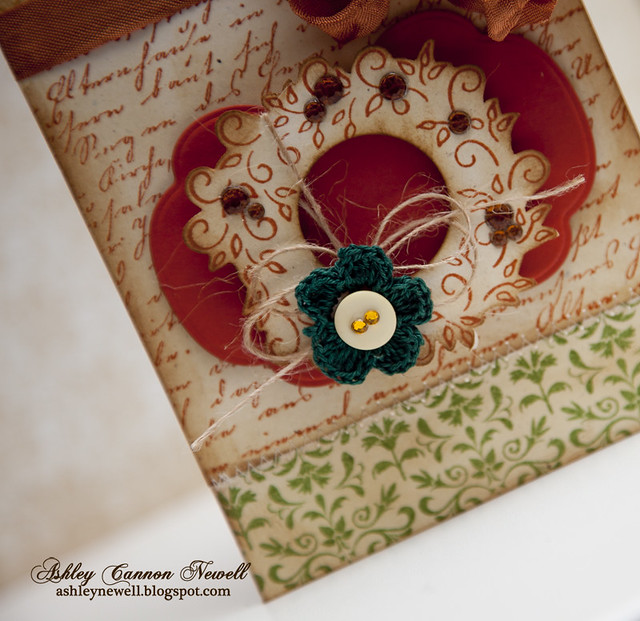
Stamp wreath on cream cardstock in rust ink, cut out, then die cut center circle. Add distress ink and rhinestones.
Tie twine around wreath and add flower treatment. Adhere to card front center with foam adhesive.
Add stitching to last border on card front.
Supplies
Stamps :: DeNami Design - leafy vine wreath; Verve Stamps - harvest blessings; Hero Arts - lace background, old letter writing, antique flower background Ink :: Ranger - antique linen, vintage photo; Close to My Heart - autumn terracotta, topiary; Clear Snap - ColorBox ochre Cardstock :: Papertrey Ink - rustic cream, terracotta tile Embellishments :: Pixie Petals - crocheted flower, ribbon; Kaisercraft - rhinestones; May Arts twine; Papertrey in - lemon tart button Tools :: Spellbinders - S4-290 labels fourteen, S4-116 standard circles sm; G-001 grand calibur; Janome - sewing machine (sew mini) Card Size :: 4.25" x 6.5" (yep, it's tall, but will fit great in a 5" x 7" envelope)
I hope you all have a fun, yet restful weekend! Enjoy and take care! Thanks so much for your visit!!
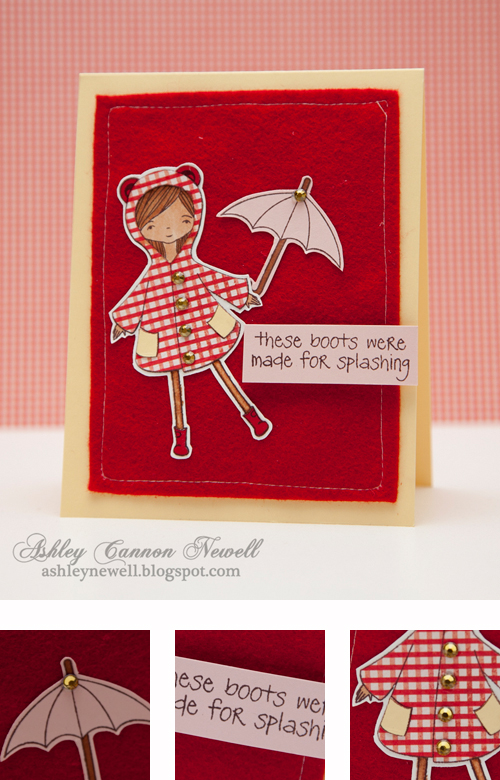
Hey Everyone! Happy Friday to you! It's time for another Embellish Color Challenge. This time, we are focusing on a unique color combination and felt. Did you know our sponsor, My Favorite Things, sells a wide variety of felt? It's great and I so love working with it. I've made a card and a scrap layout using it.
Instructions
Trim felt to about 4" x 5" and stitch a border, then adhere to A2 card front.
Stamp image 4 times - on white, red, yellow, and patterned paper cardstocks, then cut out and paper piece.
Adhere to card front.
Stamp umbrella and sentiment, then adhere to card front.
Supplies
Stamps :: My Favorite Things - rainy day friends Ink :: Stampin' Up! - chocolate chip; Copic - markers Cardstock :: Papertrey Ink - pure poppy, lemon tart; Close to My Heart - white Patterned Paper :: My Mind's Eye - quite contrary collection Embellishments :: My Favorite Things - felt, crystals
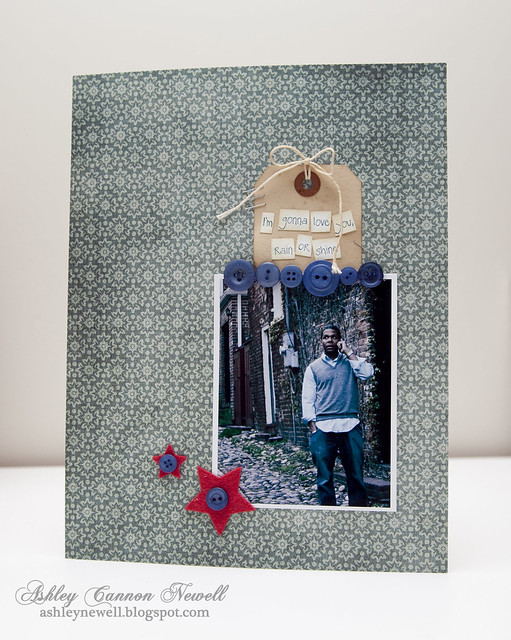
Here is a layout I designed. It's McArthur and expresses my deep love for him. I'm so blessed to have him in my life. So, here it is - love him rain or shine!
I used the Rainy Day stamp set for the journaling. I stamped it on white cardstock, added distress ink and trimmed it into strips. I added the journaling to a vintage tag.
Using some deep red felt, I die cut a couple of stars and added buttons to finish it off. It's a very quick and easy scrap layout that anyone can do! The base is My Mind's Eye patterned paper cut to an 8.5" x 11" size. Here are some detailed photographs.
Have a great weekend! Thanks so much for visiting and I hope you get time to participate in this super fun challenge!
Hey Bleeps! It's Friday and time for another Embellish challenge. This time, the focus is all about creating your own patterned paper - background stamping, something I am truly passionate about! I usually create my own patterns using stamps on most of my projects, so when Skipping Stones Design came out with their Timeless Textures set, I knew the focus has to be on stamping. Ever tried it or want to do more? Come on over to our blog to see what the rest of the design team created and what the color palette is!
Instructions
Trim white cardstock and stamp music background. Add distress ink.
Add jewel flourish and ribbon treatment.
Stamp sentiment on cardstock strip and adhere.
On gray card base, stamp patterns in corner, and add white chalk ink to edges.
Adhere stamped background cardstock to card front.
Hey Bleeps! Happy Friday to you! Yesterday, I took a little break, but was having withdrawals all day long! Today, marks a new day and a new Embellish challenge! This one is all about paper piecing and My Favorite Things is the sponsor! Head on over to the blog to check out all of the designs and see what the challenge is all about! Here are a couple of my creations.
Instructions
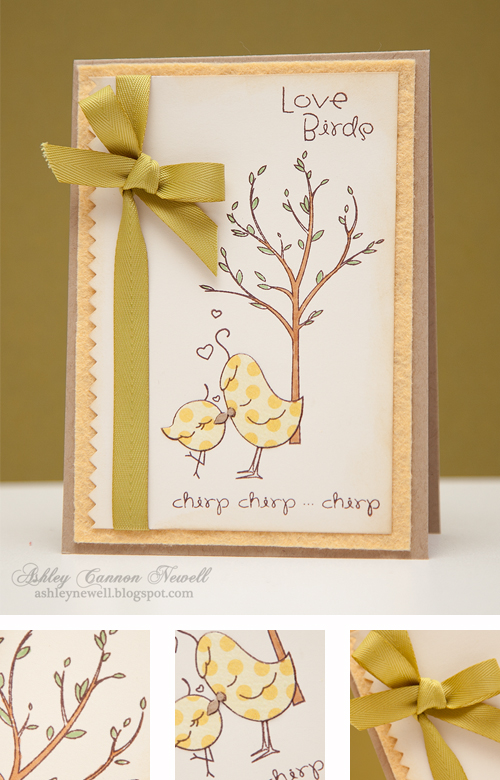
Trim cream cardstock block. Stamp images.
Stamp chickies on patterned paper, cut out, piece on cream cardstock.
Stamp chickies again on kraft cardstock. Cut out beaks and piece on patterned paper.
Color in trees.
Stamp sentiments.
Cut decorative edge.
Add twill tape and distress inking.
Adhere on felt.
Add to card front.
Supplies
Stamps :: My Favorite Things - love birds Ink :: Stampin' Up! - chocolate chip; Copic markers Cardstock :: Papertrey Ink - vintage cream, kraft Patterned Paper :: My Mind's Eye - quite contrary collection Embellishments :: My Favorite Things - banana split felt; Papertrey Ink - chartreuse twill tape Tools :: Craft Supply - pinking scissors
Instructions
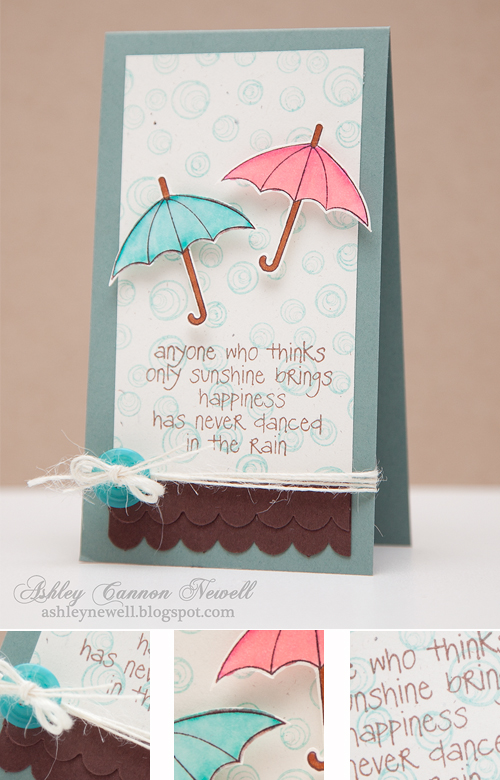
Trim rustic white cardstock and stamp rain background.
Stamp sentiment.
Stamp umbrellas, color, cut out, and pop off cardstock.
Adhere cardstock to card base.
Add scalloped edge strips.
Tie twine and button.
Supplies
Stamps :: My Favorite Things - rainy day friends Ink :: Tsukineko - vintage sepia; Stampin' Up! - chocolate chip; Papertrey In - aqua mist; Copic markers Cardstock :: Papertrey Ink - rustic white, ocean tides, dark chocolate Embellishments :: May Arts - twine; Papertrey Ink - hawaiian shores button Tools :: Stampin' Up! - scalloped edge punch
Hey Everyone! Happy Friday to you! Today, I have a "Fast Friday Card" to share and it's inspired by the Embellish Squares Color Challenge that just started today. These colors are really great. I focused heavily on purple, with some black, and a bit of green. This 3.5" square mini card was super quick to create and just perfect to give my friend for her birthday. Please hop on over to the blog to check out the challenge and the design team's wonderful projects. I hope you all enjoy your weekend!
Instructions
Stamp images on inchie squares with watermark ink.
Add purple embossing powder and heat set.
Adhere embossed inchie squares to card front with foam adhesive.
Stamp sentiment.
Add rhinestones.
Supplies
Stamps :: Papertrey Ink - take three summer Ink :: Tsukineko - Versamark, Memento tuxedo black Cardstock :: Inchie Arts - purple inchie note card Embellishments :: Inchie Arts - 1" black inchie squares; Kaisercraft - green rhinestones; American Crafts - lavender embossing powder
Thanks for taking a peek at my post today. Enjoy yourself and take care!
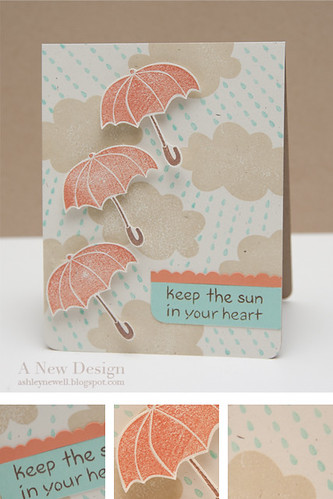
Hey there! I'm back today with another Lawn Fawn card, but this time it's because they're sponsoring an Embellish Magazine Color Challenge! This challenge is all about the quirky, cutesy, and clean design style that Lawn Fawn makes it so easy to create using their stamps. They just had an amazing release, selling out of stamps, so make sure you check them out if you haven't already!
The design team really made awesome cards using this beautiful color palette, I think I will be definitely using again! I hope you have time to make a quirky, cute, and clean project for this challenge. We're looking forward to seeing your designs!
Instructions
Trim rustic cream cardstock to 4.25" x 5.5" and stamp clouds.
Stamp rain in aqua mist ink.
Stamp umbrellas, cut out and pop off card front at an angle.
On aqua mist cardstock strip, stamp sentiment in brown ink, corner round one edge, and adhere to card front.
On a strip of melon berry cardstock, cut a decorative edge using scissors and adhere to card front.
Adhere card front to an A2 kraft card base and corner round the bottom corners.
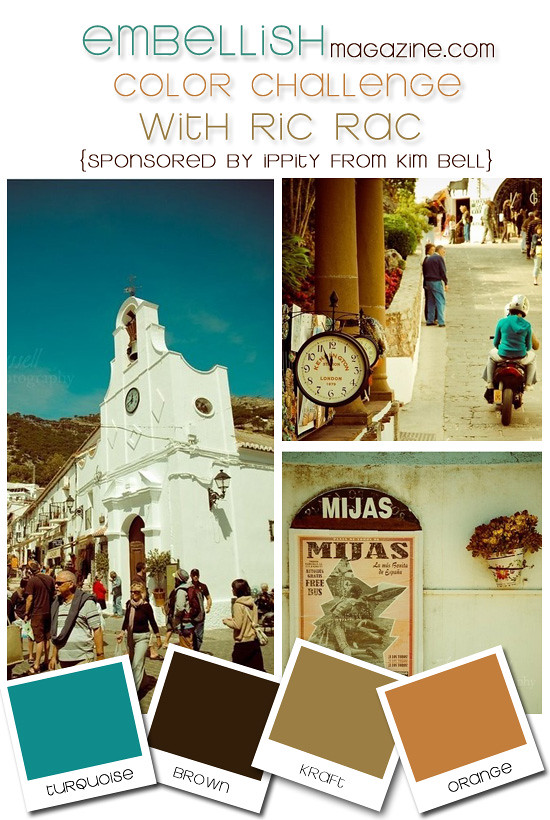
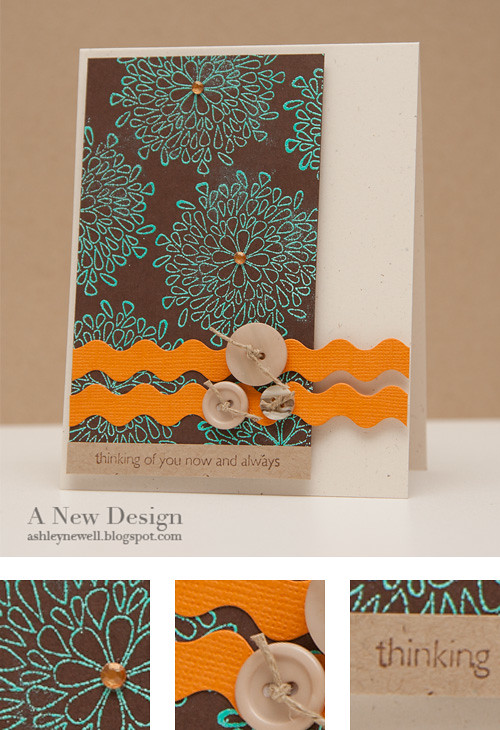
Hey Bleeps! Happy Friday to you! Today, it's time for a new Embellish challenge. This time, we are using ric rac with those fun colors. Head on over to the blog to see more about the challenge and all of the design team's projects using {ippity} stamps!
Instructions
Trim brown cardstock to about 3" x 5" and stamp background pattern with a watermark ink.
Generously cover brown cardstock with aqua embossing powder, shake off excess, then heat set.
Stamp sentiment on kraft cardstock strip and adhere to brown cardstock bottom.
Pop embossed cardstock off an A2 rustic cream card front.
So, I was in a graphics mood and created this graphic to post reminders to you about upcoming stuff! I'll be back on Sunday! Thanks so much for visiting! Have a great weekend!
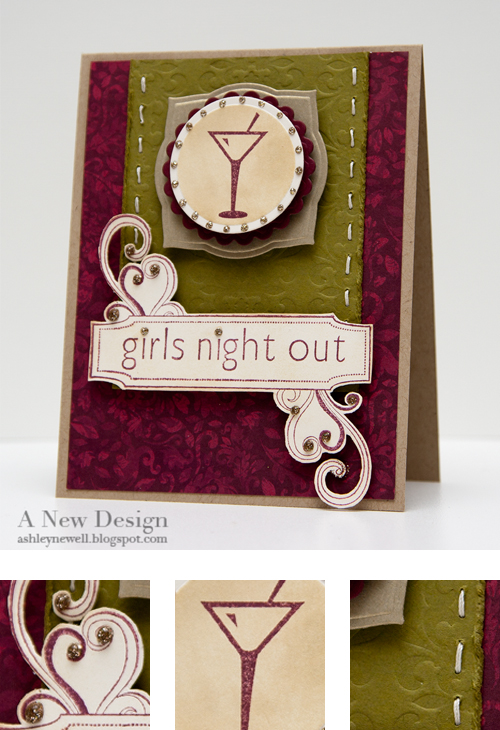
Hey there Bleeps! Happy Friday to you! It's a long holiday weekend here in the States, so I'm ready to get my 'eat on!' But before I do, I wanted to share an invitation created for Embellish Magazine's new challenge. Head on over and check it out here.
Instructions
Trim patterned paper to about 4" x 5.25".
Trim green cardstock strip, then dry emboss it, and adhere it to patterned paper.
Hand stitch on green cardstock strip and distress the edges with your fingernail.
Stamp text box and sentiment on cream cardstock, then cut out and pop off card front.
Die cut and emboss label, circle, and scalloped circle.
Stamp martini on circle, then ink.
Mat die cuts together and pop off card front.
Adhere everything to kraft A2 card base.
Add stickles.
Supplies
Stamps :: Unity - soirees & such Ink :: PTI - scarlet jewel; Ranger - antique linen Cardstock :: PTI - scarlet jewel, kraft, vintage cream, ripe avocado, gold Patterned Paper :: KaiserCraft - gypsie sisters collection (ella) Embellishments :: Ranger - stickles Tools :: Spellbinders - labels three (S4-189), standard circles small (S4-116), classic scalloped circles small (S4-125), fleur de lis pattern impressabilities (I4-1014), wizard
Thanks so much for stopping by! If I'm not back tomorrow with my easy salad recipe, then you all have a great weekend and enjoy your "Fun Fourth" holiday!
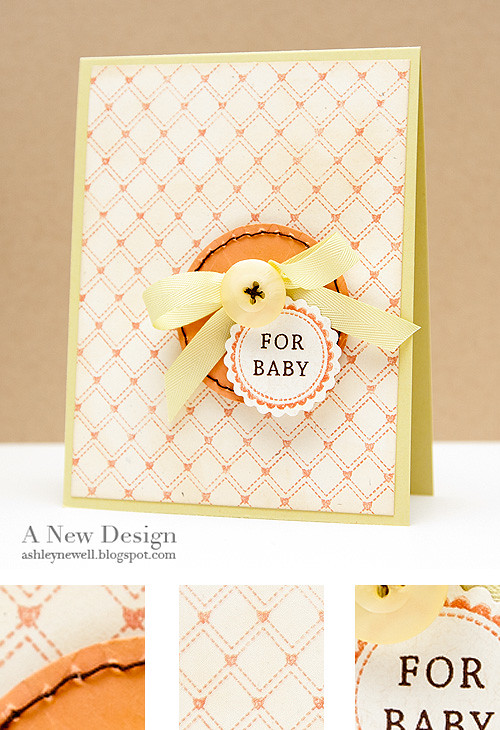
Hi there! Happy Friday to you! Today, Embellish Magazine has a new challenge that started, centered around babies. So, head on over to the blog to see what the design team created, then get started on the challenge. This challenge is sponsored by Wplus9 Design Studio with a great prize.
Instructions
Trim cream cardstock to about 4" x 5.25", then stamp background pattern.
Add distress ink to stamped background, then adhere to spring moss A2 card base.
Die cut circle, then hand stitch border.
Stamp circle border and sentiment, then die cut scalloped circle.
Pop scalloped circle off melon berry circle die cut.
Pop circle treatment off card front.
Add ribbon treatment with button.
Supplies
Stamps :: Kisses & Cuddles, Design Basics (backgrounds 1) Ink :: PTI - melon berry; SU! - chocolate chip; Ranger - antique linen Cardstock :: PTI - rustic cream, spring moss, melon berry Embellishments :: PTI - spring moss twill tape, lemon tart button Tools :: Spellbinders - standard circles small nestability (S4- 116), classic scalloped circle small nestability (S4-125), wizard; thread + needle
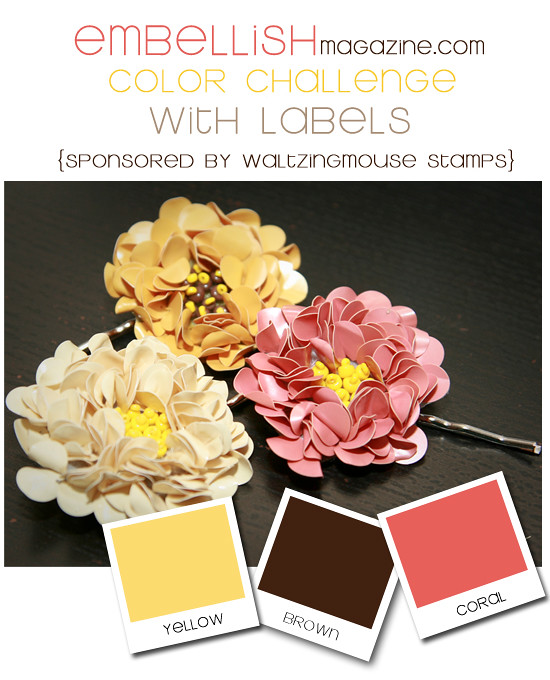
Hey Everyone! How are all of my Bleeps? I hope you all are doing well. I'm happy to report that today is Friday and it's time for a wonderful weekend! It's also time to get started on a new Embellish Magazine challenge. This challenge is sponsored by Waltzingmouse Stamps and features labels. I had a lot of fun with this challenge and I hope you do too! Go check out what the rest of the design team created and get started too!
Instructions
Trim rustic cream cardstock to fit an A2 card front.
Stamp background and add distress ink.
Stamp faux stitching on edges with brown ink, then adhere to a yellow A2 card base.
Add glimmer mist and distress ink to doily, then adhere to card front.
Die cut and emboss one label from yellow cardstock.
Die cut and emboss a smaller label from berry sorbet cardstock. Place a smaller die template inside and die cut it at the same time to create a frame.
Stamp small dotted label on yellow die cut, then stamp "hi."
Stamp decorative label on berry sorbet cardstock, then pop off yellow die cut.
Add inked resin oval frame to inset and embellish with rhinestones.
Tie cabbage rose ribbon into a bow twice and embellish with flower.
Tips & Tricks
Don't forget about your holiday stamps! Sometimes, you can find great designs there too. Here, I found a great background design. Use it in a different color than the traditional Christmas color scheme and you would never know it was a holiday stamp!
Supplies
Stamps :: Waltzingmouse Stamps - off beat backgrounds (faux stitching), very vintage labels no. 1 (die cut label stamps), very vintage christmas (background) Ink :: SU! - chocolate chip; Ranger - old photo; PTI - berry sorbet Cardstock :: PTI - rustic cream, lemon tart, berry sorbet Embellishments :: Craft Supply - doily; MemrieMare - cabbage rose ribbon; Prima - flower; Melissa Frances - oval resin frame; KaiserCraft - rhinestones Tools :: Spellbinders - labels one nestabilities (S4- 161), wizard
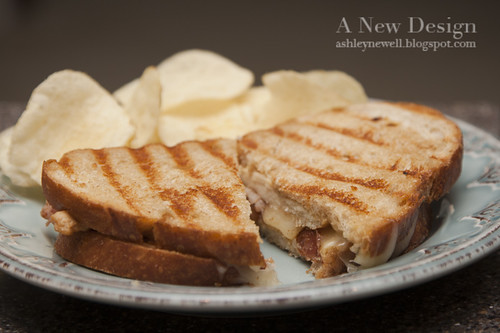
Thanks so much for stopping by yesterday and taking a peek at my Nanny's Fried Corn dish. If she were here with us, she'd be sitting in her chair with her legs crossed, taking it all in! Now, I couldn't leave you today without another quick dish, perfect for the weekend. It's my version of a panini. I don't know if you all remember, but heating/grilling sandwiches is not a new menu item, but a new trend nonetheless. I can remember my dad having one of those sandwich makers years ago for his ham and cheese or grilled cheese sandwiches he'd make himself during the day. Today, they've introduced "panini presses," which can be very expensive, especially at that Williams-Sonoma! Well, being the kitchen gadget junkie that I am, I had to have it. After staring at it online, in catalogs and even in the store, I decided it was not worth the cost and the limited storage space in my kitchen. So, I use my grill pan to make the grill marks. I could get a press to press the sandwich down, but you can use a spatula or even a plate and it's all the same!
I picked up some wheat bread last night for this quick meal, but usually I try to find a specialty bread in the bakery section of my local grocer. You all get the idea...find some nice bread that's better than your typical sliced bread. I grilled some chicken breasts and fried some bacon! On the sandwich, I put some honey mustard (never been a mayonnaise girl - it does not even come in this house - haha), then the chicken breast (or breasts for Mac!), some bacon, and provolone cheese (it's what I had on hand), then the other slice of bread with mustard on it. Place some butter on the grill pan, then the sandwich and let it cook, then more butter and flip. Here's how it turned out! Do you have some panini sandwich ideas? Please share! :)
Thanks so much for stopping by today! I hope you all have a great Friday. I'll be back tomorrow with a new Caardvarks challenge too!
Today, we have a fun blog hop for all of our fans, readers, members, and subscribers! We have some great designers who are featured in Embellish Magazine's Premiere Issue who have created some awesome projects to share with you today. We are really excited about our first issue and its success and we hop you will celebrate with us this weekend.
Exclusive Crinkly Stained Ribbon Tutorial is now available to Embellish Magazine members and subscribers! If you have access to view the magazine, then you will have access to this great new tutorial! Embellish Magazine members and subscribers, please click here and login to access the video. If you get lost, go to the “Dashboard” and it will be the first posting under the “News” section.
If you are not already a member or subscriber, you can easily obtain access here.
Make sure you hop around to each designer and leave a comment on every blog. There will be prizes awarded to blog hoppers who leave a comment. There will be 10 winners of various prizes, including twine samplers, crinkly stained ribbon, Embellish Magazine subscriptions, Lawn Fawn stamps, and as an added surprise bonus a Clear and Simple Stamps gift certificate.
The blog hop will be open through Monday, May 31, 2010 at 5:00 pm EST. Winners will be announced on this blog on Tuesday as well as the selected 'mystery' designer's blogs.
The blogs will be chosen at random as will the winners, so make sure you leave some 'love' on each designer's blog for your chance to win the following:
5 persons will win a subscription to Embellish Magazine
2 persons will win a twine sampler
2 persons will win crinkly stained ribbon
2 persons will win Lawn Fawn stamps
1 person will win a $25 Clear and Simple Stamps gift certificate
*Make sure you stop by CSS blog for your chance to win*
Thank you to all of our sponsors, designers, and subscribers who have supported us on this great adventure!
Instructions
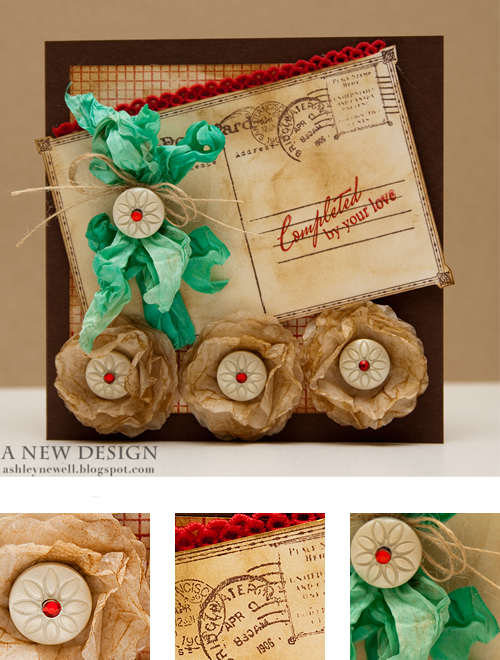
Trim white cardstock block and stamp grid pattern in red ink. Add distress ink to the edges and adhere to a 5.5 square card base.
Stamp vintage post card image on white cardstock and add distress ink. Cut out and add crinkly stained ribbon and twine/button treatment.
Pop postcard off card front.
Die cut large scalloped circles from kraft colored tissue paper, crinkle, stain and add button treatment.
Add poofy flowers to card front.
Stamp sentiment on postcard.
Add vintage red trim.
Supplies
Stamps :: Waltzingmouse Stamps - blessed by you (sentiment), off beat backgrounds (grid background); Unity - vintage postcard
Ink :: PTI - pure poppy; SU! - chocolate chip; Ranger - vintage photo, old paper, tea dye
Cardstock :: PTI - dark chocolate, white
Embellishments :: Craft Supply - crinkly stained ribbon, tissue paper; Jenni Bowlin - buttons; KaiserCraft - red rhinestones (placed on buttons); May Arts - twine; Webster's Pages - red trim
Tools :: Spellbinders™ - wizard, big scalloped circle sm nestabilities (S4-250); ranger - blending tool
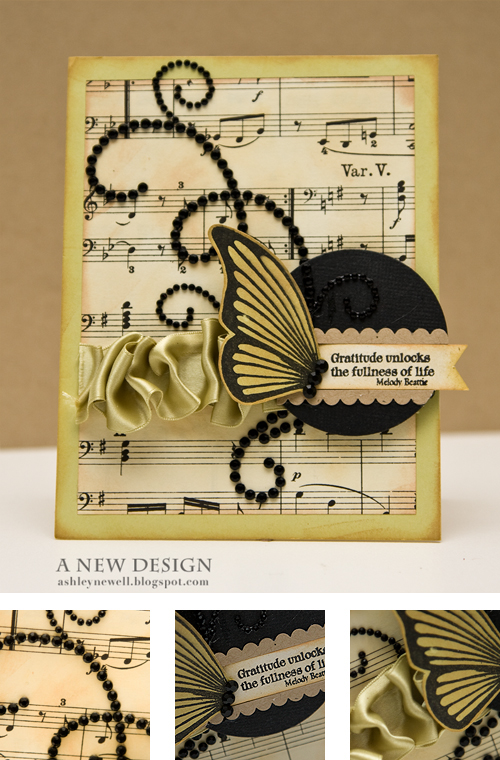
Hey there! This Friday starts off a new challenge over at Embellish Magazine. The challenge is to use butterflies and a color combination of kraft, black, and green! If you get a chance, go check it out and create something too! There are a few stamp sets up for grabs!
Instructions
Trim vintage music paper to about 4" x 5.25" and add distress ink.
Add ruffled ribbon.
Die cut circle.
Trim cream cardstock strip, add distress ink, and stamp sentiment, then adhere on circle die cut.
Using decorative scissors, trim kraft cardstock and adhere above and below sentiment strip.
Pop circle die cut off music sheet.
Add black rhinestone flourish, cutting some pieces to create dimension.
Stamp butterfly with black ink on green cardstock and add distress ink.
Cut out butterfly and pop off circle die cut near sentiment strip. Add three black rhinestones to butterfly body.
Adhere focal point to spring moss A2 card front.
Supplies
Stamps :: Skipping Stones Design - healing wings Ink :: SU! - black; Ranger - tea dye, antique linen Cardstock :: PTI - spring moss, kraft, rustic cream; American Crafts - black Patterned Paper :: Craft Supply - vintage Mozart music sheet paper Embellishments :: Midori - green satin ribbon; Zva - black flourish jewel; KaiserCraft - black rhinestones Tools :: Craft Supply - scalloped decorative scissors; Spellbinders - standard circles nestabilities (S4-114), wizard
So, last night I made my pulled pork sandwich with french fries. I usually make my own fries from potatoes, but I got home a lot later than usual and the frozen bag won! Cole slaw is on my pulled pork sandwich because it's good! I lived in North Carolina over a non-consecutive seven years. While there, I drank sweet tea and ate barbecue. North Carolina pulled pork sandwiches are often served with cole slaw, but many eat it on the sandwich. The first time I saw this, I screamed a big "EWAH!" McArthur had me to try it, along with a hot dog "Cook Out" style, which is with chili and cole slaw. Needless to say, I liked it! It's the only way I like barbecue sandwiches now. Look at it like a dressing on a sandwich, similar to mustard or mayonnaise (even though I secretly hate mayonnaise, which is why I can't use it in my slaw). I hope you give it a try, if you haven't already!
Instructions
Place pork loin in slow cooker and season. Cook on low for about 7 hours.
Pull pork apart using two forks, until stringy.
Add barbecue sauce and heat.
Cut up about 1/3 of an onion and place into a bowl with angel haired cole slaw mix.
Add celery seed and Marzetti's cole slaw dressing.
Cook french fries as desired.
Toast kaiser roll bun and prepare sandwich. Add a bit more barbecue sauce on top of pork and some slaw.
Supplies
Pork Loin (Chicken is a great substitute) Barbecue Sauce (a little over a bottle was needed) Marzetti's Cole Slaw dressing Angel Haired Cole Slaw mix Onion French Fries Kaiser Roll buns
Thanks for your visit, comments, support. Enjoy your weekend!
Happy Friday, Bleeps! It's already time for another Embellish challenge and now Renaissance by Design is sponsoring! I created this card using the color constraints and dimension, which is the element to include this time around. Make sure you head on over to the blog here to find out all of the details and see what the rest of my fabulous design team created. They're the best!
Have you all checked out Embellish Magazine's Premiere Issue yet? A lot of people have and I really appreciate the support and great feedback you all have given us about this major project! For those of you who haven't, it is still available to view here and the premier issue is only $3. Inside, there are a lot of great cards designed by well known designers and some newbies too! Also, you'll find articles and information about CHA! Make sure you check it out.
That leads me to the next topic...the next Embellish issue. The focus is on buttons! Who doesn't love buttons? The publication call is now open to everyone. The deadline is May 10, but I want to extend it another week...just because I can! We all need extra time, right? Trust me, being a designer I know that. So the new deadline will be May 17 at 11:59 pm EST to get those submissions in to be considered for the next issue. It is sponsored by DeNami Design and has a $250 prize up for grabs for the designer whose project is featured on the cover!
I'm done now! I just had to get that off my chest! So, what's everyone doing this weekend? I'll be creating, getting some gym time in, celebrating with my mom, and having a good time. I hope you enjoy your weekend.
Thanks so much for your visits and kind comments. I read each of them and am very grateful for you all!
Instructions
Trim patterned paper to about 4" x 5.25" and ink it up with a blending tool and dye ink.
Trim spring moss cardstock strip and ink, then adhere to patterned paper center.
Ink chipboard frame with blending tool and add ribbon to both sides. Embellish the ribbon knots with pearls.
Pop chipboard frame off patterned paper center.
Stamp teapot and cut out. Pop off card front center using four layered dimensionals.
Die cut tag and ink the edges.
Stamp the sentiment and tie onto frame with twine.
Stamp flower images on green cardstock strip, once in cream ink, then again in brown ink for a more subtle effect.
Add pearls to flower images.
Adhere patterned paper to a brown A2 card base.
Supplies
Stamps :: Renaissance by Design - Coffee and Tea Ink :: SU! - chocolate chip; Ranger - vintage photo, old paper; PTI - vintage cream, terracotta tile Cardstock :: PTI - dark chocolate, stamper's select white, rustic cream; spring moss Patterned Paper :: My Mind's Eye - Ooh La La - la da dee paper Embellishments :: KaiserCraft - pearls; Tattered Angels - chipboard frame; PTI - twine; Memrie Mare - cabbage rose ribbon Tools :: Spellbinders™ - tags trio (S3-148), wizard; Ranger - blending tool
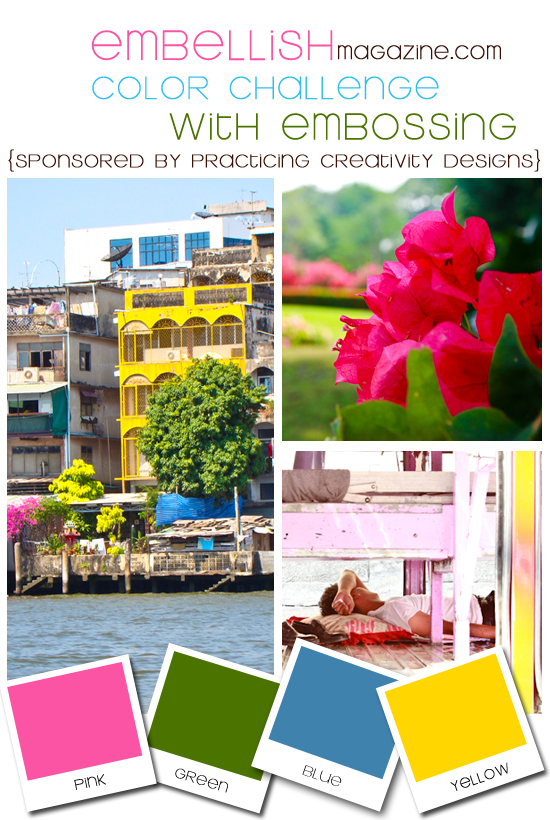
Hey Everyone! It's Friday and time for another Embellish challenge. This time, we're highlighting embossing, both dry and heat! Our sponsor is Practicing Creativity Designs, which is a new stamp company that also sells May Arts ribbon. You've got to check all of it out here.
I created a "Fast Friday" card and used heat embossing, with a tad of dry embossing from the chipboard frame. The colors are all there, just subtly added for the green and blue. I hope you get a chance to check out the entries and create a project too!
Thanks for visiting and enjoy your weekend!
Instructions
Create a 4.25" square card.
On pink cardstock, stamp circle background with watermark ink, add clear embossing powder, and heat set.
Add ribbon and flower to chipboard frame.
Trim cardstock to fit the chipboard frame and adhere.
Pop chipboard frame off card front.
On yellow cardstock strip, stamp sentiment, and pop off frame focal point.
Supplies
Stamps :: Practicing Creativity Designs - Look Up + For the Love of Dots Ink :: Versamark; PTI - raspberry fizz Cardstock :: PTI - raspberry fizz; SU! - crushed curry Embellishments :: CTMH - sheer ribbon; Prima - flower; Tattered Angels - chipboard frame; American Crafts - clear embossing powder Tools :: heat gun
Hey there! I just wanted to pop in and share the new Embellish Magazine Color Challenge. This time, you have to use stitching and the soft colors shown above. The challenge is sponsored by Your Next Stamp, who sells great rubber stamps. You have to stop on over and check it out.
In my card, I chose to hand stitch twine around the border of aqua mist cardstock. This idea is from by sweet blog friend, Amy Sheffer. Her designs are amazing and when I saw her stitching with twine, I had to try this out! I finally did and love the texture it adds to projects. I also made my 'cocktail' into a frozen one by adding some glitter!
These colors work great for the spring season and even Easter, so I hope you get the chance to stop by, check out the entries and DT projects and of course time to make your own.
I hope to post a shabby inspired card later...that is if I get to making one today!
Thanks so much for your visit! I hope you're enjoying your weekend.
Instructions
(1) Trim kraft cardstock into a 4.25" square card base. (2) Trim aqua mist cardstock into a 4" square and hand stitch border. (3) Stamp drink; once on aqua mist cardstock, another on white cardstock. (4) Color umbrella stamped on white cardstock, cut out, then pop off aqua mist cardstock image. (5) Color 'cherry' and add glitter. (6) Stamp sentiment. (7) Add ribbon treatment. (8) Adhere aqua mist cardstock to card front with foam adhesive.
Supplies
Stamps :: Your Next Stamp - cheers Ink :: SU! - black; Copic markers Cardstock :: PTI - aqua mist, kraft, white Embellishments :: PTI - sweet blush satin ribbon, twine Tools :: needle, paper piercer
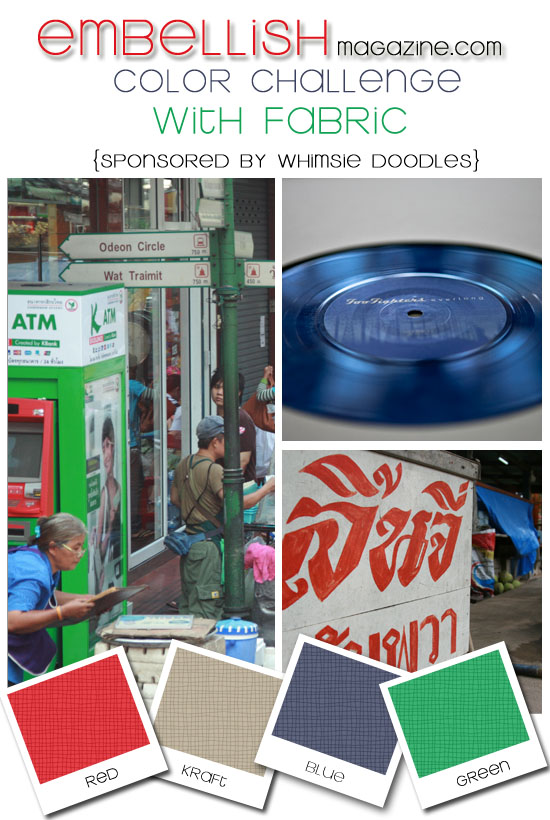
Hey Everyone! I'm so very happy to say Happy Friday to each of you! I thought this day would never come. I honestly believe this was the longest week I've had in quite some time. My sleeping schedule slightly improved. After work, I was able to stay awake long enough to make it through Costco and the grocery store. We have been completely out of foodies since we returned from our travels. It's been no big deal because I've been sleeping instead of eating in the evening. But, when I wake up I'm STARVING. So, I've been hitting up the local Dunkin Donuts with a quickness every morning! It's an extra 10-20 to my commute, but since I've been waking up at 4:00 am EST, I'm early to work anyway! :) Do you have a Dunkin Donuts in your area? In my opinion, their drinks are far better than Starbucks. Just saying...
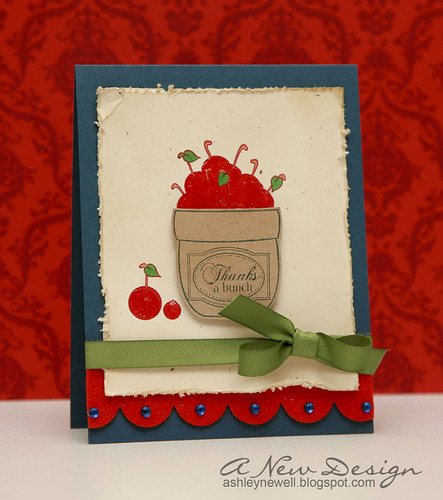
Anyway, it's time for another Embellish color challenge. This time, you have to use fabric. On my card, I used felt and tested out some of PTI's new scalloped edge dies! SO COOL! I've had my red felt for quite some time and picked it up at Michael's. It's very stiff, so it die cuts with ease and without those little hairy pieces. I found it in the kiddie craft aisle I believe! I'll post more details below. My stamped cherries end up looking like cherry jam! After I stamped them in red, I realized I wanted to color them in, which takes away the outlined part...duh...I should've used black (again, like yesterday's mishap)! So, then I tried to make it better and add some glossy accents and it just turned into jam!
Thanks so much for stopping by and make sure to make some time for the challenge this weekend! The colors are quite challenging, but fun in the end! Enjoy your weekend!!
Instructions
Make an A2 card from navy cardstock.
Trim rustic cream cardstock into a block and stamp cherries.
Stamp jar on kraft cardstock with navy ink and cut out.
Stamp label on jar front.
Color cherries and apply glossy accent.
Adhere jar to cardstock with foam adhesive.
Distress edges of cardstock and ink.
Die cut felt with scalloped edge die cut and adhere to card front.
Tie ribbon around cardstock and adhere it to the card front.
Add rhinestones to the scalloped edge felt border.
TGIF, Bleeps! It's almost time for the weekend and so that means there is an other Embellish Magazine challenge ready for you to start. This challenge incorporates the use of borders. That means, border punches specifically, but if you don't have border punches, then be creative! Use stamps, scissors, or die cuts from patterned paper kits. The sponsor is Verve Stamps and their stamps embellish so well with border punches. Here is how I created mine for the challenge.
Instructions
Make an A2 card base.
Trim yellow cardstock block and stamp flowers into a background pattern.
Die cut and emboss labels.
Stamp sentiment on yellow label, assemble, then pop off yellow card front center.
Trim yellow cardstock strip and border punch it, then adhere it to the bottom of other cardstock.
Add ribbon and adhere the entire focal point to card front center.
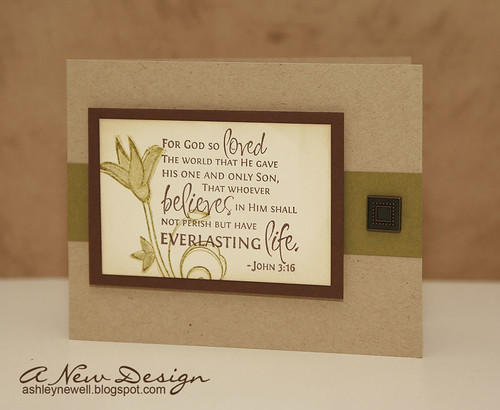
These stamps are so great, that I thought I'd make one to share today. This card exudes masculinity I think. Perfect for your pastor, right?! Aren't those card always hard to select? Well, here is one for you!
Instructions
Make an A2 card base.
Trim green cardstock strip and adhere to card front center.
Trim cream cardstock block, then mat on brown cardstock.
Hey there, Bleeps! Finally, a day out of the house! :) We're finally snow-free. Well, not really because the snow mountains are still there and late in the evening the wet pavement from the melting snow gets a bit icy. However, yesterday we saw lots of sunshine and it was beautiful! It even warmed up to about 40 degrees. I got a fun new hair cut with some new color and feel refreshed after being "held hostage" by the snow in the house for nearly a week.
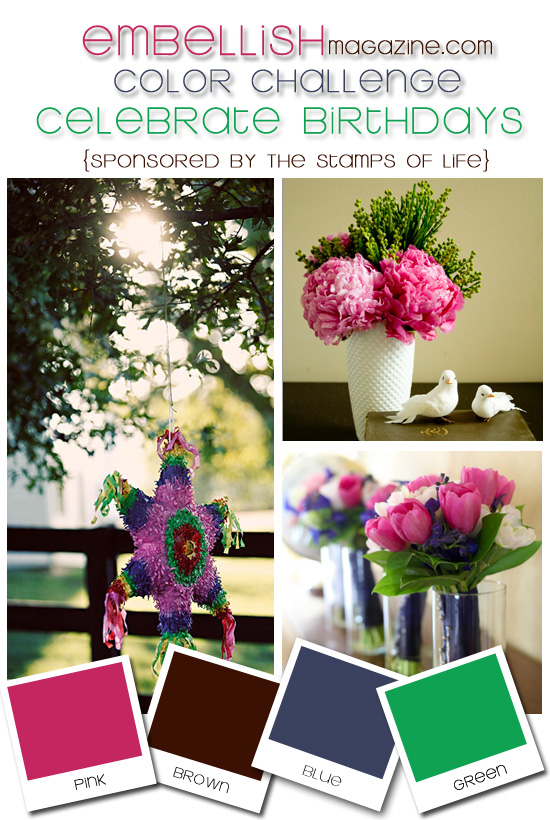
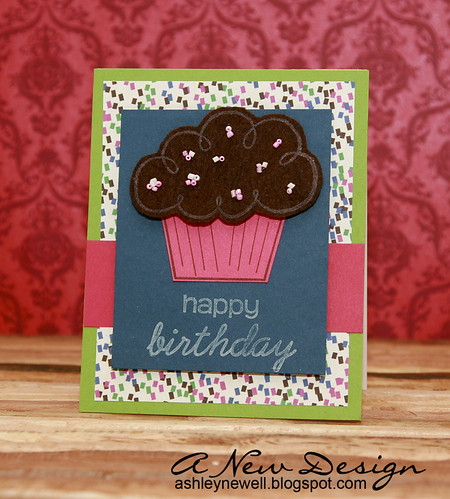
Today, I have great news for my fellow crafters. Embellish Magazine has a fun new challenge for you, sponsored by The {Stamps} of Life. This challenge is a bit different from the usual challenges where you get to create a paper craft project using a birthday theme! So, any embellishment is allowed - just make it birthday related. The colors are shown above and make sure you check out Stephanie's great stamp company too!
Enjoy your weekend and have a great Valentine's Day. I hope to be back to share a card with you, but if not here's some love for you! :)
Instructions
In Photoshop, create a brush from the 'sprinkles' image in the digital stamp set. Repeat the pattern in various colors to create digital patterned paper, print and cut to fit card front center.
Adhere digital patterned paper to card front.
Trim pink cardstock strip and adhere to card front center.
Stamp cupcake topper on brown felt with Staz-On white ink and cut out.
Add beads to cup cake topper.
Stamp cupcake bottom on pink cardstock, then adhere to navy cardstock block.
Adhere topper and stamp sentiment in white ink.
Adhere navy block to card front center with foam adhesive.


 I used patterned paper from the Chocolate and Vanilla collection (Big Stripes) + (Dot Reverse) as side borders. In between the paper, I included a jute twine border using this chocolate texture. The flower die cuts are old embellishments I picked up from my LSS and I think they're by Creative Imaginations or Creative Cafe, but not 100% sure, just a hunch from my memory about 2 years ago.


