header.gif (12,818 bytes)
Showing posts with label gift box. Show all posts

9.17.2010

Paper Crafts Magazine Presents: The 12 Designers of Christmas Blog Hop


Hey there! Happy Friday to you all and welcome. Today, I'm participating in Paper Crafts magazine's 12 Designer's of Christmas Blog Hop. I worked on the Holiday Cards & More, Vol. 5 issue mostly last year. I find it easier to create during the holiday season. Knowing that Paper Crafts will have special holiday issues and calls, I plan ahead and save projects specifically for thematic submissions. Holiday projects are really fun to create because it is the time of year when family and friends reunite and fellowship. Creating projects that portray loving thoughts is such a fulfilling past time. For this issue, I had fun selecting unique color combinations and holiday packaging. Cards are a major element of the holiday season; however, gift giving is a really close second. So, finding creative ways to package special gifts makes the entire experience just a tad more special for the recipient.

The Holiday Cards & More issue is amazing. You definitely will be inspired to create fabulous holiday cards, gift bags, tags, boxes, and more for all of your loved ones. From simple to intricate designs, there is something creative that shall inspire everyone in this issue. If you have not already picked up a copy of this issue, you can order it here.

Today, I'm sharing a special gift box made for this hop. I used Leslie Webster's template to create this gift box. It is a super easy pattern that any crafter can use to make one or multiple gift boxes. Fill boxes with special food treats, jewelry, or cute hair accessories. Make sure you check out the pattern here.
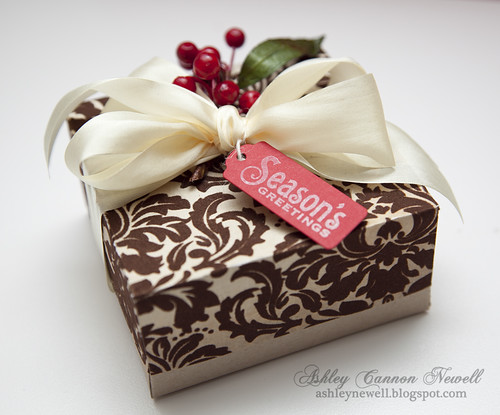
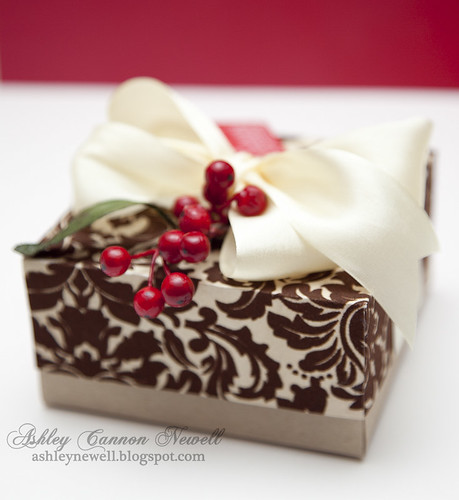


Don't forget to stop by the other designers in this hop. They also have special projects to share that will inspire you beyond belief. Additionally, you will have 14 chances to win a holiday collection package by leaving comments on all 12 designers' blogs, plus on the Paper Crafts Connections and Moxie Fab World blogs. All comments must be posted by Sunday, September 19 at 12:00 AM MDT. The grand prize winner will be announced on Tuesday, September 21 on the Paper Crafts Connection blog.

But, wait...there's more! One person who comments on my blog will win an issue of Holiday Cards & More! I'll share the winner (by random selection) on Tuesday, September 21.

Teri Anderson

Betsy Veldman

Latisha Yoast

Maren Benedict

Heidi Van Laar

Jessica Witty

Anabelle O’Malley

Kim Kesti

Sarah Martina Parker

Windy Robinson

Kimberly Crawford


Instructions
  1. Trim kraft cardstock to 8"x8", then score at 2" on all sides.
  2. Assemble box bottom and set aside.
  3. Trim patterned paper to 7"x7", then score at 1.5" on all sides.
  4. Assemble box top.
  5. Add ribbon treatment.
  6. Adhere berry spray.
  7. Stamp sentiment, then die cut tag and tie with twine.
Tips & Tricks
  • Flocked Patterned Paper is perfect for gift packaging. The texture on the paper will be appreciated by the recipient and it shows very well. Give it a try!
  • Floral Sprays are perfect ways to embellish projects, from cards to altered items. Check some artificial sprays at your local craft store and simply trim the stems.

Supplies

Stamps :: Waltzingmouse Stamps - very vintage christmas
Ink :: Papertrey Ink - vintage cream
Cardstock :: Papertrey Ink - pure poppy, kraft
Patterned Paper :: Kaisercraft - tis the season collection (reindeer specialty paper)
Embellishments :: May Arts - ivory silk ribbon, twine; Michaels - berry spray
Tools :: Spellbinders - S3-148 tags trio, wizard; Scor-Pal - scoring tool
Box Size :: 4"L x 4"W x 2"D

Thanks so very much for stopping by today and for your comments. Please know you are appreciated! Good luck and have a great weekend.

11.18.2009

SCS Product Review :: Crafter's Companion


Wedge Box
(decorated with leaves into a Christmas Tree)
the ribbon allows you to hang it from the tree


For SCS, we just reviewed the Crafter's Companion. To read more about our reviews, see our projects, and even tutorials, hop on over to SCS. I made an ensemble for this review. I rarely do this, but this product is perfect for those who love making projects from templates. I made a card with a tag and even some berry spray! Next, I made a gift box. It was super easy to do and really effective when you need a small box. The box measures 4.5" x 7" and is 2" deep. It is a pretty decent size box, especially for a bunch of cards! Next, I made a wedge box. It is secured with ribbon. I then decorated it with maple leaves into a Christmas tree design. I'm not going to go into the instructions for all of these projects, but I will provide supplies I used for all of them!

Thanks so much for stopping by and enjoy your HUMP DAY, Bleeps!

Supplies

Stamps :: Papertrey Ink - signature christmas; o christmas tree
Ink :: Papertrey Ink - pure poppy
Paper :: Papertrey Ink - ripe avocado, kraft, pure poppy; October Afternoon - falling snow; Cut Card Stock - cream shimmer
Embellishments :: berry spray; Paper Source - wide gold ribbon; eyelet; twine; Making Memories - vintage lace trim; Papertrey Ink - pure poppy ribbon; stickles; Palette - glitter
Tools :: Spellbinders - maple leaves nestabilities; Crafter's Companion

12.26.2008

Card Gift Box Set


It's the day after Christmas and time for some shopping. The LSS in Greensboro is having a sale and I'm also going to check out a new store and crop with a new scrapbooking friend!

Today, I'm sharing my gift to most this year. It included a gift box (from Archiver's) and 5 cards with various sentiments and vanilla envelopes (all from Archiver's). I used Papertrey Ink's Ripe Avocado cardstock and embossed it with Swiss Dots Cuttlebug embossing folder, then corner-rounded the edges. Papertrey Ink's Piece of Cake stamp set has a curly label stamp that I used and cut out to include the sentiments. The sentiments were from various stamp sets by Papertrey Ink, Close to My Heart, and Verve Visual. I wrapped brown ribbon around the green cardstock and popped the curly label off of the center. These sets were a big hit this Christmas!

Oh yeah, that nice green ribbon on the outer box is by Paper Source, but Archiver's now carries it too!


:: My Goodies {Greeting Cards}::
Stamps: Papertrey Ink-Piece of Cake (curly label); Sentiments by Papertrey Ink, Verve Visual, Cloe to My Heart
Ink: SU!-Chocolate Chip
Cardstock:
Papertrey Ink-ripe avocado, dark chocolate, vanilla
Accessories: swiss dots embossing folder; cuttlebug; dimensionals; corner rounder; SU!-chocolate chip ribbon; Paper Source-green satin ribbon; Creative Memories-tag punch; A7 pre-scored cards + card box by Archiver's
Card Size: 4.25 x 5.5

12.25.2008

Merry Christmas


Merry Christmas everyone! Here are a few 2-5-7-10 boxes I made to package some small gifts. Some were already opened and people loved them! They were fairly easy to make with 1-8.5 x 11 sheet of cardstock and my scor-pal. Use your favorite background design stamp and adhere.

Here's how to make them:
  1. Follow Jenn Balcer's tutorial on Splitcoast.
  2. The only step I altered was stamping after the cuts were made.
I hope you enjoy your Christmas and please be safe! Tomorrow, I'll share some card sets given as gifts that were a true 'hit' this holiday! Don't forget to enter the blog candy by tonight before midnight EST!

My Goodies
Stamps: Papertrey Ink-Silent Night; Stars Background Basics; Winter Wishes
Cardstocks: Papertrey Ink-Dark Chocolate; Spring Moss; Ocean Tide; Ripe Avocado; Pure Poppy; White; Berry Sorbet

Ribbon: Red; Martha Stewart
Punch: Giga snowflake; scallop edge
Stickles: liquid pearls white; cinnamon; red; platinum; gold

3.04.2008

A Gift Full of Surprises!

Recently, I've been working hard on a baby scrapbook album for my co-worker and his wife! Sunday, I went to the baby shower and finally got 'rid' of this project...and boy and I'm glad! They truly loved the gift. I love creating paper art, especially for preserving memories and what better gift for a new baby!


"Sweet Pea" was one of my favorite layouts. I used DCWV chipboard letters for the title. For the striped paper, I used DCWV Nursery collection for baby girls. I circle punched in basic white and inked the edges to give it a finished look. I added a few pink brads to side green DCWV paper for a decorative touch. Now, all it needs is a picture!


I can't believe I actually cut out the pea pod! I free handed the pea pod. As a point of reference, I always use Google images as a guide to sketch my artwork. I cut out my sketch, then added dotted lines along the edges with my black marker for a dimensional look. And of course I included in the lettering inside to create the 'pea in the pod!'


"Daddy's Little Girl" turned out fabulous! I did not think this would be one of my favorites, but it is. The background paper is a "Dad" theme with all of the possible names a child would call him. I like the combination of the fuchsia with the army green! I stitched around the edges to add a little extra spice using my Janome Sew Mini. I added three green eyelets by using my Crop-a-Dile.


I used my Cricut Expressions die cutting machine to cut the title "Daddy's Little Girl." I used the Alphalicious cartridge. I also used the Stretch Your Imagination Cricut cartridge for the flowers. The flower buds are accented with pink and green buttons. The wave design I sketched, then cut using my Tim Holtz scissors.


I also decorated a plain white gift bag to match my card "Baby Girl." On the card and the bag, I stamped a dressy "onesie" and the wording "baby girl" in pink ink. I added a pink and green ribbon to the bag to dress it up a bit. I also matched the gift box that included onesies.


Originally, this was a plain white box and included "onesies" for the little one. I would have loved to stamp each onesie with a cute 'girly' image, but did not have the permanent ink in my supply closet. So, I just rolled each onesie separately and bundled them with ribbon that matched the gift box. I used my circle scallop punches and stamped "baby girl" for the top. The lid can easily be removed and keeps its decorative touch!


I'm still busy researching the best options for my website, so hopefully I can make a final decision this week! Until then, this blogging concept is catching on pretty well! Happy Tuesday!
Blog Design: Girly by Design