|
|
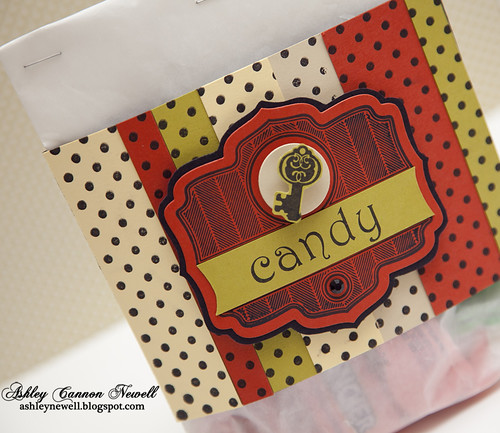   Hey Bleeps*! Happy Hump Day to you all! Today, I have a Halloween candy bag to share with you. I used a glassine bag and created a decorative sleeve. An easy project for a simple Halloween gathering or even use smaller glassine bags to give to your local trick or treaters! It's a super quick project and you can dress up a glassine bag for any occasion, but I have candy on my mind now...big time! Note:- Check this post here. You may have won an issue of Holiday Cards & More, Vol. 5!
- Check this post here. You may have been outbid, but there's still time to bid on my card to fight the breast cancer battle. Read more there. Thanks so much!
SuppliesStamps :: Waltzingmouse Stamps - victorian alphabet, little box labels; Hero Arts - cling dots Ink :: Stampin' Up! - black Cardstock :: Papertrey Ink - linen, terracotta tile, simply chartreuse, harvest gold; American Crafts - black Embellishments :: Kaisercraft - black rhinestone; It's in the bag - glassine bagTools :: Spellbinders - S4-229 labels five, S4-114 standard circles LG, wizard Thanks for taking a peek today and watching my video! Have a SWEET Wednesday! *Bleeps = Blog Peeps
Hey ya'll! I hope you enjoyed your weekend! Thank you all for stopping by on Friday for the Paper Crafts blog hop celebrating the Holiday Cards & More issue. Also, thanks for the bids that I have received for my "Blog 4 Boobies" card. If you are interested in finding out more and want to bid, please click here. Today, I am sharing a few Hero Arts cards for the new Caardvarks challenge. This time, the challenge is all about keeping designs clean and simple. Most of my designs are pretty simple, but I did sneak one in there with a slightly more pizazz! Head on over to the Caardvarks blog to check out some amazing designs and maybe get inspired to create your holiday card this year. Clean and simple designs are perfect to create bulk holiday cards.  Instructions Instructions- Trim red cardstock to an A2 card base and emboss card front.
- Stamp trees on cream cardstock, cut out, and adhere to cream block.
- Stamp sentiment.
- Mat on green cardstock, then add gemstones.
SuppliesStamps :: Hero Arts - get merry Ink :: Tsukineko - versafine spanish moss, memento tuxedo black Cardstock :: Papertrey Ink - pure poppy, vintage cream, ripe avocado Embellishments :: Hero Arts - gemstones Tools :: Provo Craft - Cuttlebug, swiss dots embossing folder 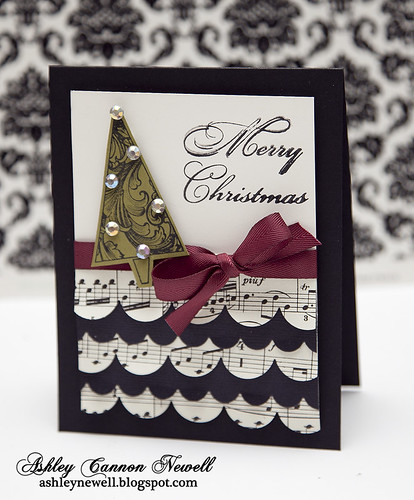 Instructions Instructions- Trim music sheet and black cardstock into strips, die cut scalloped borders, then adhere together.
- Add cream cardstock block to scalloped borders.
- Add twill tape and tie into a bow.
- Stamp sentiment.
- Stamp tree on green cardstock, cut out, then pop off.
- Pop off focal point off A2 black card base.
SuppliesStamps :: Hero Arts - merry christmas trees Ink :: Stampin' Up! - black Cardstock :: Papertrey Ink - true black, vintage cream; Craft Supply - vintage music sheet Embellishments :: Hero Arts - gemstones; Papertrey Ink - scarlet jewel twill tape Tools :: Papertrey Ink - medium, small scalloped edge dies; Provo Craft - cuttlebug 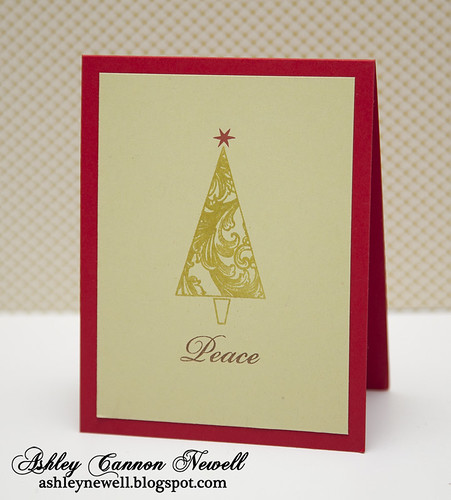 Instructions Instructions- Trim green cardstock to 4" x 5.25".
- Stamp tree, then heat emboss with clear embossing powder.
- Add gemstone.
- Stamp sentiment.
SuppliesStamps :: Hero Arts - merry christmas trees Ink :: Tsukinkeo - versamark watermark ink, versafine vintage sepia; Close to My Heart - cranberry Cardstock :: Papertrey Ink - pure poppy, spring moss Embellishments :: American Crafts - clear embossing powder  Instructions Instructions- Trim kraft cardstock block, then stamp "JOY" in red and add remaining sentiments around it in white.
- Stamp snowflakes and stars on blue cardstock and adhere to kraft cardstock.
- Add twine and ink the edges with white chalk ink.
- Pop off A2 card front, then add gemstones.
SuppliesStamps :: Hero Arts - get merry, merry christmas trees Ink :: Papertrey Ink - aqua mist; Stampin' Up! - white; Clear Snaps - colorbox white; Close to My Heart - cranberry Cardstock :: Papertrey Ink - kraft, white, aqua mist Embellishments :: Hero Arts - gemstones; Craft Supply - twine Thanks so much for visiting today! I hope you have a marvelous Monday!
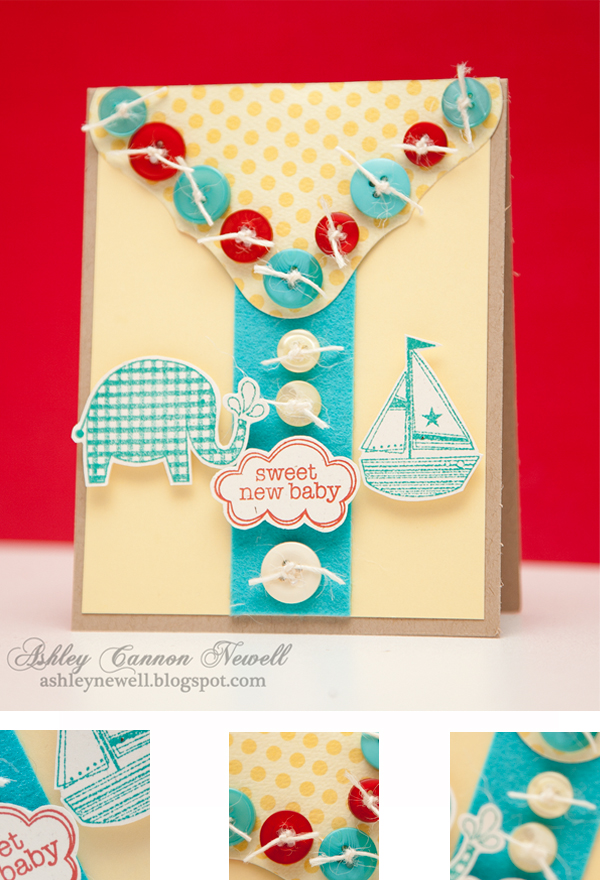
Hey there! It's Hump Day and that was a little faster than usual since Monday was a "free day!" This was a pretty quick card, partially because I had it sketched out, but it is super colorful and fun. I hope you enjoy the video!  You may also view the video here. :: Hero Arts - precious baby boy Ink :: Stampin' Up! - bermuda bay; Close to My Heart - cranberry Cardstock :: Papertrey Ink - lemon tart, rustic white, kraft Patterned Paper :: My Mind's Eye - quite contrary collection Embellishments :: Papertrey Ink - hawaiian shores felt, buttons, pure poppy + lemon tart buttons; May Arts - twine Tools :: Spellbinders - S4-161 Labels Ones, wizard; Fiskars - rotary trimmer Thanks for your visit! Have a wonderful Wednesday!
 UPDATE: This card has been temporarily removed for publication. You may find this card in CARDS magazine February 2011. UPDATE: This card has been temporarily removed for publication. You may find this card in CARDS magazine February 2011.Happy Friday to you, Bleeps! I hope you all have a fabulous weekend! Thank you so much for joining me on Moxie Fab World's blog yesterday. It was super fun! Today, I have a card to share with you, along with a video tutorial. Instructions- Trim patterned paper to about 4" x 5.25", ink the edges, add ribbon to corners, and adhere to rustic cream A2 card front.
- Stamp lacey frame on rustic cream cardstock, cut out, and ink.
- Ink the chipboard embellishment, stamp sentiment, and pop off lacey frame.
- Ink card front edges.
Video Tutorial- Here is a video tutorial on how I made the crinkly stained ribbon used in this card.
SuppliesStamps :: Hero Arts - lace frame, everyday sayings Ink :: Tsukineko - VersaFine vintage sepia; Ranger - antique linen, tea dye Cardstock :: Papertrey Ink - rustic cream Patterned Paper :: Melissa Frances - Clara Embellishments :: May Arts - ivory silk ribbon; Tattered Angels - glimmer mist, chipboard You all have a great weekend. I'm so happy you stopped by today!

Hey there! Today, I'm sharing a card inspired by Melissa Phillips photo challenge. I really liked the pink and green color combination along with the clean white elements. I'm off to some appointments, so not too chatty this morning!
I hope you all enjoy and as always, thanks so very much for stopping by. Have a great Tuesday.
Instructions
(1) Trim spring moss cardstock to create a 5" card base. (2) Trim white cardstock block and stamp text background pattern in pink cardstock. (3) Punch the bottom edge of white cardstock strip and add to white stamped patterned block. (4) Add ribbon treatment. (5) Die cut tag, stamp sentiment, and tie around ribbon. (6) Stamp flowers and leaves and cut out. (7) Color, add rhinestones, and glitter, then pop off card front.
Supplies
Stamps :: Hero Arts - old letter writing; PTI - in bloom + mixed messages Ink :: PTI - hibiscus burst; Clear and Simple Stamps - green with envy; Copic marker - RV21 Paper :: PTI - spring moss + white Embellishments :: Our Craft Lounge - chunky crystal; KaiserCraft - rhinestones; PTI - hibiscus burst ribbon + twine Tools :: Spellbinders - tag die; EK Success - border punch; Provo Craft - cuttlebug
 TGIF Bleeps! I'm so happy it's Friday! YaaaaaaY! Today, I'm sharing a card inspired by a Paper Crafts magazine call for their September/October issue. They have a color inspiration column that features cards using the same color combination. I participated in the July/August issue, so you'll have to check that out this summer. However, this time - the column was open for all designers to submit. The problem - the color combination! It was definitely a challenge. The colors were a cobalt blue, purple, grey, and yellow gold. Whew! How do you design something with those colors, right?! Well, I did and here's what I created. Let's just say it wasn't picked up, but I like it, so I'm sharing it here!
I just wanted to be frank with everyone that I do not get all of my cards submitted accepted by editors for publication. I get those rejections too that you just don't understand. "I thought it was very pretty or cute." Do you find yourself saying these things? If so, take another look at your card and see what you think after the fact. If you have thick skin, ask a fellow card maker what they think or how it could be improved. Perhaps you may get some ideas or insight on how others view your designs - for publication purposes. However, sometimes - I just think the card doesn't 'fit' the publication. So, your card may be pretty or cute, but does not fit that particular publisher's issue!
Well, I hope you enjoy your weekend! Take care and I'll be back tomorrow with a fun Caardvarks post!
Instructions
(1) Make an A2 card base from cardstock. (2) Trim blue cardstock block and stamp background with watermark ink. (3) Add clear embossing powder and heat. (4) Adhere blue cardstock to card front. (5) Trim purple strip and adhere to the right side. (6) Trim purple strip, stamp sentiment and adhere. (7) Stamp elephant, color, and embellish with rhinestones. (8) Cut out elephant and pop off card front. (9) Add liquid pearls to background pattern.
Supplies
Stamps :: Hero Arts - dots and flowers (background) + exotic decor (elephant); Papertrey Ink - fillable frames #1 (sentiment) Ink :: Versamark; Papertrey Ink - enchanted evening + smokey shadow; Copic markers (T3, V09, V17, Y19) Paper :: Die Cuts With a View - blue; Stampin’ Up! - crushed curry; CutCardstock.com - purple; Papertrey Ink - white Embellishments :: KaiserCraft - rhinestones; Ranger - gold liquid pearls; American Crafts - embossing powder

It's already Hump Day! Oh how I love four-day work weeks. They seem to speed up just a tad bit. Before we know it, the weekend will be here again! Wonderful Weekends!
Today's card uses a combination of supplies and elements from rub-ons to stamps, then punches to jewels. It's all here in this clean and simple card.
Thanks so much for stopping by and commenting! I appreciate your support. Enjoy your day.
Instructions - Make card base.
- Trim pink cardstock block and adhere to card front.
- Trim green cardstock, punch scallop edge, then adhere.
- Trim yellow cardstock square, then mat on kraft cardstock.
- Adhere rub-ons.
- Add rhinestones.
- Adhere to card front.
- Add ribbon.
- Stamp sentiment.
Supplies
Stamps :: Hero Arts - everyday sayings Ink :: Versacolor - pink Paper :: PTI - white, new leaf, kraft; Bazzill - pink embossed dots Embellishments - Creative Cafe - rub-ons; Kaiser - rhinestones; PTI - ribbon Tools :: SU! - scallop punch
 Hey there, Bleeps! Happy Monday to you! I can say that because it's a holiday today! Have you all seen the new Hero Arts 2010 catalog? I remember when it was released last year and I made a list of goodies I wanted! The doily stamps were a definite for me. So, when I visited Raleigh, I found a few at Archiver's and one was this doily stamp. I stamped it off of the page for a different effect and heat embossed it.
I hope you have a great day! Thanks so much for stopping by.
Instructions - Make an A2 card base.
- Trim berry sorbet cardstock to fit card front.
- Stamp doily and heat emboss with clear embossing powder, then heat set.
- Stamp sentiment.
- Add ribbon and pearl.
- Corner round edges and adhere to card front center with foam adhesive.
Supplies
Stamps :: Hero Arts - starbust lace + everyday sayings Ink :: Versamark; Clear Snap - chestnut Paper :: PTI - dark chocolate, berry sorbet Embellishments :: PTI - ribbon; Kaiser - pearl Tools :: American Crafts - clear embossing powder; We R Memory Keepers - corner chomper
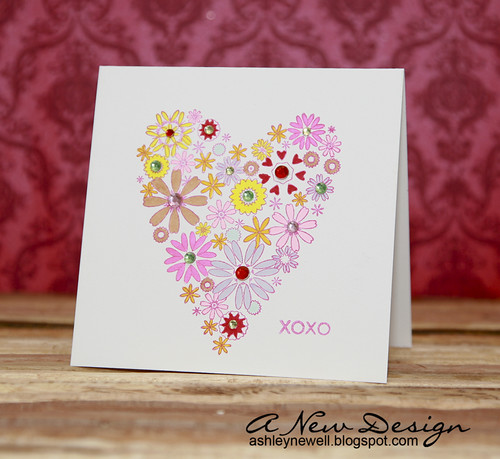 Hey there, Bleeps! I'm back with a quick card to share with you. This card was finished in about 15 minutes. The longest part was the coloring the flowers. The stamps on this card are all by Hero Arts. I colored the flowers with Copics and embellished with rhinestones. Valentine's Day is right around the corner. Do you have any plans? Let's hear them!
DC Weather Update: We're still snowed in. The federal government is still closed and we're expecting another 10"-20" tomorrow evening and through the night on top of our 30" blizzard from the weekend. I'm not even sure where we'll put the snow that's expected because there is already no more space! The mountains of snow are so high that it makes it very difficult to drive and see past them, which is causing accidents in the area. I'll be stamping tomorrow hopefully and spend my day working from home!
Thanks for visiting! Enjoy your weather, that is if you're not in the DC area!
Instructions - Create a 4.25" square card.
- Stamp heart and sentiment.
- Color stamped image.
- Embellish with rhinestones.
Supplies
Stamps :: Hero Arts - blooming heart + everyday sayings Ink :: Tsukineko - VersaColor Opera Pink; Copic markers Paper :: PTI - white Embellishments :: KasierCraft - rhinestones
|
|


