After December 4, 2010, all future posts are on a new site. Please subscribe to my NEW feed at www.ashleynewell.com or click below to subscribe to the NEW feed.
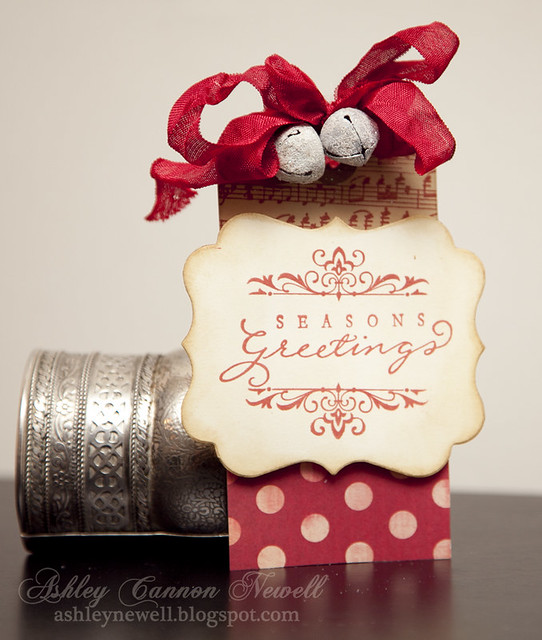
Hey there! It's time for another video. This week's project features a quick and easy holiday gift tag you can attach to presents or gift bags. You can make these ahead of time and have them ready. Simply wrap them around a gift for instant presentation or place your gift in a bag and attach the tag. So, that's enough chit chatting, off to the videooooooooo!
Hey Everyone! Happy Wednesday! It's time to watch me...for fun watch the first video! McArthur thought it was so funny and said this video fit me well. So, check it out before it expires January 15, 2011.
Alright, now that you all are officially in the holiday spirit with my dances, check out how I made this gift card holder!
Hey Everyone! First, I'd like to thank you for all the wonderful comments I've received over the past few days. I have really enjoyed reading them and appreciate all of your kind words. For my new blog readers, Welcome!
Today, I have a special post for my husband of 5 years, McArthur. Friday was our wedding anniversary, but today is our 13th anniversary together. So, I thought it would be sweet to celebrate here on the blog for the "other" anniversary. So, check out the card and if you're interested, feel free to check out the tribute and videos as well.
Since the 5th wedding anniversary gift centers around wood, I thought it would be cool to design a wood grain card as a focal point. I stamped the pattern on the back of Jillibean Soup patterned paper (white macaroni) since it has a great kraft color - and used black ink. I die cut the car, stamped and paper pieced it together. The polka dot patterned paper is by My Mind's Eye (haunted collection, harlequin paper). I added some distress ink. I stamped polka dots on cream cardstock, then stamped the sentiment. Added a little zig zag stitching, then adhered it to the A2 card base and I was done. I popped the car right off the center to finish it off. Simple and masculine.
The choice in colors - decided based off our wedding colors of cranberry and gold. Instead of designing the exact colors in a formal style of card, I made them a little more flat using a burgundy and kraft and coupled it with black (like his tux) and cream (like my dress - it was not white even though it looks like it in photos)!
I decided to use this car stamp set as my focal point along with the wood grain pattern to celebrate me and McArthur's journey together. We have spent the past 13 years together - through undergraduate, graduate, and law school. We've experienced some great times and even a little down times, but we have held each other up along the way making sure both of us has a smile and laughs. I've enjoyed the ride so much with him over these past few years and I can't wait to continue that journey for many more years.
Seriously, I think I have the best husband in the world. He loves CHA! I mean enough said, right?! But really, he loves me unconditionally and with that there's not much more I can ask for in life. So, here is a short video I compiled using our wedding photos and video highlight from our wedding to take us back down memory lane to 2005!
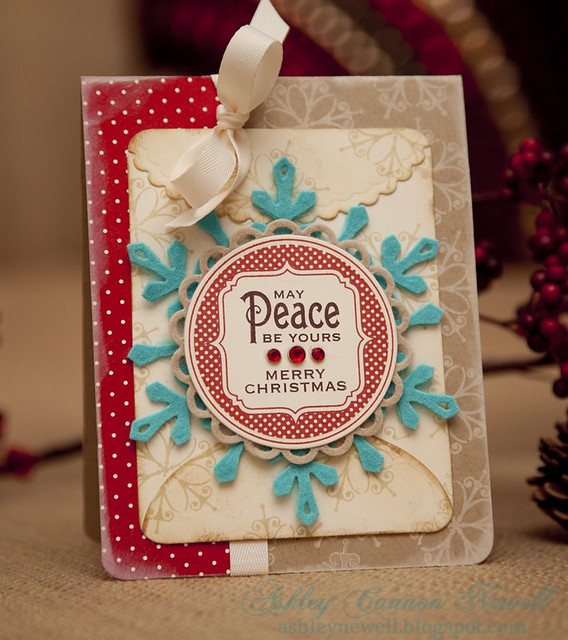
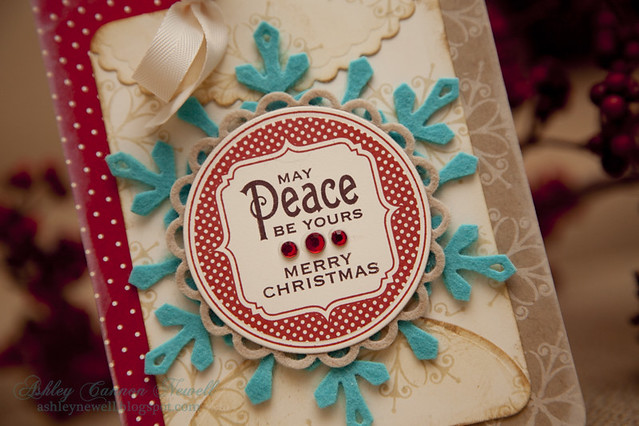
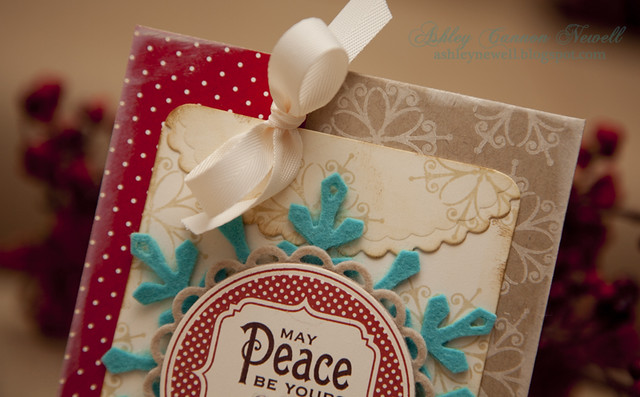
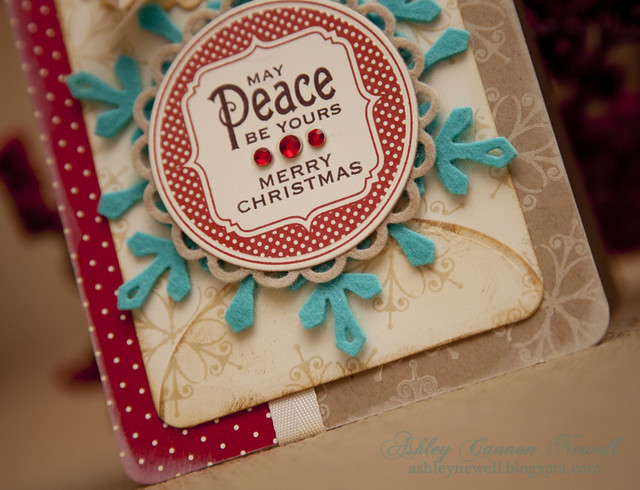
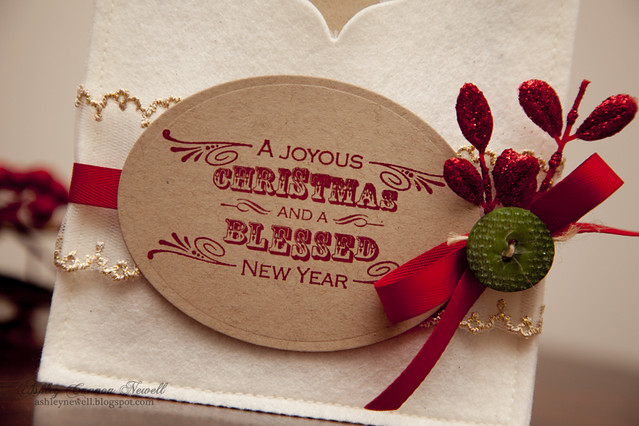
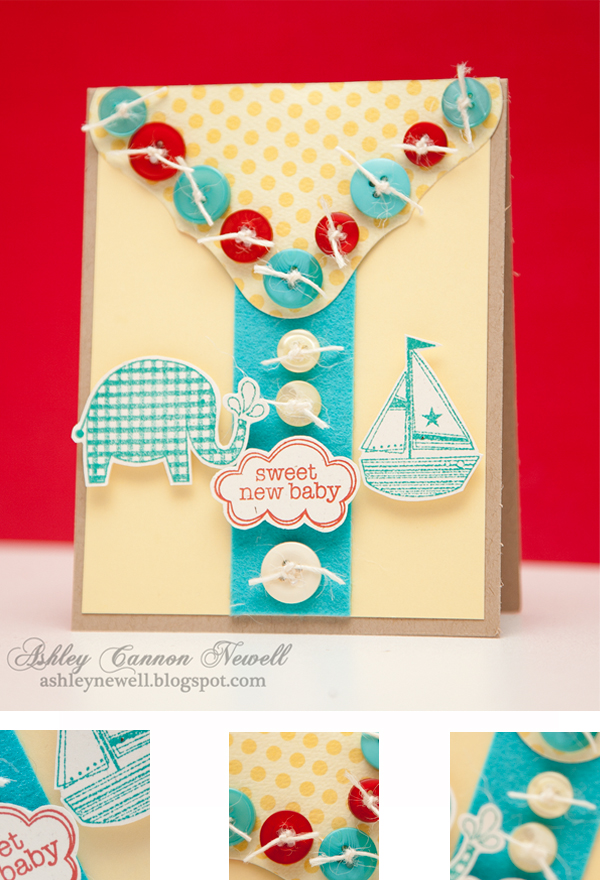
Hey Everyone! I hope your week is going well so far! It should be because it is already Wednesday and here that means time for a new video! So, I created this holiday card to share with you. It's full of read and cream and a pop of turquoise for some fun!
Check out that felt and cardstock embellishment I created with Spellbinders' die templates. You can create an endless amount of elements using dies, including basic shapes, tags, borders, shaped cards, embellishments, and even mini albums. The world is yours with die templates and that's why I enjoy using them so much.
I created a custom focal point using dies to make a decorative envelope-type element.
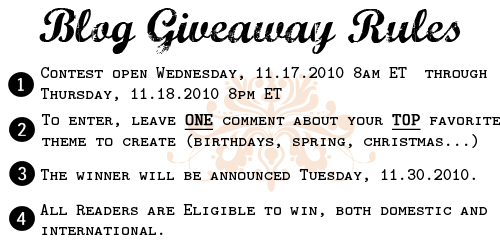
As I mentioned yesterday, I just reached the 300,000 hit mark on my blog and I'm continuing to celebrate my gratitude for my blog readers and browsers, so I have arranged another giveaway for the week. The blog giveaway prize contents are shared in the video. Please make sure you review the rules below. You must comment on this blog post to enter to win (not YouTube, Facebook or Twitter).
*Please note: I will ship prize to contest winners around the first week of December, if not sooner. This allows me to make one trip to the Post Office, instead of multiple trips.
I hope you enjoy the video. Click here to watch it on YouTube.
Supplies
Stamps :: Waltzingmouse Stamps - seasons of love, vintage circles (small) Ink :: Close to My Heart - bamboo, cranberry; Stampin' Up! - chocolate chip; Ranger - antique linen, vintage photo; Papertrey Ink - vintage cream Cardstock :: Papertrey Ink - vintage cream, kraft Patterned Paper :: Papertrey Ink - bitty dots Embellishments :: Kaisercraft - rhinestones; Papertrey Ink - vintage cream twill tape, hawaiian shores felt, linen felt Tools :: Spellbinders - S4-293 lacey circles, S4-286 2010 snowflake pendant, S4-141 petite scalloped ovals SM, S4-139 petite ovals LG, S4-114 standard circles LG, GC-001 grand calibur; We R Memory Keepers - corner chomper
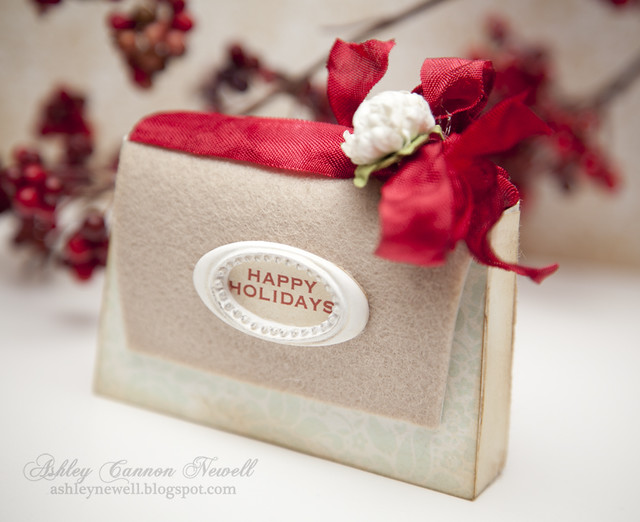
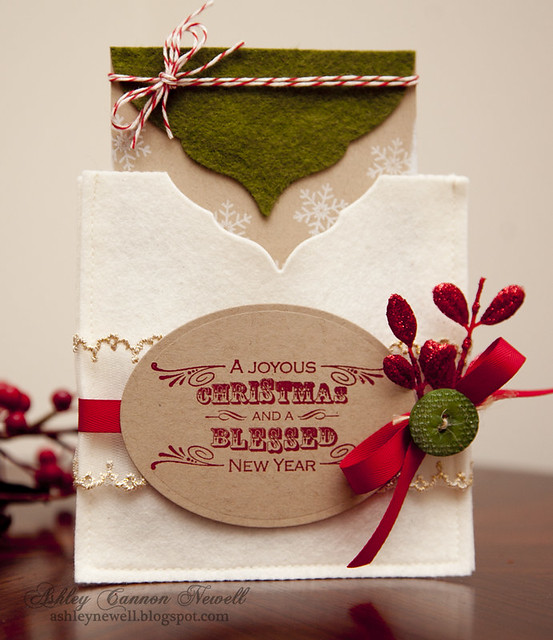
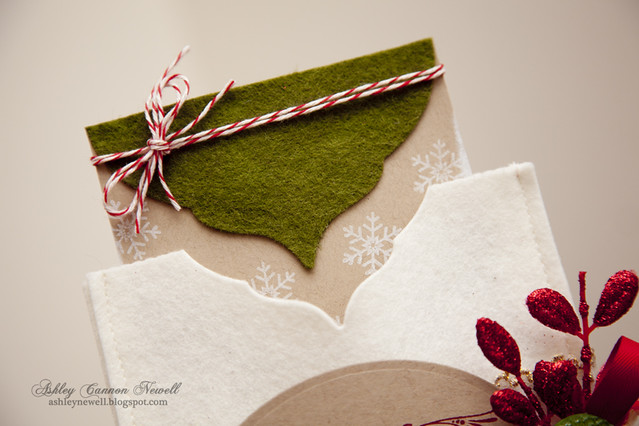
Hey There! I hope you're having a great week! I'm so happy today is Hump Day because it's the end of my work week! YAAAY! But, I'm even more excited to start sharing holiday projects for the WMW video series. Instead of creating a card, I was inspired by a felt pocket I've been holding on to for about two years! I couldn't quite use it, so I thought to create my own version.
I stitched together two 5" x 5" felt squares around the border using my sewing machine. I embellished the front with a few of my favorite current elements.
Using Spellbinders' ornament die template, I created a unique decorative edge.
Here is the simple gift card holder insert. Customize the card with a handwritten sentiment.
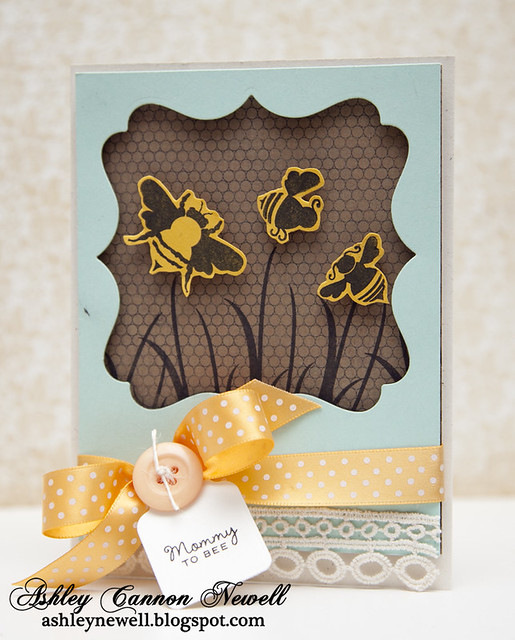
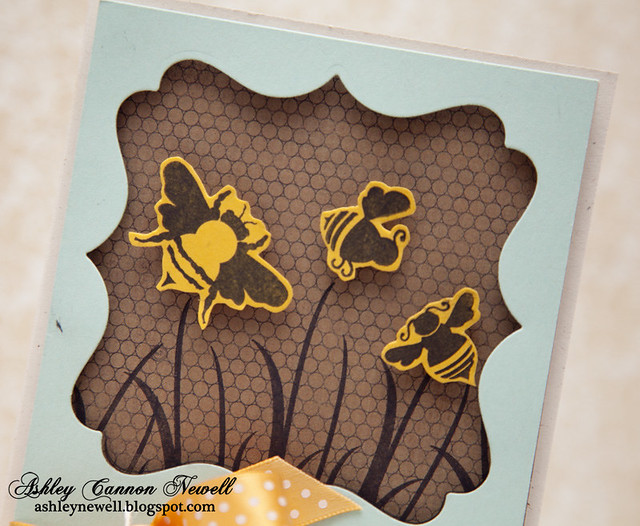
Hey Bleeps! Happy Wednesday to you. I created another "new mommy" card. It's a different kind of card for me since I created a 'scene.' I hope you enjoy the video. Not too chatty today. I guess I said it all in the video, so just watch that and stop reading!
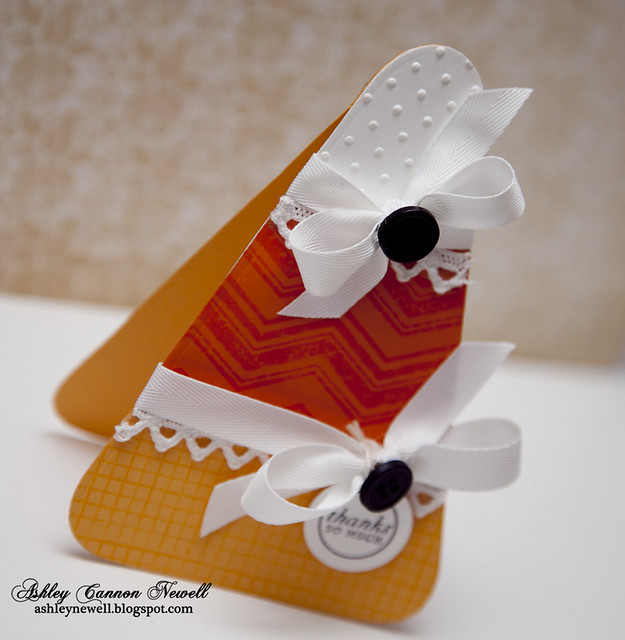
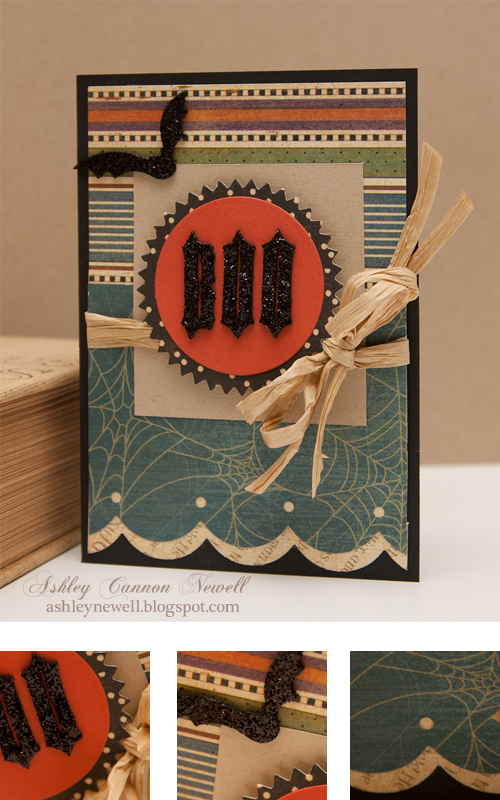
Hey there! It's time for another Watch Me Wednesday video. Since Halloween will be wrapped up by next week's video date, I thought it would only be fitting to celebrate with a candy corn shaped card. I made another candy corn card here, which was featured on Paper Crafts' Moxie Fab World blog post here. I was thrilled that it was showcased there with so many other fabulous Halloween projects. Mine was so simple than my usual cards lately that I thought, I must re-do that card to 'dress it up.' So, I'm sharing how I created this shaped card and how you can embellish it more (or not like I did previously).
I stamped background patterns on the cardstock to give it some depth. I also added ribbon and tag treatment. The tag border was created using the Spellbinders Standard Circles LG die template as a stencil. I kept the cardstock in the die template after cutting and traced the circle. You can see this in the video though!
To create more texture, I added some crochet trim and embossed the top portion of the 'candy corn' with Provo Crafts' swiss dots embossing folder.
I created a template for the entire card. For all of my shaped cards, I have two shapes, one for the card front and the other for the card back. I score the top portion of the cardstock used for the card back, then adhere it to the back of the top of the card front's cardstock. That sounds really confusing, so check out the video if it really was!
Stamps :: Waltzingmouse Stamps - off beat backgrounds; Papertrey Ink- mixed messages Ink :: Papertrey Ink - summer sunrise; Tsukineko - memento tuxedo black; Ranger - spiced marmalade Cardstock :: Paper Source - white; Papertrey Ink - summer sunrise, orange zest Embellishments :: Papertrey Ink - snow white twill tape, true black buttons; Maya Road - crochet zig zag trim; May Arts - twine; Making Memories - eyelet Tools :: Spellbinders - S4-114 standard circles lg, GC-001 grand calibur, S4-278 nested candy corn; We R Memory Keepers - crop-a-dile
Do you all have fall allergies? What's up with that? Well McArthur and I do. Last week, he had them and this week it's my turn! I have a big-head feeling, very itchy and burning eyes, and that dry cough. So, I'm going to take it easy because it's wearing me out! Anyway, thanks very much for watching! Have a great Hump Day!
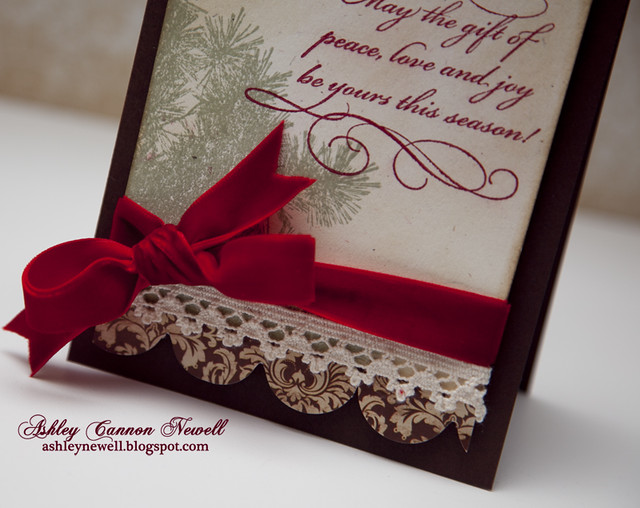
Hey Bleeps! It's Wednesday and time for another video and a Caardvarks challenge. This challenge is sponsored by Penny Black and I received some great holiday stamps. I designed a card for the challenge and hope you like it. Take a peek at my video to see how I made it!
Stamps :: Penny Black - the gift of peace, pine silhouettes Ink :: Close to My Heart - garden green; Clear Snaps - ColorBox chianti; Ranger - antique linen, vintage photo Cardstock :: Papertrey Ink - dark chocolate, rustic cream Embellishments :: Kaisercraft - die cut (tis the season collection); Michaels - velvet ribbon; Hero Arts - crocheted trim
Thanks so much for watching and stopping by! Enjoy your Wednesday!
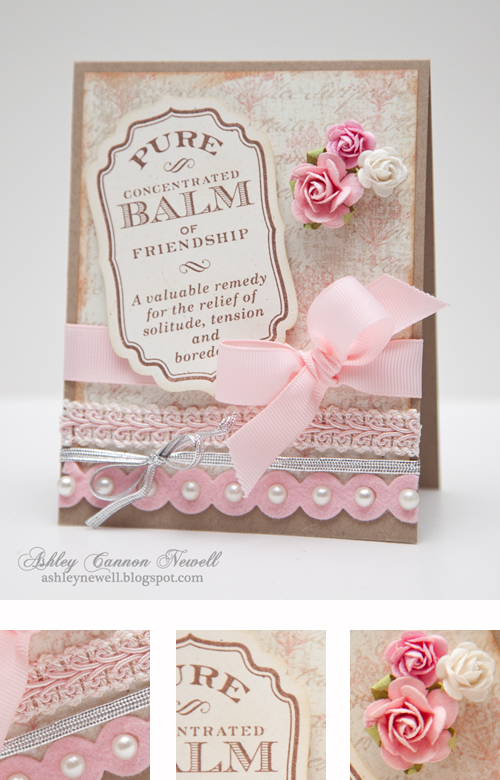
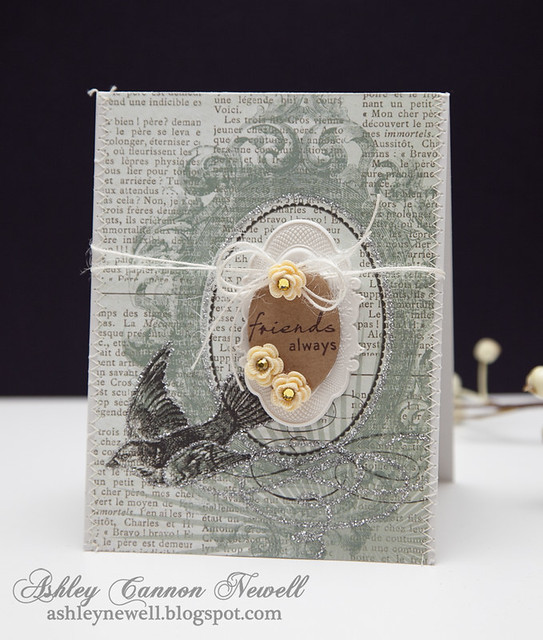
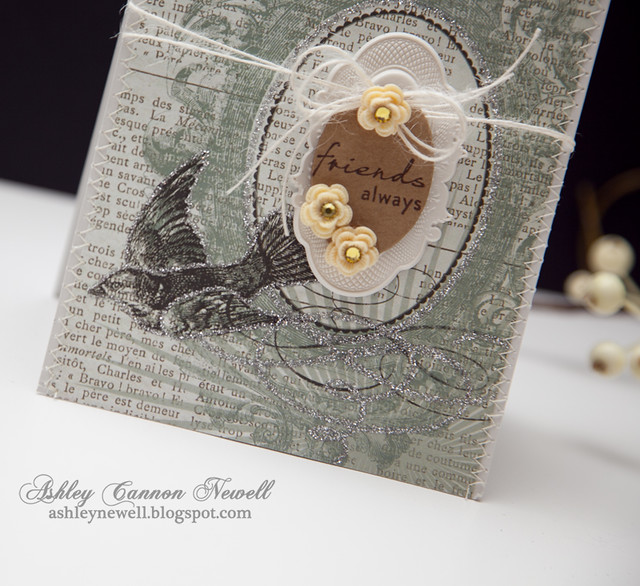
Hey there Bleeps! I hope your week is going well for you all! Today is Hump Day and that means it's time for another Watch Me Wednesday video! I created a friendship card using some fun new products I picked up at Scrapdoodles, my {not so} local scrapbook store. While I was driving into the grand shopping center, I saw the sign for a Hobby Lobby. I usually have to go way out of town to shop at one. I've been to Hobby Lobby in Georgia, Indiana, and Texas so far! But, finding out there is one somewhat near me was such great news! Then, I went to their site and did a store finder search only to find there are two more in the DC Metro area! YaaaY! I really got excited because that could me one is in the works just a tad more closer to me! After all that excitement, you would think I went in right? Wrong! I did not even stop by the store! It was something about the piece of mind that it was closer that derailed my 'need' to shop!
Anyway, I hope you like my card and some of the new finds I used! Here are some detailed photographs of my project.
Hey there, Bleeps! Happy Hump Day! It's time for another video. I spared you with a Halloween card today since I created one to share yesterday and made an autumn card instead.
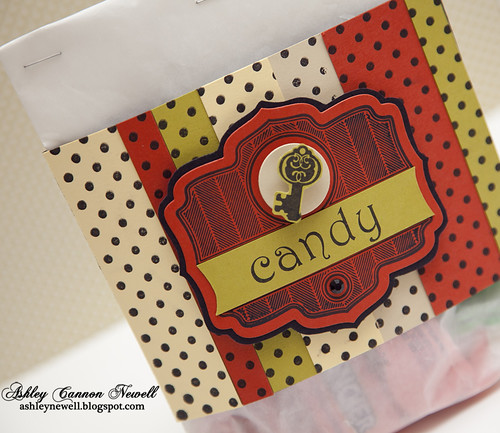
Hey Bleeps*! Happy Hump Day to you all! Today, I have a Halloween candy bag to share with you. I used a glassine bag and created a decorative sleeve. An easy project for a simple Halloween gathering or even use smaller glassine bags to give to your local trick or treaters! It's a super quick project and you can dress up a glassine bag for any occasion, but I have candy on my mind now...big time!
Note:
Check this post here. You may have won an issue of Holiday Cards & More, Vol. 5!
Check this post here. You may have been outbid, but there's still time to bid on my card to fight the breast cancer battle. Read more there. Thanks so much!
What's going on, Bleeps*? Long time, no see, huh? I've been working a lot, but just not on projects specifically for the blog, but I made sure to squeeze in just enough time for my video of the week! Today, I created a soft and girly friendship card. I hope you enjoy it! Make sure to check back around 10 am EST because I'll have another post with another card you just may be interested in getting yourself!!
Hey there! It's Hump Day and that was a little faster than usual since Monday was a "free day!" This was a pretty quick card, partially because I had it sketched out, but it is super colorful and fun. I hope you enjoy the video!
The card + video have been removed temporarily for publication. Find it in Cards magazine February 2011. The video will be re-published in March 2011.
Hey Everyone! Yaaaay...it's Wednesday and time for another video! Today, I decided to create a card using some new Kaisercraft. The Up, Up & Away collection is so vintage. Here's a birthday card probably for a guy. So, take a peek at how I made it!
You may also view the video here. Thank you for watching!
Supplies
Stamps :: Technique Tuesday - numbers game; DeNami Design - polka dot background; Papertrey Ink - get to the point sentiments Ink :: Hero Arts - latte; Ranger - vintage photo, tea dye Cardstock :: Papertrey Ink - ocean tides, dark chocolate, vintage cream Patterned Paper :: Kaisercraft - up, up & away collection 6" paper pad Embellishments :: Kaisercraft - up, up & away collection chipboard & cardstock die cuts; May Arts - twine
One more thing! Have you heard? There is a new challenge that has started. This time, it's photography related. You've got to check it out...it's hosted by none other than BoldLifestyle Photography (also known as McArthur's creative photography blog). He's been really wanting to host his own photography-based challenge and finally decided to take the plunge. So, what are you waiting for? Head on over to the blog here and see what the first challenge entails. Dust off your cameras and snap some photos. There's no need to be a professional. It's all about being creative and trying new things, just like any other paper crafting challenge. And you want to know what's great about it all? You can scrap these photos! Just think of the story behind each of them. I can't wait to participate myself and I hope you join me!
Thanks for visiting and I hope you have a great wonderful Wednesday.
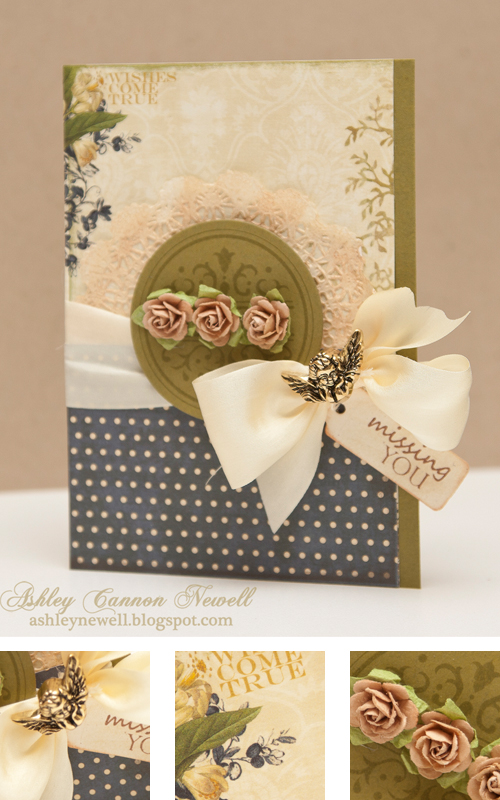
Hey ya'll! Happy Hump Day! I'm back with another video. This week, I chose to do a little stamping, but used more patterned paper than usually. Check out how I made it by watching the video below or here.
Supplies
Stamps :: DeNami Design - decorative crest circle; Papertrey Ink - take three summer (sentiment) Ink :: Papertrey Ink - ripe avocado; Tsukineko - VersaFine vintage sepia; Ranger - antique linen, tea dye Cardstock :: Papertrey Ink - rustic cream, ripe avocado Patterned Paper :: Webster's Pages Embellishments :: Craft Supply - metal cherub button (check back later for more details); May Arts - twine, ivory silk ribbon; Recollections - flowers Tools :: Spellbinders™ - S4-114 Standard Circles LG, S3-149 Tags Trio, W-001 wizard
That's right, Bleeps, you read it right! My "Watch Me Wednesday" series is back! I've been dying to start a weekly VLOG post sharing my card making process with you all. Over the months, I encountered a few problems with my video cameras, but recently purchased a new one and finally cleaned my area enough to start videoing! I am hoping to record a new video every Wednesday, but don't hold me to it! As you know, sometimes time gets all in the way of everything and then runs out. So, I did not want to say anything to you all until I was sure enough ready to start! I even have next week's card already sketched out! I'll keep this up as long as you all like it, so let me know if you're still interested!
As a side note, this week's video is a bit yellow and not true to color. Working on my lighting issues and learning my new camera. Hoping to have a better picture next week! :)
Now, onto today's card...another Halloween theme (yep, I know it's 2 months early, but I'm trying to create a pattern here and be ready for Christmas early this year)!
Hey there, Bleeps! I hope you're having a great week. I threw a music slideshow together for the CHA Summer 2010 photos I had. I hope you enjoy it and dance too! :)
UPDATE: This card has been temporarily removed for publication. You may find this card in CARDS magazine February 2011.
Happy Friday to you, Bleeps! I hope you all have a fabulous weekend! Thank you so much for joining me on Moxie Fab World's blog yesterday. It was super fun! Today, I have a card to share with you, along with a video tutorial.
Instructions
Trim patterned paper to about 4" x 5.25", ink the edges, add ribbon to corners, and adhere to rustic cream A2 card front.
Stamp lacey frame on rustic cream cardstock, cut out, and ink.
Ink the chipboard embellishment, stamp sentiment, and pop off lacey frame.
Ink card front edges.
Video Tutorial
Here is a video tutorial on how I made the crinkly stained ribbon used in this card.
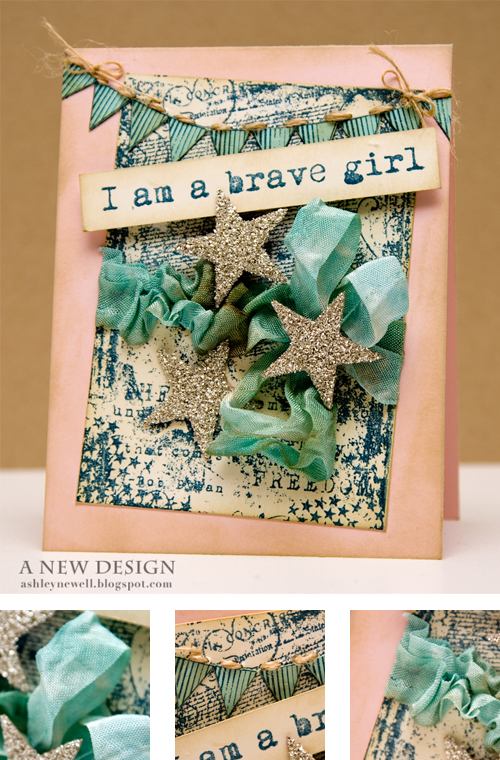
Well, not really me, but that's what this card is all about! Last week, I told you all that I'm working on sending a couple of boxes to soldiers in Afghanistan via a family friend who is currently deployed there. Well, she is soon to return and this card is for her.
She is a brave girl!
I'm not sure if I could have ever been deployed, but she did and I am grateful that she served for me, you, and the rest of our country. We both grew up as military brats and are all too familiar with the military lifestyle, but during times of war it all becomes surreal.
Instead of making a red, white, and blue card, I "pinked" up the blue to make it 'pretty!' I was inspired by The Shabby Tea Room's challenge for the week, which provides that we use stars and stripes. So, here's my card!
Instructions
Trim cream cardstock and stamp background pattern in navy ink.
Add distress ink to the edges.
Ruffle cabbage rose ribbon and tie into a bow.
Adhere at an angle to pink A2 card base.
Stamp banner and flags and paper piece.
Add twine hand stitching.
Stamp sentiment on cream cardstock strip, ink, and pop off card front.
Adhere glitter stars.
Tuts, Tips & Tricks
How to add distress inks to your project to 'age' your projects
Stamps :: Unity - brave girl (sentiment), declare freedom (background); Practicing Creativity Designs - look up Ink :: PTI - enchanted evening; Ranger - old paper Cardstock :: PTI - vintage cream, sweet blush, aqua mist Embellishments :: MemrieMare - cabbage rose ribbon, glitter stars; PTI - twine
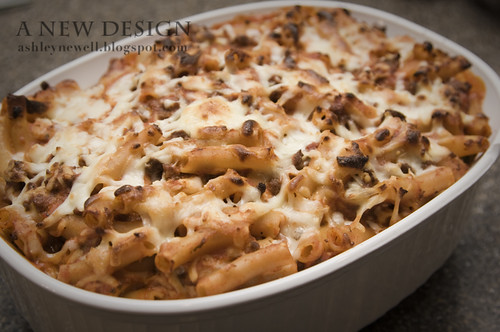
But wait, there's more today!
Last night, I made some baked ziti and talked it up on Twitter/Facebook so much that I think some people wanted to see it, so I grabbed my camera and shot a photo! Now, it may look a little dry on top from the melted cheese, but believe me it wasn't in the inside (giggling)! Laura's recipe inspired me to make this meal. However, I cut some corners because I did not feel like stopping by the grocery on my way home from work. I had the bulk of the ingredients and took out the ricotta cheese and replaced sausage with ground beef. I have a small basil plant (LOVE THAT), so I was able to pop a little green in there! So, even with those adjustments, the dish turned out great, plus I have lunch tomorrow! Enjoy and stop by Laura's blog for some fun recipes to try out in your kitchen.
But wait...there is even more!
So, I have a little secret to tell. I really do not eat sweets. I LOVE food, but I usually pass on desserts. I have nothing against them, but when it's dessert time, I usually grab another plate of non-sweet food! However, there are a few desserts I like, such as cheesecake, mango and sticky rice, and strawberry shortcake (with a biscuit).
Now, remember I like to cut corners. I work every day and *need* lots of time to create, so cutting corners is my thing to do, especially during the week. So, I grab some of those Pillsbury individually frozen biscuits to have fresh ones baked within 25 minutes! Now, if I were a true cook/baker, I'd make some on the weekends and freeze my own, but I'm too busy paper crafting and lounging on my sofa...oh yeah and working on Embellish Magazine! I like to pre-make my strawberries, so they are prepared for the week (or however few days it takes to eat 'em). Anyway, here's how I make it:
Ingredients
biscuit(s) 2 scoops (or more) french vanilla ice cream pint of strawberries (cut) 2 cups sugar
Instructions
Cut strawberries and store in a container with LOTS of sugar and place in refrigerator for a few hours. Shake it up here and there while you're getting excited.
Bake biscuits.
Cut biscuit in half, place bottom biscuit in serving dish.
Add ice cream.
Add sugared-down strawberries.
Add biscuit top and more strawberries (and juice).
EAT FAST!
Thanks so much for stopping by today and indulging in one of my favorite blogging moments!
Hey there! It's the weekend, but better yet I have a great ribbon favorite to share with you all. Nichole asked some of the DT and myself to share our favorite ribbon technique. Well, I was stumped for a few days, but finally decided on sharing how I like to layer my ribbons. Sometimes, I double ribbons and have two bows, while other times I may have a flat ribbon and a ruffled ribbon. Here, I decided to share double ruffled ribbon so you can see how I bunch the ribbon and create a wider ribbon effect. I even made a quick video on my ribbon ruffling technique.


