|
|
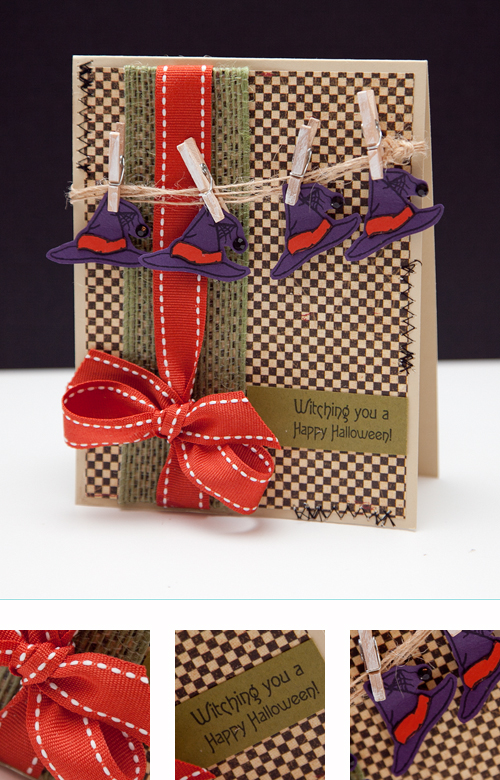 Hey Everyone! How was your weekend? I hope it was refreshing. Mine wasn't too shabby, but an extra two days would've been nice! But, I did get a chance to party with some friends, hang out with my sister, shopped at IKEA, and even crafted a bit! What more could I ask for...really?! Today, I have {another} Halloween card to share with you. I'm surprising myself over my desire to create for Halloween. This card used a sketch I created for Skipping Stones Design (see below). I used their Boo stamp set for the witch hats and sentiment, along with some Graphic 45 patterns! Here's how I made the card. Instructions- Trim patterned paper to about 4" x 5.25", then add twine decorative trim.
- Tie saddle stitch ribbon around patterned paper into a bow.
- Stamp hats on purple cardstock, then stamp on rust cardstock. Trim hat border from rust cardstock and paper piece on purple hats.
- Cut out hats and string on twine with mini clothespins. (I painted a few clothespins before this project with white acrylic paint.)
- Stamp sentiment on olive cardstock strip and adhere.
- Adhere paper to an A2 card base.
- Add zig zag stitching randomly so it looks like sutures!
SuppliesStamps :: Skipping Stones Design - boo Ink :: Tsukinkeo - memento black Cardstock :: Papertrey Ink - linen, ripe avocado, terracotta tile; Stampin' Up! - eggplant Patterned Paper :: Graphic 45 - hallowe'en in wonderland (square hare) Embellishments :: May Arts - twine; Crafts Supply - mini clothespins; Papertrey Ink - terracotta tile saddle stitch ribbon; Offray - green twine trim So, here's the sketch I made! It's sort of strange, but you never know what you can come up with until you try! If you have a banner you want to create, it's perfect to use, so give it a try and link it up on SSD's blog! If you find you're loving their stamps, some are up for grabs on Embellishes Background Stamping Color Challenge too! 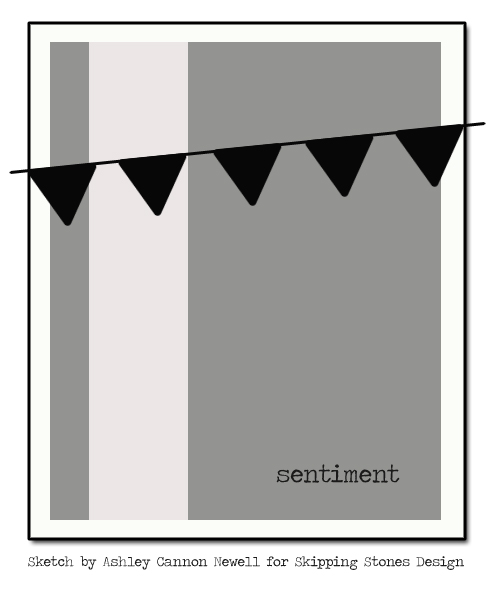 This is my last sketch for SSD. I had fun creating the sketches both creatively and digitally! Thanks for having me again Skipping Stones! You all take care and as always, thanks so much for showing me some love and stopping by!
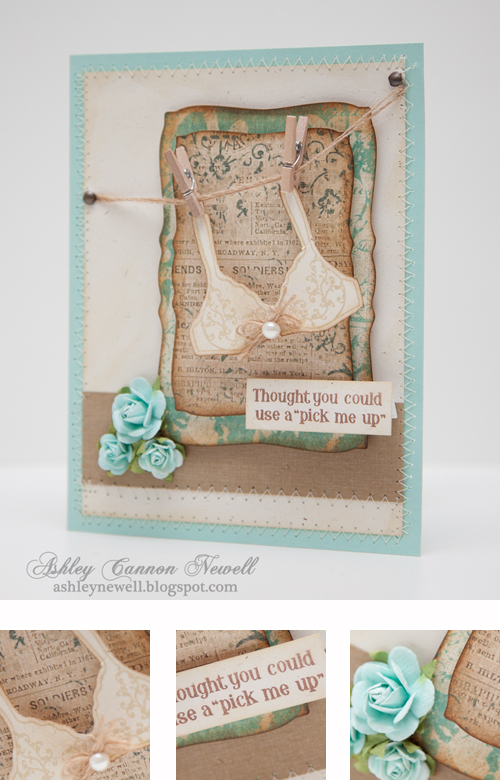
Hey Everyone! I wanted to remind you all about the card I have for auction (shown above) specifically for the Blogs 4 Boobies Blog Hop, hosted by Skipping Stones Design. This blog bounce is to support breast cancer and bidding on my card will help find the cure. You may bid on my card to win it. All proceeds will be donated to the Susan G. Komen Foundation on behalf of SSD. They are also donating $2 for EVERY stamp set sold through today to help with breast cancer research. This is a one-of-a-kind-blog bounce! Every project that is showcased in the "Blogs 4 Boobies" blog bounce is up for auction! The deadline for bidding ends tonight at 8:00 MT, so you have plenty of time to continue bidding. The current highest bidder for my card is $14 by Susan. Thanks so much Susan. Some of you have placed orders for stamps too, which is another option and we greatly appreciate your support - THANK YOU! I'm hoping you all like my card enough to bid higher, not for me, but to find the cure for breast cancer. Here's more information: 1. Shop
For every stamp set purchased during Sept 15 - 23. SSD will donate $2 to the Komen Foundation. Stamping and shopping that you can feel good about! Click here to check out SSD stamps2. Bid
Another way you can help us raise money for the Komen Foundation is to bid on a project along the blog bounce. A $5 or more starting bid is recommended. Your bid includes the project and shipping to your address as well.
Place a Bid for the Card
Step #1
Please post your bids here, not on the original post. Step #2
Once you are in the "blogs 4 boobies" comment section fill in the dollar and cents amount of what you are willing to pay for the card/project. The next highest bid must exceed $14 (at the time of this post). 100% of the bid proceeds will be donated to the Susan G. Komen Foundation. Step #3
Next to your $ bid please type in your email address. During a silent auction bidders sign their name next to their bid. Typing your email address is the electronic equivalent of signing your bid. Also it will help the blogger contact you if you are the highest bidder. Step #4
Watch and wait. Once you have entered your bid/comment sit back and wait. If someone outbids you, then you may bid again. Bidding will continue until September 23 at 8:00 p.m. MT.
After Bidding
Watch and WaitThe "Winner of the Auction" will be the highest bid (that includes an email address) in the comment section of the most recent blogs 4 boobies post at the end of the silent auction. Things to keep in mind
Near the end of the bidding you may not see bids as they come in. Most blog have a comment feature where the blogger must approve comments before they are published. So bid high. You might have the highest bid that is published, but someone might have outbid you in an unpublished comment/bid. The blogger will declare who has won the silent auction. Skipping Stones Design will send you an invoice for your donation/bid amount. Please pay that invoice as soon as possible, so the designer can get your card/project in the mail to you. Thanks for stopping by! Happy bidding!
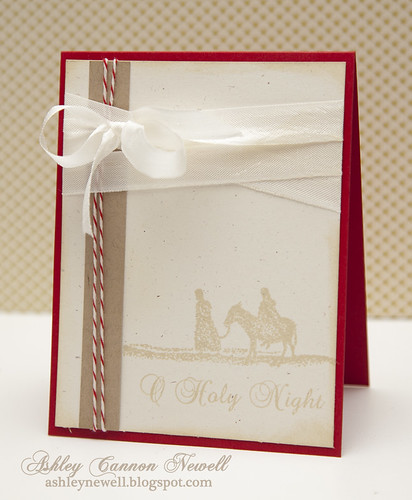 Hey Everyone! I hope you enjoyed your Monday. Thanks so much for your kind words on my Hero Arts holiday cards. They mean so much! Today, I am sharing a card prepared for Skipping Stones Design's sketch challenge. I designed the sketch, which you can find over here. If you get a moment, take time to participate in this challenge and check out the stamps too! Isn't the font and the sentiment so great?! This set is perfect for traditional, religious Christmas cards. Now, on to some important messages! **Miss the detailed thumbnail photos? If so, let me know! **Don't forget about the Blog 4 Boobies Blog Bounce where you can bid on my card here. The highest bidder so far is at $14! **Paper Crafts Blog Hop Winner is Debbie! Please e-mail me your mailing address Debbie so I can see that you get your new Holiday Cards & More, Vol. 5 issue! Congratulations and thanks to the 410 of you who commented on my holiday box! I read every comment and smiled!! 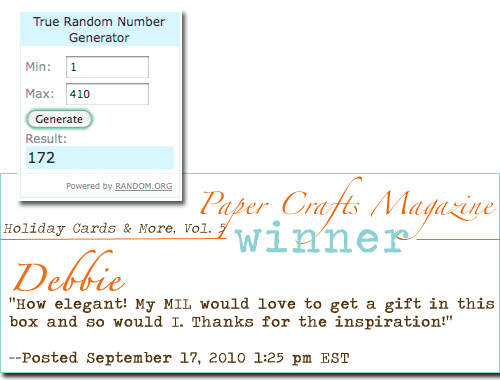 Instructions Instructions- Trim cream cardstock to about 4" x 5.25", then stamp scene and sentiment.
- Add distress ink to the edges.
- Add kraft strip and twine.
- Add seam binding ribbon treatment, then adhere to an A2 red card base.
SuppliesStamps :: Skipping Stones Design - wisemen Ink :: Close to My Heart - bamboo; Ranger - antique linen Cardstock :: Papertrey Ink - rustic cream, pure poppy, kraft Embellishments :: Craft Supply - eggshell seam binding, twine Thanks for seeing what I was up to today! Check back tomorrow for my Watch Me Wednesday video!!
Welcome to the "Blogs 4 Boobies" Blog Bounce
I have joined up with Skipping Stones Design (SSD) to help raise money to fight the breast cancer battle. SSD is celebrating the release of 2 new stamp sets. They are also donating $2 for EVERY stamp set sold this week to help with breast cancer research. This is a one-of-a-kind-blog bounce! Every project that is showcased in the "Blogs 4 Boobies" blog bounce is up for auction! All of the money raised through the silent auction, on our blogs, will be donated to the Susan G. Komen foundation. There are 3 ways that you can help, and join in on the fun!
1. Shopping
For every stamp set purchased during Sept 15 - 23. SSD will donate $2 to the Komen Foundation. Stamping and shopping that you can feel good about! Click here to check out SSD stamps2. Bidding
Another way you can help us raise money for the Komen Foundation is to bid on a project along the blog bounce. A $5 or more starting bid is recommended. Your bid includes the project and shipping to your address as well.
Place a Bid for the Card
Step #1
Find the comment section of the blog that shows the "Blogs 4 boobies" card or project that you want to buy. You may only bid on the card/project shown in the specific "blogs 4 boobies" post. Any bids not placed on the correct post will be considered invalid. Step #2
Once you are in the "blogs 4 boobies" comment section fill in the dollar and cents amount of what you are willing to pay for the card/project. We recommend a starting bid of $5 or more. 100% of the bid proceeds will be donated to the Susan G. Komen Foundation. Step #3
Next to your $ bid please type in your email address. During a silent auction bidders sign their name next to their bid. Typing your email address is the electronic equivalent of signing your bid. Also it will help the blogger contact you if you are the highest bidder. Step #4
Watch and wait. Once you have entered your bid/comment sit back and wait. If someone outbids you, then you may bid again. Bidding will continue until September 23 at 8:00 p.m. MT.
After Bidding
Watch and WaitThe "Winner of the Auction" will be the highest bid (that includes an email address) in the comment section of the most recent blogs 4 boobies post at the end of the silent auction. Please note that ALL cards/projects will be re-posted on the 23rd of September. The silent auction will end September 23 at 8:00 p.m. MT Things to keep in mind
Near the end of the bidding you may not see bids as they come in. Most blog have a comment feature where the blogger must approve comments before they are published. So bid high. You might have the highest bid that is published, but someone might have outbid you in an unpublished comment/bid. The blogger will declare who has won the silent auction. Skipping Stones Design will send you an invoice for your donation/bid amount. Please pay that invoice as soon as possible, so the designer can get your card/project in the mail to you. You should have come to me from the wonderful Kim Kesti - http://kimberlykesti.typepad.com/ *Thanks for your kind words! Please bounce to Angela Thomas - http://sparkleandbling.blogspot.com/*About my card*SuppliesStamps :: Skipping Stones Design - bras (volume 2) Ink :: Close to My Heart - bamboo; Tsukineko - VersaFine vintage sepia; Ranger - vintage photo, antique linen Cardstock :: Papertrey Ink - rustic white, aqua mist, kraft Patterned Paper :: K & Company - life's journey collection Embellishments :: Recollections - flowers, pearl; Prima - flowers; Craft Supply - mini clothespins; May Arts - twine; Stampin' Up! - antique brads Tools :: Spellbinders - S5-006 curved rectangles nestabilities, wizard; Janome - sewing machine Thanks for stopping by! Happy bidding!
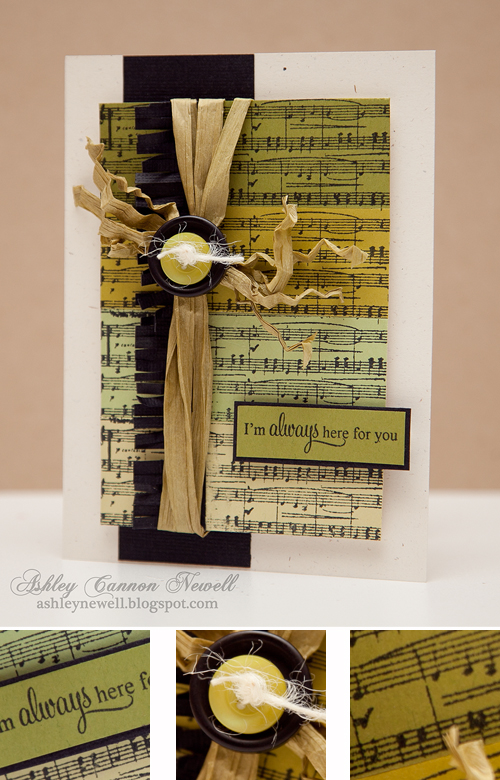 Hey everyone! I hope you had a great Labor Day weekend! Ours was quite busy with the two weddings, but still fun. My feet really killed me after the first wedding, so on Saturday, I went and picked up some sorta cute Naturalizers. They worked like a charm on Sunday, but standing still made my heels ache. I don't want to wear those shoes that look so comfy they're hideous, so they'll just have to do! So, I'm back this week with a card + a sketch to share with you! Skipping Stones Design is such a great company. I've designed for them before earlier this year and had a great time. This time, I'm back as a Sketch Designer. Now, this is my first time taking on this challenge, but it was fun! I usually sketch first, then design. So, it wasn't too hard for me to draw up the sketch below. So, give it a shot and head on over to Skipping Stones Design blog to link it up! I'd LOVE to see what you do with it.  Instructions Instructions- Using leftover scraps from the mini card here, adhere them to a 3.5" x 5" card stock and stamp music background.
- Trim black cardstock strip and adhere to card base.
- Trim black cardstock strip, cut fringe, and adhere to gradient cardstock.
- Add raffia trim, button treatment.
- Stamp sentiment, trim, and mat on black cardstock.
- Adhere gradient cardstock and sentiment using foam adhesive to card front.
SuppliesStamps :: Skipping Stones Design - timeless textures (music background), always here (sentiment) Ink :: Tsukineko - memento tuxedo black Cardstock :: Stampin' Up! - certainly celery, kiwi kiss, old olive; Papertrey Ink - rustic cream, spring moss; American Crafts - black Embellishments :: Michaels - raffia trim; Papertrey Ink - buttons; May Arts - twine Tools :: Martha Stewart - fringe scissors Card Size :: 4.5" x 6" Thanks for visiting. Have a great Tuesday!
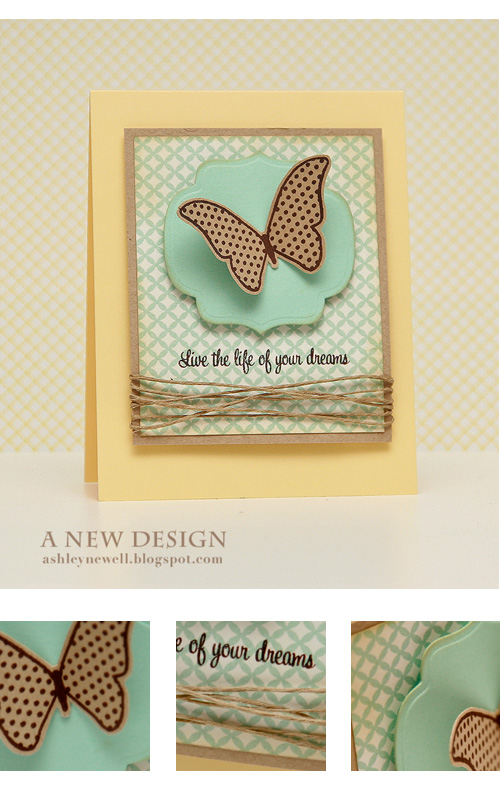 Hey Everyone! I promised you a card today and like magic, here it is! :) Today's card is inspired by a Skipping Stones Design sketch. It is my last card posted as a guest designer with the team. It has been wonderful working with Skipping Stones and their products. As you can see, I can't get enough of the butterflies. They're always just so much fun! The Healing Wings set is so great. I love the sentiments (and pretty font) and the large butterflies in different styles. This set really makes me happy and I can't stop reaching for it! Seriously, I'm not trying to 'sell' the set, I'm just sharing how much I like it! There are many more I like in the store too, I just have to narrow down my selection and make a choice! So, make sure you stop over to the blog today to check out what all of the other designers created using this great sketch, created by Kimberly Crawford. Thanks so much for checking me out today! Instructions- Create an A2 card base from lemon tart cardstock.
- Trim patterned paper block, ink, and mat on kraft cardstock.
- Tie twine around multiple times and secure in the back.
- Die cut and emboss the label, ink, and pop off patterned paper.
- Stamp butterfly, cut out, and adhere to label die cut.
- Stamp sentiment below label.
- Pop focal point off card front.
SuppliesStamps :: Skipping Stones Design - healing wingsInk :: SU! - chocolate chip; Ranger - old photo Cardstock :: PTI - lemon tart, kraft Patterned Paper :: My Mind's Eye - lush collection Embellishments :: Craft Supply - twine Tools :: Spellbinders - wizard, labels nine die template ( S4-233)
 Hey there, Bleeps*! Today, I'm sharing a card for Skipping Stones Design. Today's sketch is a shaped card, so I created a scalloped circle card. I'll give a tip about how I create them below. used my Copic markers to color the hearts and really bedazzled the card! Thanks so much for stopping by for a visit today! Instructions- Die cut two large scalloped circles from black cardstock.
- On one scalloped circle, score a line at one end about 1/4" from the top and set aside.
- Die cut a circle shape from white cardstock, then emboss it.
- Pop circle die cut off scalloped circle die cut (without the scored line).
- Stamp three hearts on white cardstock, color, cut out, then pop off white circle.
- Stamp sentiment.
- Add rhinestones.
- Adhere scalloped circle die cut (with scored line) to the card front.
Tips & Tricks- To create a full shaped card, die cut two shapes. For the shape of the back of the card, score a line at the top, then add adhesive above the scored line. Adhere that part to the card front to create a scored card.
SuppliesStamps :: Skipping Stones Design - whispering wings Ink :: SU! - black; Copic markers Cardstock :: PTI - black, white Embellishments :: KaiserCraft - rhinestones Tools :: Spellbinders - scalloped circle nestabilities, circle nestabilities, wizard; Scor-Pal
 Welcome to Skipping Stones Design DT Blog Hop to celebrate the release of two new stamp sets, Birthday Donuts and Whispering Wings. If you should happened upon my blog today, you'll want to go back to the beginning at Skipping Stones Design. You should have arrived from Kandi Phillip's blog. Combined with the blog hop today, it's also Skipping Stones Sketch Tuesday, which means the Design Team is showcasing another great sketch by Kimberly Crawford. We'd love for you to play along with the sketch. Just remember to use keywords SSD020 if you upload to any online galleries or link your card at the Skipping Stones blog. They're looking for guest designers...so you never know! :) New Release
Birthday Donuts and Whispering Wings stamp sets are now available to purchase here. Go check them out! Promotion
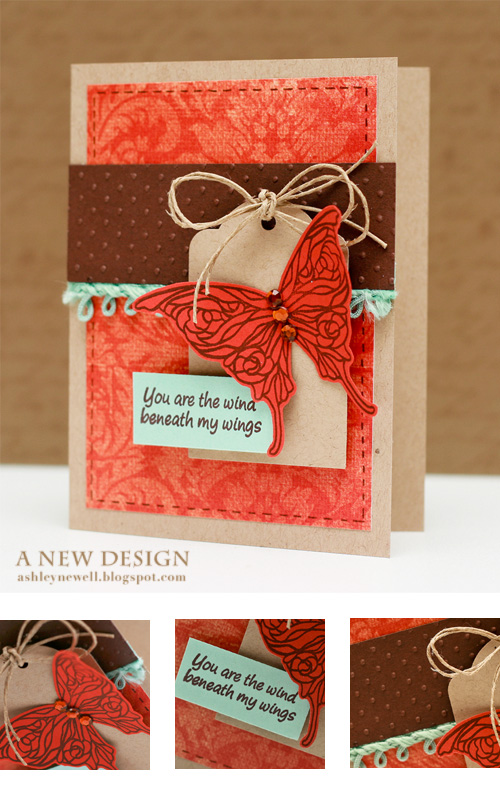
The following promotion is good from April 13 at 8:00 am MST to April 22 at midnight MST or while supplies last. Buy four stamp sets, get Bras Volume 2 stamp set or Bras Volume 3 stamp set for FREE! The unreleased stamp sets will be available to view on the blog until April 22. Instructions- Trim kraft cardstock to create an A2 card base.
- Trim patterned paper block and adhere to card front.
- Trim brown cardstock strip, then dry emboss.
- Adhere trim to brown cardstock, then adhere to card front.
- Punch tag from kraft cardstock and add twine, then pop off card front.
- Stamp butterfly, cut out, then adhere to tag. Add rhinestones
- Stamp sentiment on blue cardstock, then pop off tag.
- Add faux stitching.
Tips & Tricks- When creating faux stitching, if you want super straight stitch, use a ruler!
Supplies
Stamps :: Skipping Stones Design - healing wings Ink :: ClearSnap - colorbox chestnut; SU! - chocolate chip marker Cardstock :: PTI - kraft, aqua mist, dark chocolate, terracotta tile Patterned Paper :: My Mind's Eye - ooh la la collection (between the lines) Embellishments :: Making Memories - trim; KaiserCraft - rhinestones; Craft Supply - twine Tools :: Creative Memories - tag punch; Provo Craft - swiss dots embossing folder, cuttlebug; ruler Thanks for stopping by! Have a great day.
 Hey there, Bleeps*! I hope you had a great Monday. Today, I have some fun news. I'm going to be sharing some fun designs inspired by Skipping Stones Design for the month of April! Have you been there yet to check out their great stamps? I'm really excited to be a part of the team this month and play around with some super fun sketches and stamps and I hope you'll join me every Tuesday for a new sketch and project! Run on over to the blog and check out the sketch for this week AND to see what everyone else created! It has lots of scalloped layers and a very clean and simple layout. The fabulous Kimberly Crawford created them for us all to use! Thanks, Kimberly! Although sympathy cards are very difficult to create, especially when you really NEED one, this stamp set makes it a bit easier giving you those beautiful butterflies and great sentiments. The good thing is, the set can be used for countless other occasions as well. You can't have enough butterflies in your collection. Well, I know I can't! *I've updated my stamps for sale! Thanks so much for stopping by! Enjoy your Tuesday! *Bleeps = Blog Peeps Instructions- Trim fabric paper to about 3.75" x 4" and ink it up with a blending tool and dye inks.
- Trim three strips of natural muslin and die cut them edges with a scallop border die and ink.
- Adhere the fabric layers together with tacky glue.
- Run fabric through Creatopia fabric adhesive and adhere to fabric paper.
- Tie ribbon treatment around fabric paper and muslin and tie into a bow.
- Add inked flower to ribbon knot with tacky glue.
- Adhere fabric paper/fabric to a 4.75" x 6" rustic cream card base.
- Ink the card base.
- Stamp butterfly, cut out, and ink.
- Adhere to card front and add pearls.
- Color pearls with Copic marker to soften the stark white color.
- Stamp sentiment on bottom center card front.
Tips & Tricks- When muting colors on your designs, think to tone down all elements. Here, I used a Copic marker to color on pearls to make it not appear so white. Now, I have a more cream pearl as opposed to white.
SuppliesStamps :: Skipping Stones Design - healing wingsInk :: Ranger - antique linen, tea dye; SU! - chocolate chip; Copic marker (Sand - E33) Cardstock :: PTI - rustic cream Fabric :: American Crafts - tickled tulip fabric paper (dear lizzy collection); Craft Supply - natural muslin Embellishments :: Prma - flower; KaiserCrafts - pearls; MemrieMare - cabbage rose ribbon Tools :: PTI - large scallop die; Provo Craft - cuttlebug; Xyron - Creatopia
|
|


